How to Draw a Coffee Cup Step by Step
This tutorial shows how to draw a coffee cup in six steps. It includes illustrated examples and quick drawing instructions.
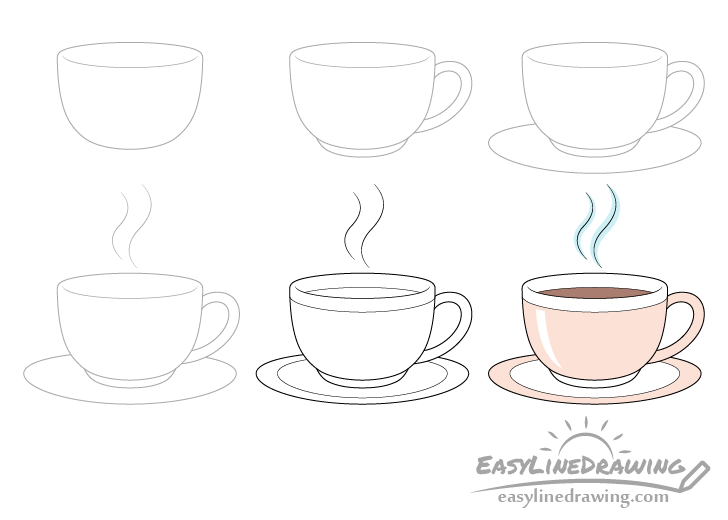
You can see a preview of the drawing steps above. This particular cup will have a bit of a design added to it to make it look slightly more interesting but you can draw a more plain one if you prefer.
It’s recommended that you start the tutorial in pencil and make light lines that you can easily erase in case you make a mistake. You can darken them once you feel your drawing looks right.
For drawing a paper coffee cup see:
How to Draw a Paper Coffee Cup Step by Step
Step 1 – Draw the Outline of the Cup
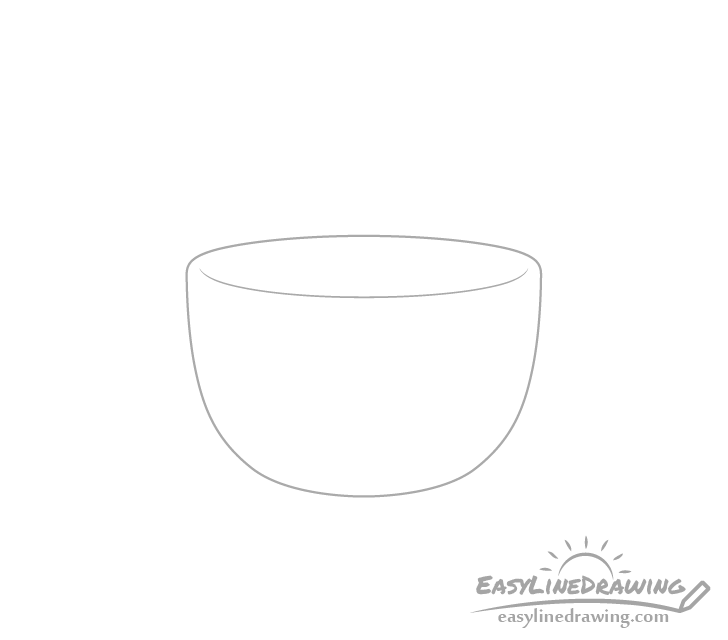
Begin by outlining the main shape of the coffee cup. This should pretty much look like a little bowl. Be sure to leave a bit of room at the top of your drawing area for the steam.
When drawing the curve of the rim keep a bit of space between it and each of the sides. This will make the cup look like it has some actual thickness to it. If you make the curve touch the sides the cup will look like it’s paper thin.
Step 2 – Add the Handle & Base
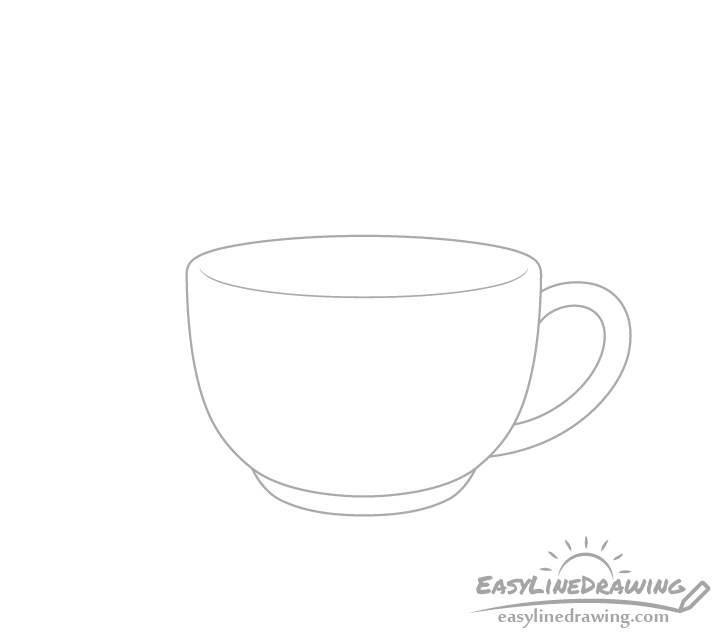
Add the handle and the base of the cup as shown in the example. These are pretty straight forward, just be sure that the base has a nice and round curve at the bottom. People often make a mistake of drawing it flat.
Step 3 – Draw the Plate
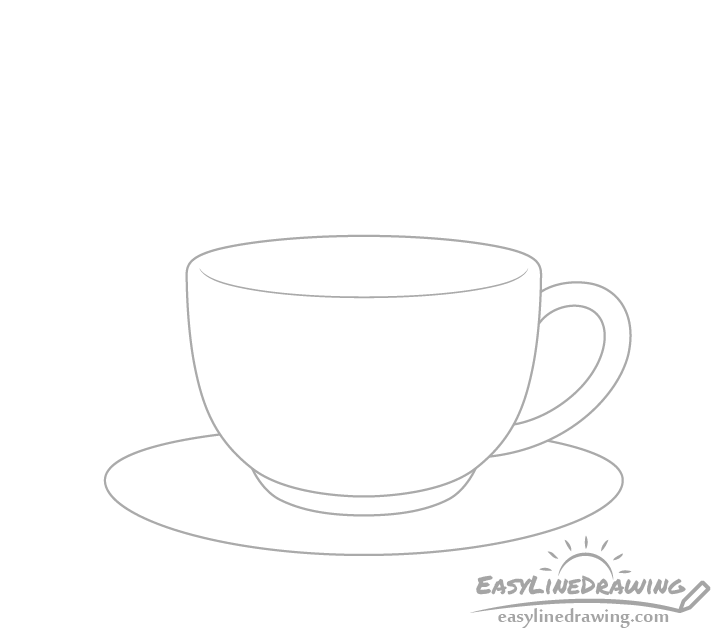
Below the cup draw the plate. For this step it should just be one big oval. Be careful not to make it too “flat” as your drawing will look odd.
Step 4 – Add Steam

For this simple step add some steam coming up from the coffee cup. You can show it as just a pair of wavy lines.
Step 5 – Draw the Coffee & Details

Finally draw the coffee and add an inner outline to the plate to give a better hint of it’s shape.
As mentioned at the start of the tutorial you can also add a small decoration to the cup to make it look slightly more interesting or you can leave it out and keep it more plain.
To give the cup a bit of a design simply draw a curved line just below the rim.
Whatever option you choose you can then finish the line drawing by tracing over it with a black pen or marker. Alternatively you can also simply darken your lines by pressing harder on the pencil.
Step 6 – Color the Coffee Cup

To color the drawing you can leave the little rim area at the top as well as the base of the cup and the inner part of the plate white. Color the main area of the cup as well as the handle and the rim area of the plate a light brown (or whatever color you prefer). You can also leave a white highlight (light reflecting from it’s surface) to one side of the cup. Make this wider at the top and narrower as it goes towards the bottom (as shown in the example).
Color the coffee a dark brown and add some blue around the curves of the steam.
You chose to draw the more plain version of the cup (no decorations) you can either leave it and the plate completely white or fill both in with one solid color (again leaving the highlight white).
Conclusion
The example in this tutorial is of a coffee cup with a fairly generic shape. However by giving it just a tiny bit of a decoration you can make the cup look slightly more interesting.
For other similar tutorials also see:
- How to Draw a Mug Step by Step
- How to Draw a Glass of Water Step by Step
- How to Draw a Bottle of Water Step by Step
- How to Draw a Tea Bag Step by Step
- How to Draw Cheese Step by Step
- How to Draw a Pretzel Step by Step


