How to Draw Shells Step by Step
This tutorial shows how to draw four types of seashells with illustrated examples for the different drawing stages of each shell.
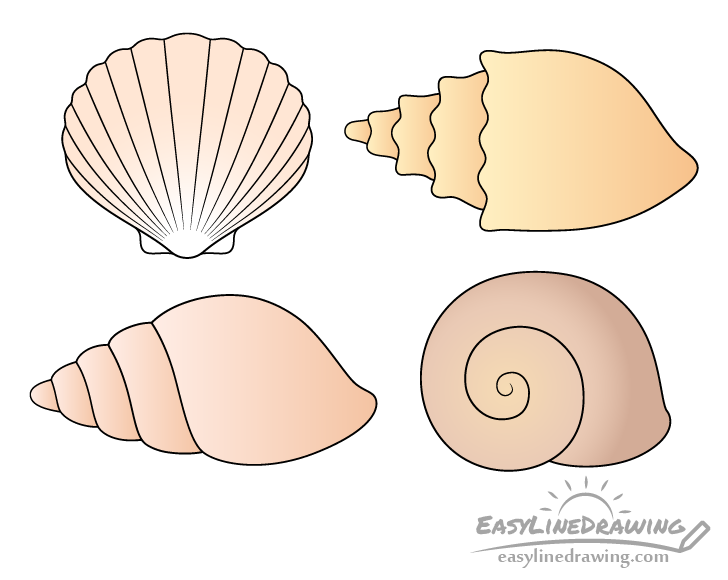
Seashells come in a large variety of interesting shapes. You can see the four that are included in this tutorial in the preview image above.
Whichever one you would like to draw start in pencil and make light lines that you can easily erase in case you make a mistake. You can darken them later on with a black pen or marker.
How to Draw a Scallop Shell Step by Step
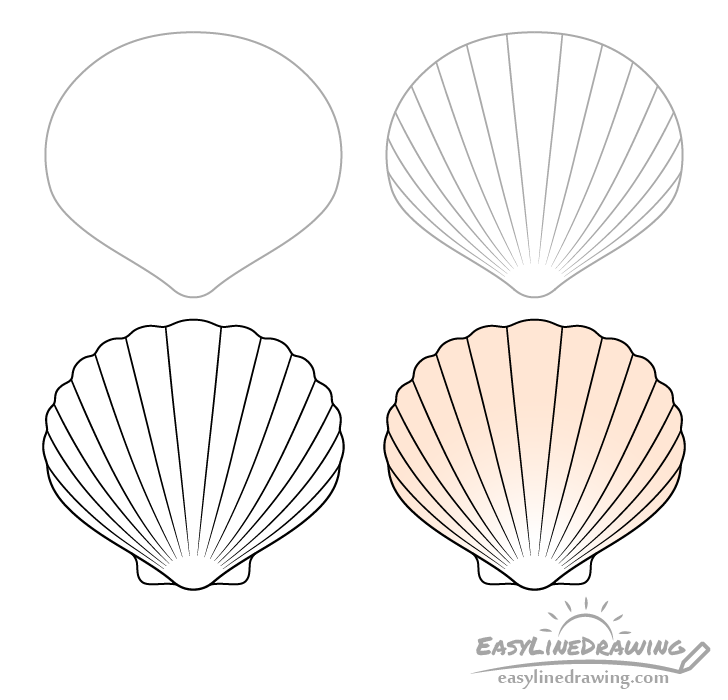
This first example is of a scallop shell. Probably one of the most common types of seashells.
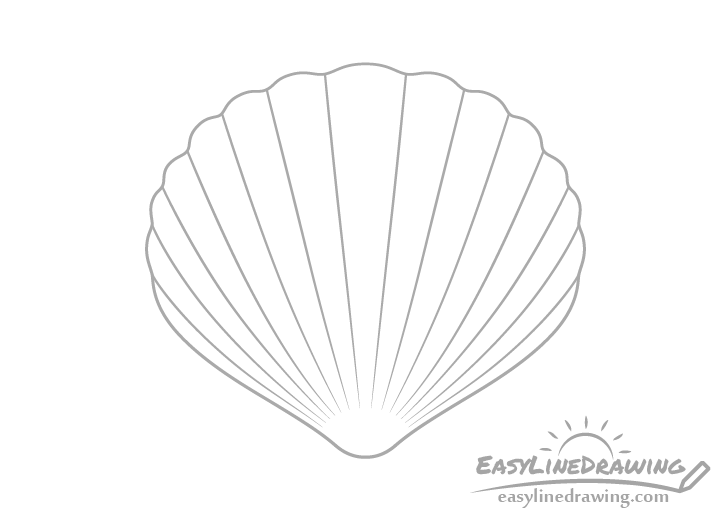
Step 1 – Draw an Outline of the Shell’s Shape

Begin by drawing the outline of the shell’s shape without any of the smaller details. As mentioned at the start you should start the drawing in pencil, especially for this particular shell as you will need to erase a part of it’s outline later on.
Make the scallop shell wider at the front (top of drawing) and narrower at the back (bottom of drawing) ending with a little curve.
Step 2 – Draw the Lines
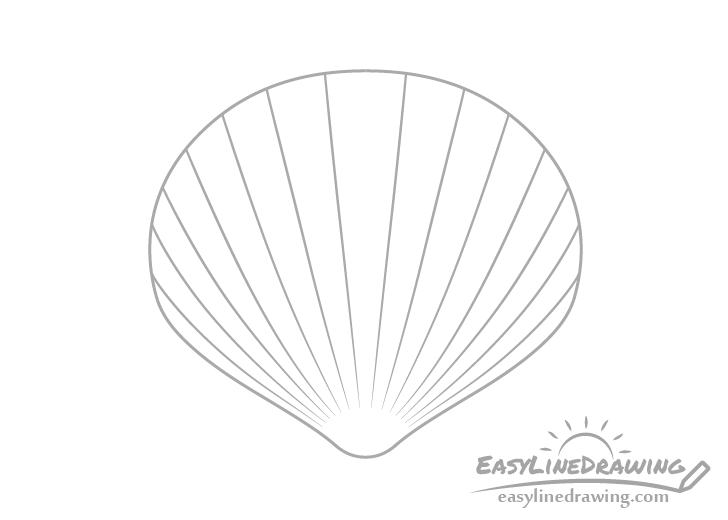
Running through the shell’s surface add a series of lines that “fan out” from the little bump at the back/bottom.
Step 3 – Add the Other Smaller Details & Finish the Line Drawing
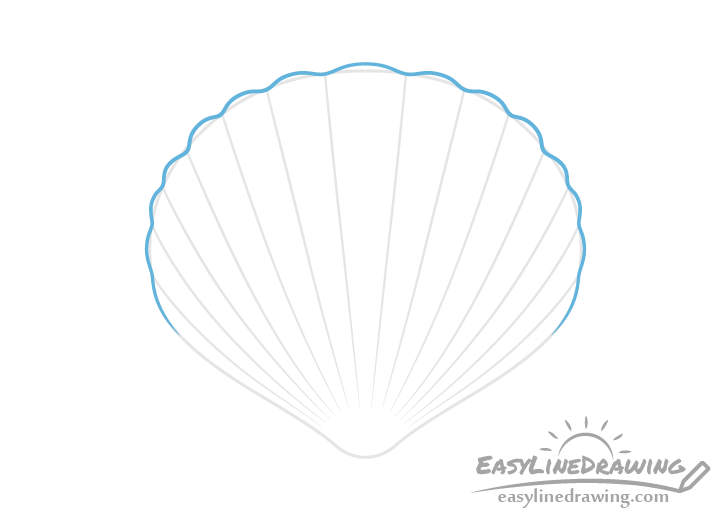
Use the outline of the shell from step one as a guide to draw a series of curves that give it a wavy outline. These curves should match up with the lines from the previous step as shown in the example.
You can then erase the part of the earlier outline so that you have a clean drawing of the shell with thew “wavy” front.
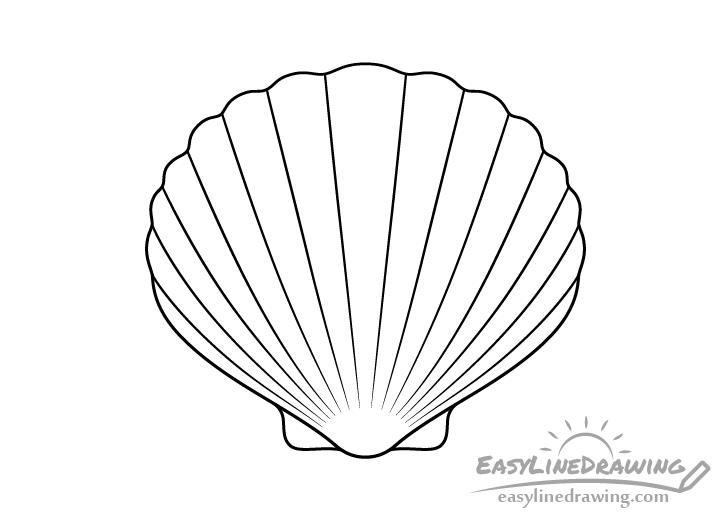
After drawing the curves along the top add two little “bumps” that these types of shells tend to have around it’s back/bottom tip.
Afterwards you can trace over your lines with a black pen, marker or darken them with the pencil.
Step 4 – Color the Shell
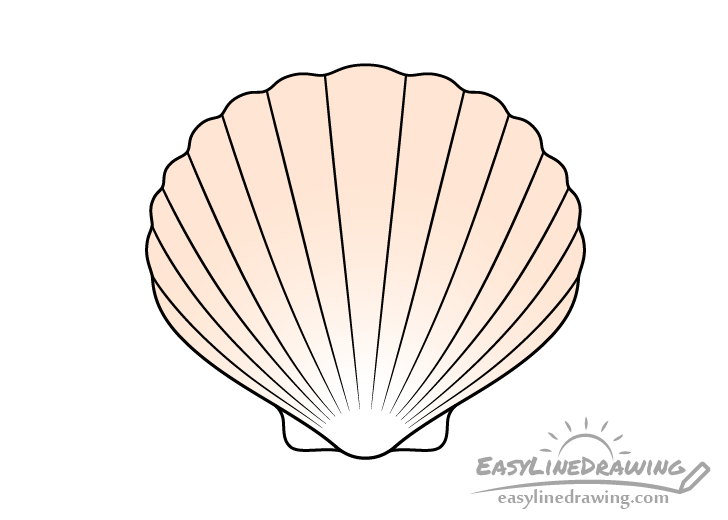
An easy way to color the shell is with colored pencils. In this case it will be orange/brown in color near the front/top and will then slowly transition to white towards the back (with a nice smooth gradient).
You can create the gradient by carefully blending the colors with the pencils. If you prefer you can also just make the shell one solid color.
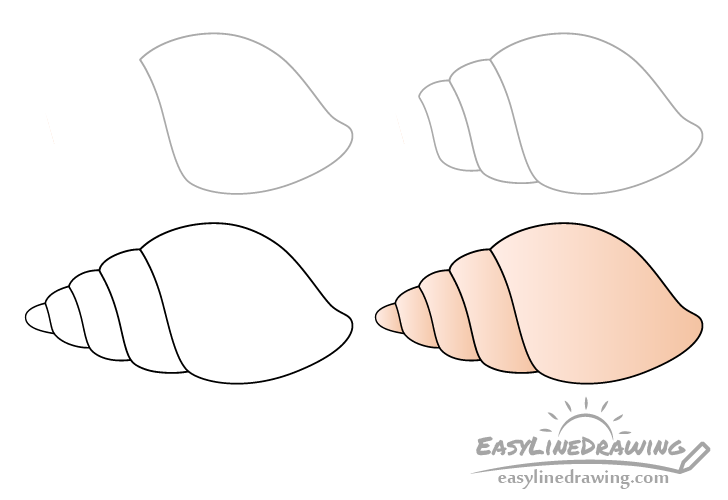
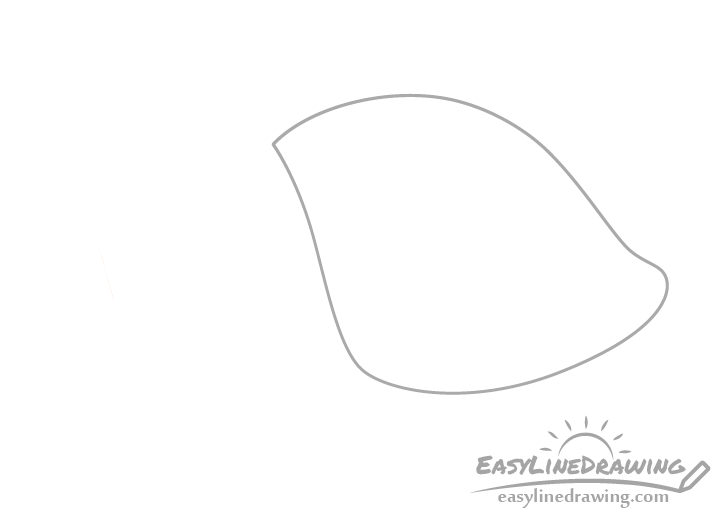
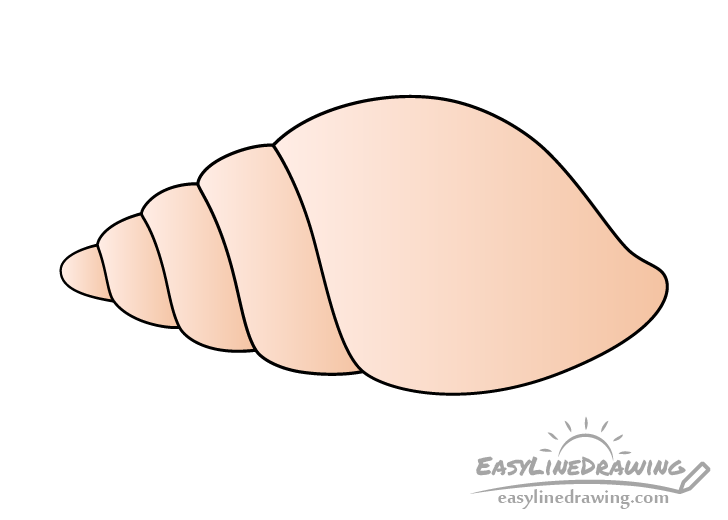
How to Draw a Conch Shell Step by Step
This example is of a conch seashell.
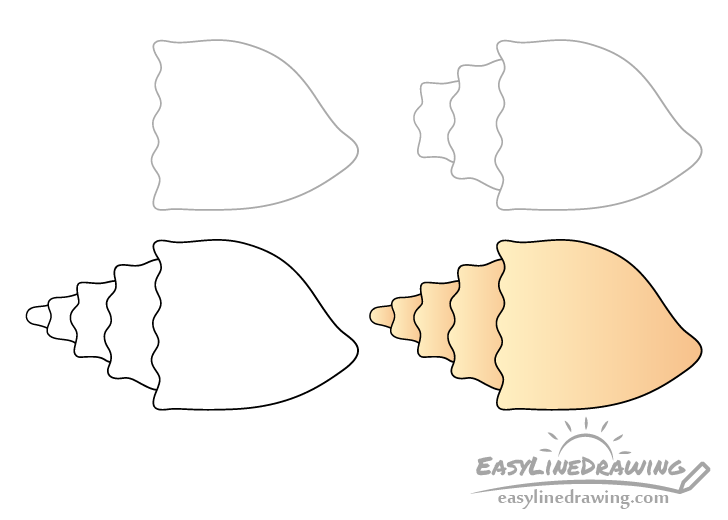
Step 1 – Draw the Base of the Shell
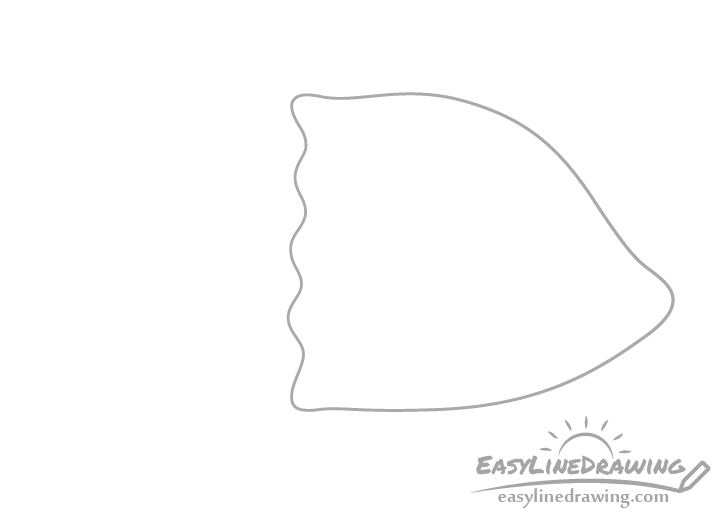
Begin by drawing the shells largest section as shown in the example. Give it a series of bumps on one side and draw the other side with several smooth curves ending with a rounded tip towards it’s bottom.
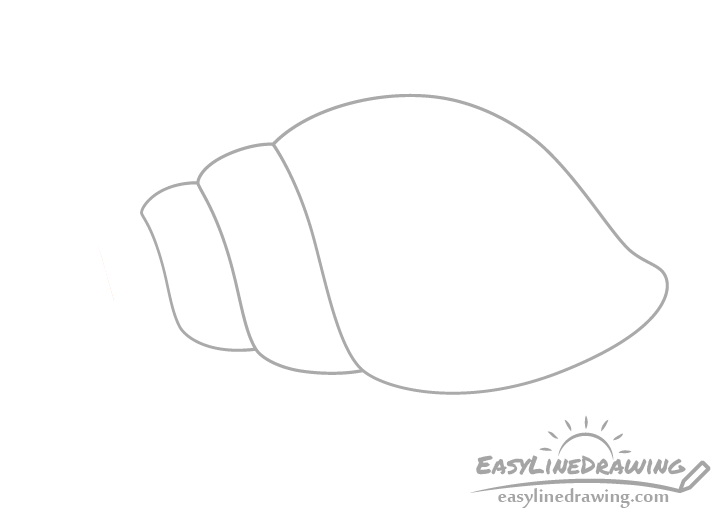
Step 2 – Draw the First Set of Sections
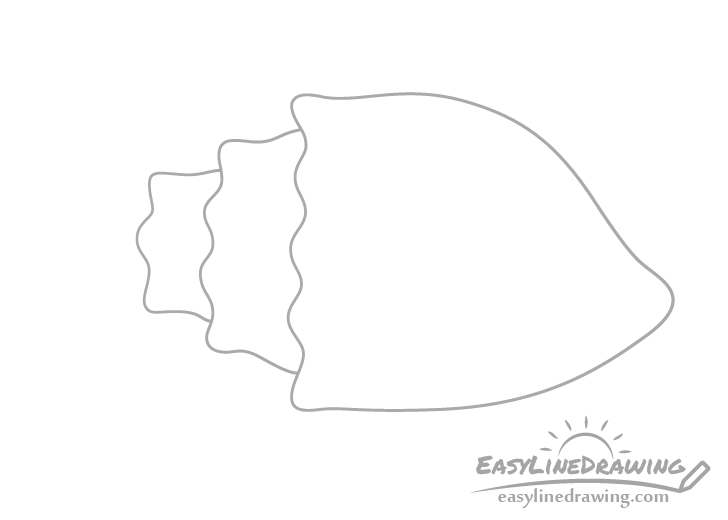
Onto the initial part of the shell add another smaller section, again with a series of bumps (but fewer of them). Afterwards add an even smaller section onto that one with fewer bumps.
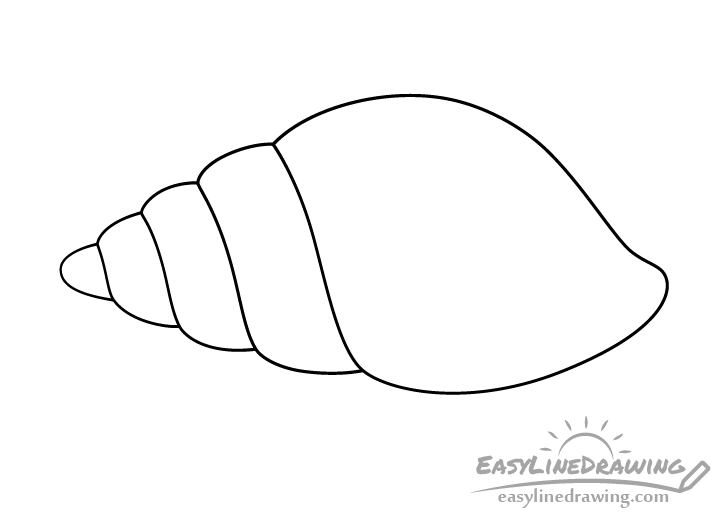
Step 3 – Add the Remaining Sections & Finish the Line Drawing
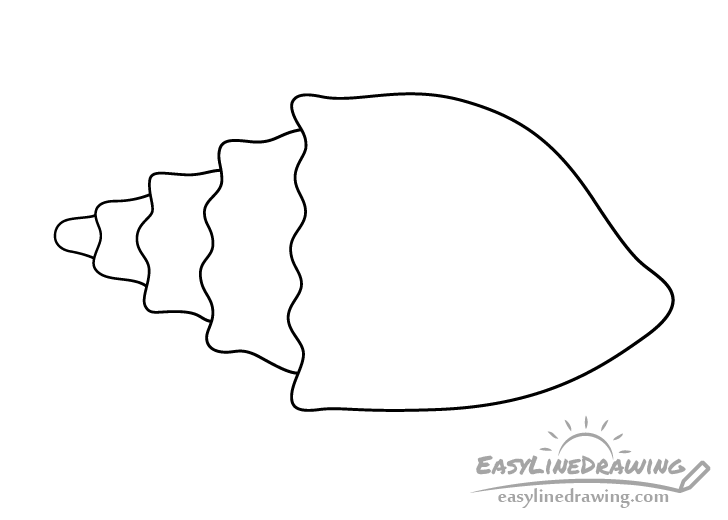
Draw yet another section coming out of the previous one and onto that add the tip.
Afterwards trace over your drawing with a black pen/marker or darker pencil lines.
Step 4 – Color the Shell
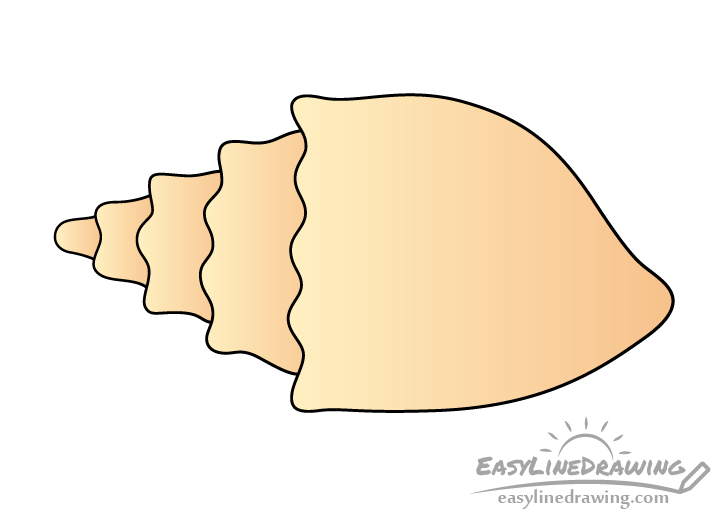
To color the conch shell use colored pencils. In this case it will have gradients going from orange to yellow (as shown in the example). You can also use a different color combination if you prefer.
Create the gradients for each of the sections by carefully blending the pencil colors to crate a smooth transitions from one to another.
If you find this difficult you can also simply make the shell one solid color.
How to Draw a Tulip Shell Step by Step
The tulip shell is similar in shape to the previous example of the conch shell but without the little “bumps/spikes”.
Step 1 – Draw the Base of the Shell
Begin by drawing the largest section of the tulip shell. Give it a bit of an angled and wavy line on one end and draw the other end with smooth curves that join to create a little rounded tip towards the bottom.
Step 2 – Draw the First Set of Sections
Draw a coup the sections of the shell’s spiral as shown in the example. These should get smaller as they go towards the tip.
Step 3 – Add the Remaining Sections & Finish the Line Drawing
Add the next section in the series and then the tip of the shell. Once done trace over your drawing with a black marker, pen or darker pencil lines.
Step 4 – Color the Shell
To color the tulip shell you can make it a brown/pink. As in the other example you can also give it some gradients where the color of each section will be a little lighter towards the tip. Once again colored pencils are probably one of the easiest way to create these. Simply apply less pressure to them as you color from one end to another to create the gradients.
If you find the gradients difficult to make you can simply color the shell a solid pink or brown.
How to Draw a Snail Shell Step by Step
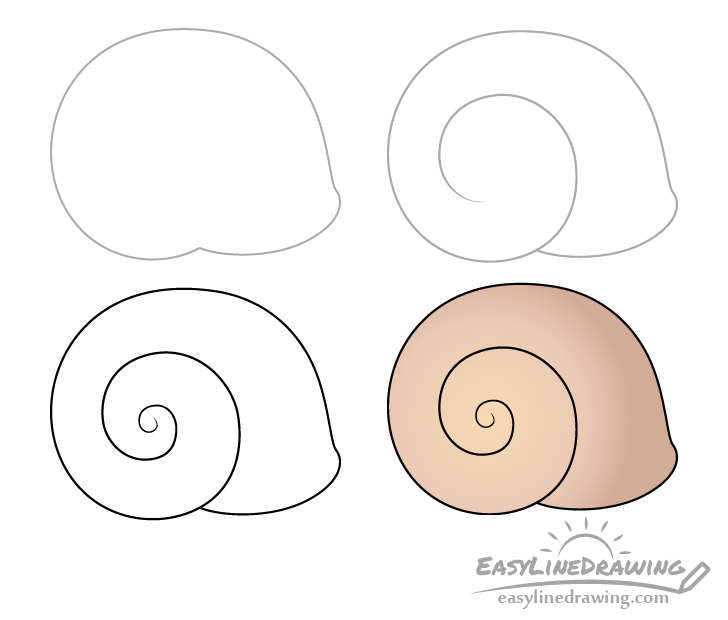
This last example is of a snail shell. It can be drawn for a land or a sea snail.
Step 1 – Draw an Outline of the Shell’s Shape
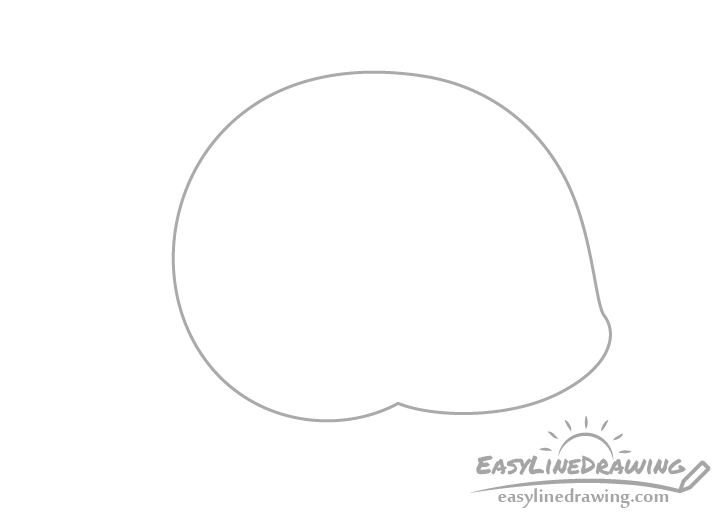
Begin with an outline of the shell. In this case basically it’s silhouette. You can draw it as shown in the example. Make the shell rounded on top and draw the large opening area towards the bottom.
Step 2 – Begin Drawing the Spiral
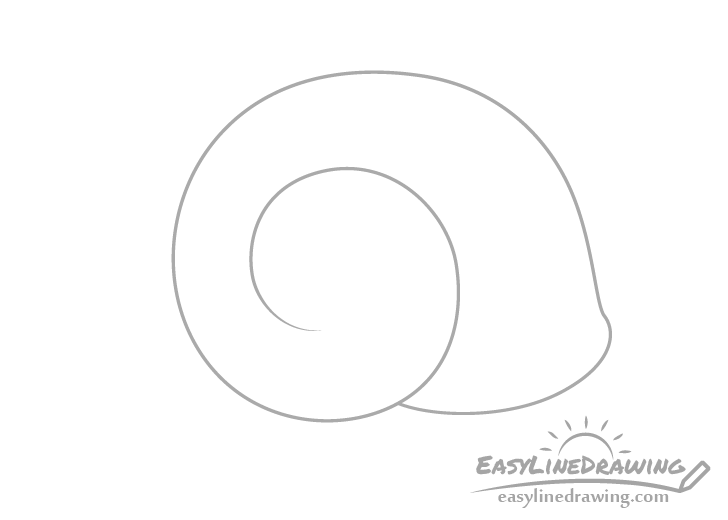
Going form in between the opening (where the nail comes out) and the curve of the shell begin drawing the spiral.
Step 3 – Finish the Spiral & the Line Drawing
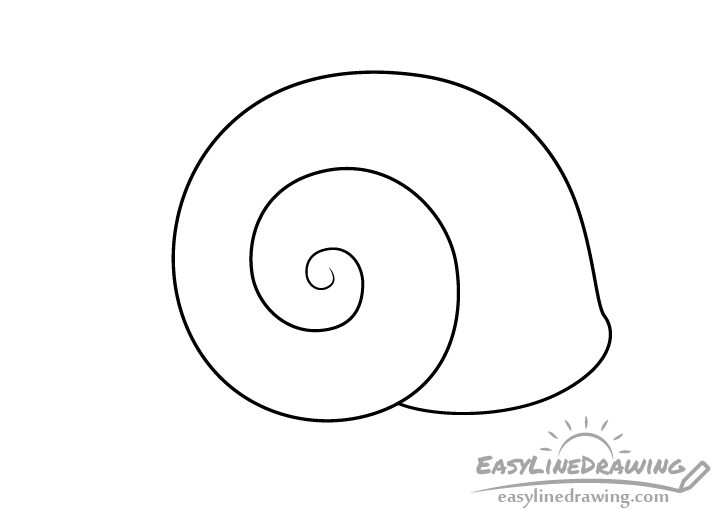
Finish the curve of the spiral (as shown in the example) and trace over your drawing with a black pen/marker or darker pencil lines.
Step 4 – Color the Shell
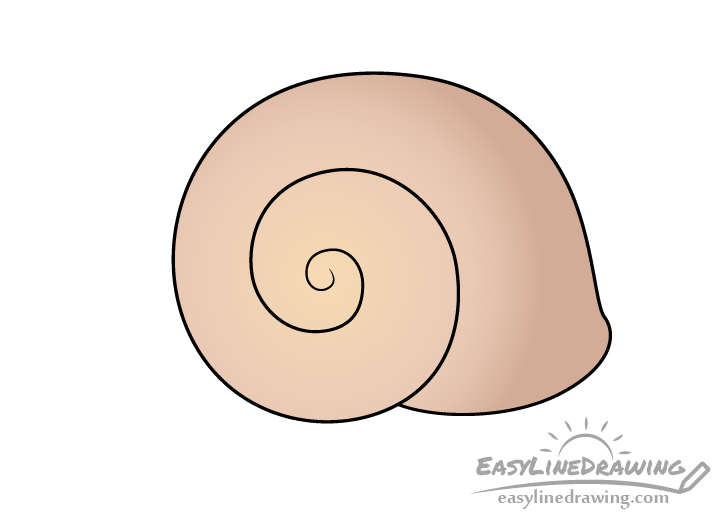
To color the snail shell you can once again use colored pencils (like in the other examples). Make it a yellow/brown in color (or use a different color combination if you like).
You can make the middle of the spiral a yellow brown and slowly transition to just brown around it. You can also shade the side of the shell with the opening to be slightly darker.
If you find the gradients difficult to do you can make the whole shell one solid color (such as brown).
Conclusion
Due to their variety and interesting shapes sea shells can be quite fun to draw. Some of them may be slightly more complex than others but overall all of the examples in this tutorial are fairly simple. Hopefully you’ve found at least one you like.
For more similar tutorial also see:
- How to Draw a Palm Tree Step by Step
- How to Draw A Boat Step by Step
- How to Draw a Cloud Step by Step

")


