How to Draw a Crown Step by Step
This six step tutorial shows how to draw a crown. It includes detailed illustrated examples and quick explanations to go with them.
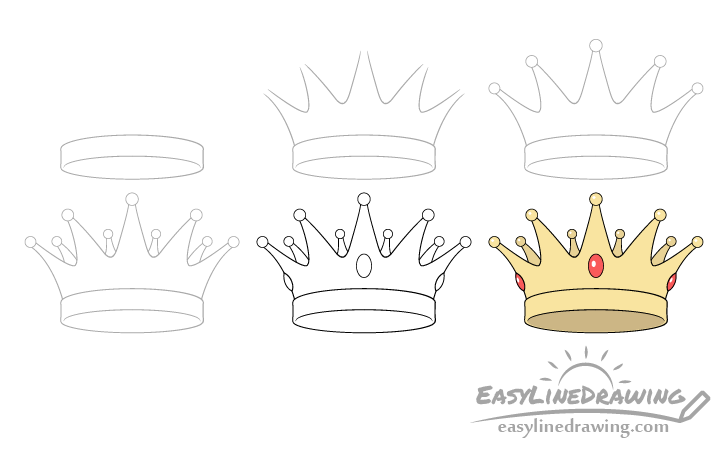
You can see a preview of the drawing steps for the crown above. Even a fairly simple crown like the one in this example still has quite a bit of detail to it which can make the tutorial more difficult if you are beginner. However, if you follow the steps carefully you should be able to do it.
Definitely start the drawing in pencil and make light easy to erase lines in case you make a mistake or want to make an adjustment. You can darken them later on with a black pen or marker.
Step 1 – Draw the Bottom of the Crown
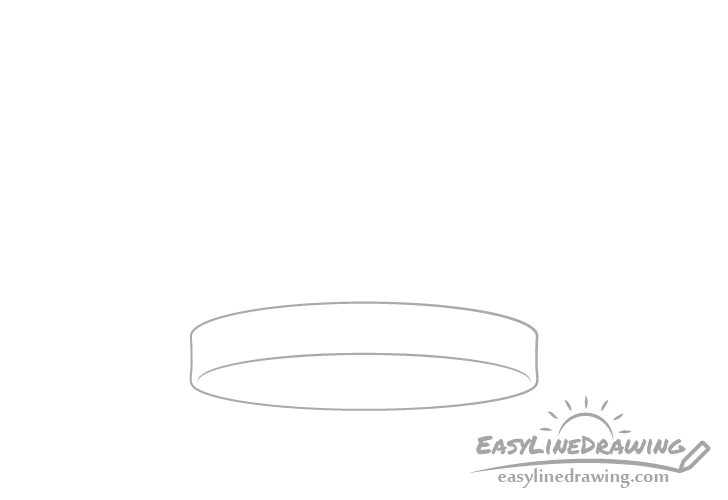
Begin by drawing the bottom of the crown which will be shaped like a ring. Draw it as shown in the example and when adding it’s bottom forward facing edge be sure to leave a tiny bit of space on it’s sides. This will show that the ring has some thickness to it and is not just paper thin.
Step 2 – Draw the Front
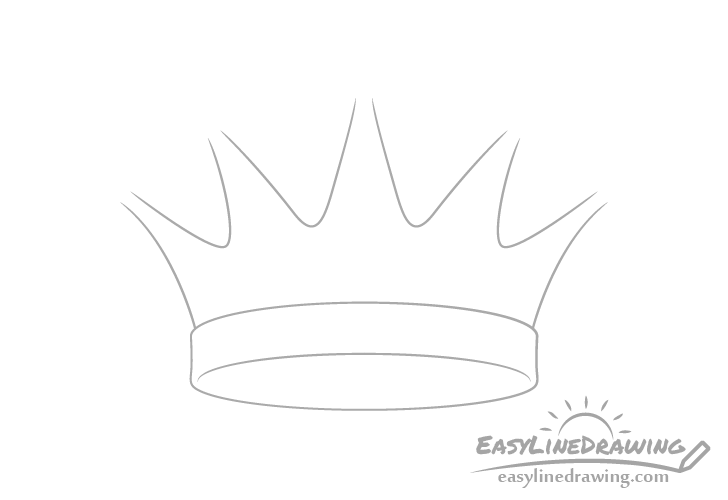
Next draw the spikes. At this stage leave them with open tips. Make the middle one the tallest and draw it pointing directly upwards. Draw the spikes directly to it’s sides curving slightly away form it. Draw the next set of spikes curving sideways even more and also make them slightly thinner than the previous set.
Step 3 – Draw the Spheres on the Tips
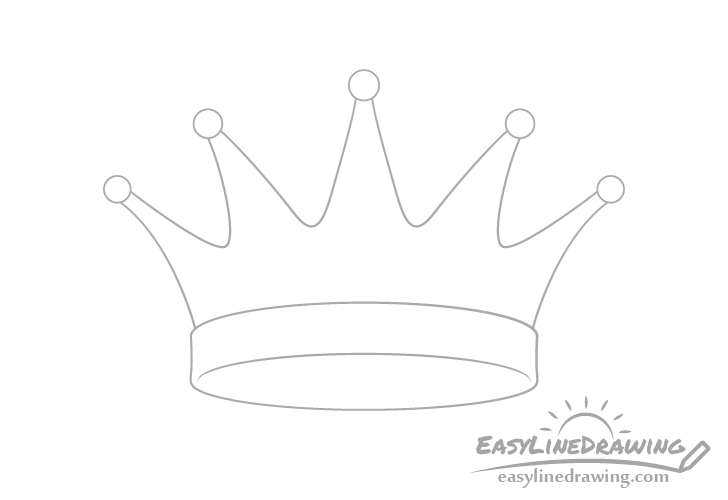
Add little spheres/circles to the top of each spike. You can make the one in the middle the largest and then draw them just a tiny bit smaller on the next set of spikes and even smaller on the one after that.
Step 4 – Draw the Back
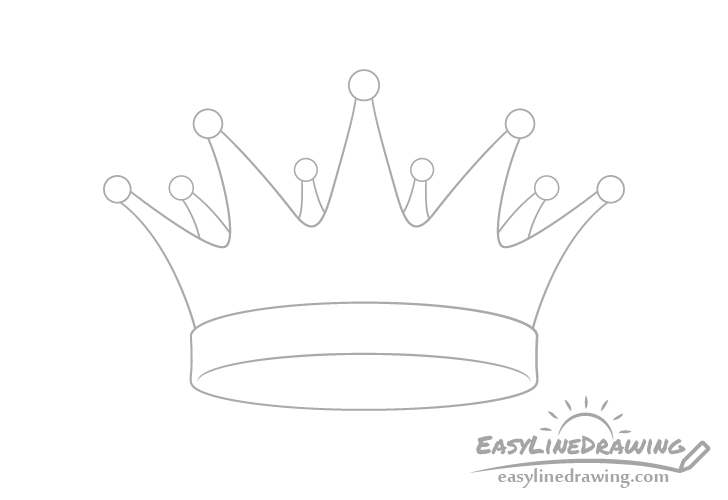
Coming out form between the initial set of spikes draw the ones at the back of the crown. They will mostly be hidden behind it’s front section but you should draw their visible parts thinner and smaller than than the spikes in the front. Draw the spheres/circles at their tips smaller as well with the ones on the two spikes in the back/middle being the smallest.
Step 5 – Draw Gems & Finish the Line Drawing
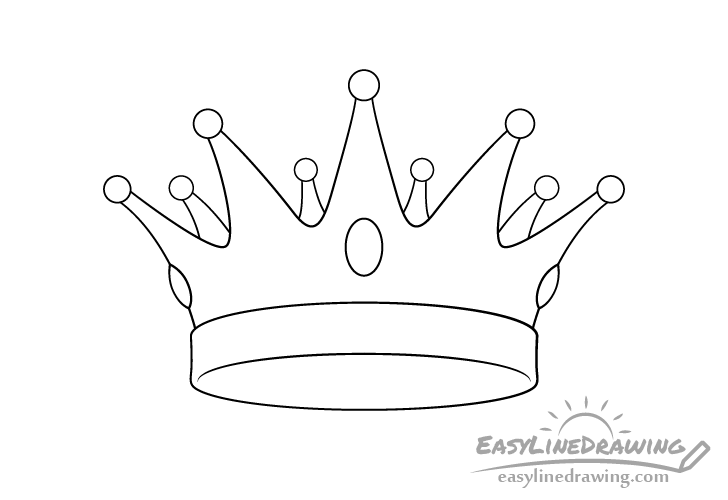
Finally add some jewels to the crown. In this case there will only be three that are visible. One in the middle and two on the sides. In this case they will be oval in shape.
When drawing the side ones you can erase the little bit’s of the crown outline where the gems are supposed to go.
Once done drawing the jewels confirm that what you have up to this point looks the way you want it to and make any corrections if you feel they are needed. Afterwards trace over your lines with a black pen or marker. Alternatively you can also simply darken them with the pencil.
Step 6 – Color the Crown
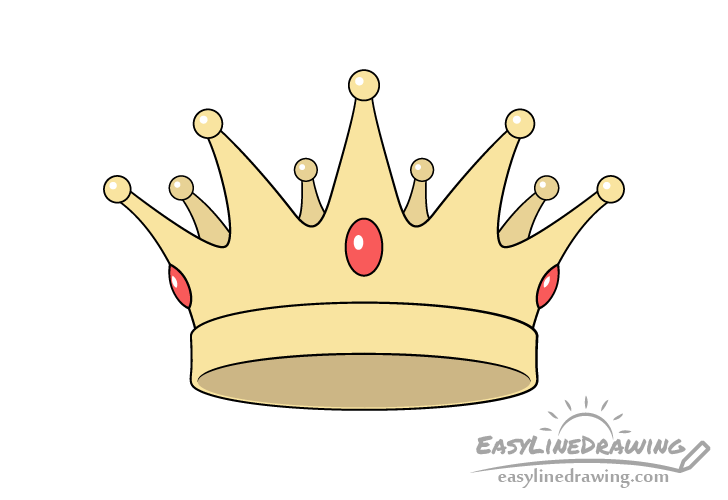
To color the crown make it yellow/brown so that it looks like gold. Make the jewels red (or any color you like). Colored pencils may be the easiest option for this particular drawing but paints may be good as well.
Inside each sphere at the tip as well as each jewel leave a little white area for the highlight (light reflecting from their shiny surfaces).
You can make the shape of each highlight the same as the tips/jewels but smaller (round, oval, etc…). Lightly outline these in pencil to make it easier to color around them. You can also shade the bottom part o the crown as well as the spikes in the back to be a little darker than the rest of it as these areas will tend to have shadows over them. To add the shading lightly darken these parts with a regular pencil on top of the initial yellow/brown color.
Conclusion
The crown in this tutorial is not overly complex but at the same time not too simplistic either. While it’s possible to make a more basic drawing of one it would not look as nice as the current example. Sometimes it’s better to put in some extra effort but get a significantly nicer result.
If you liked this tutorial you may also want to try the following:
- How to Draw a Necklace Step by Step
- How to Draw a Ring Step by Step
- How to Draw a Ruby or a Gem Step by Step
- How to Draw a Diamond Step by Step
- How to Draw Shells Step by Step
- How to Draw a Bow Tie Step by Step

")


