How to Draw a Bow Tie Step by Step
This tutorial shows how to draw a bow tie in six steps. It includes easy to follow line drawing, coloring and shading examples with quick tips.
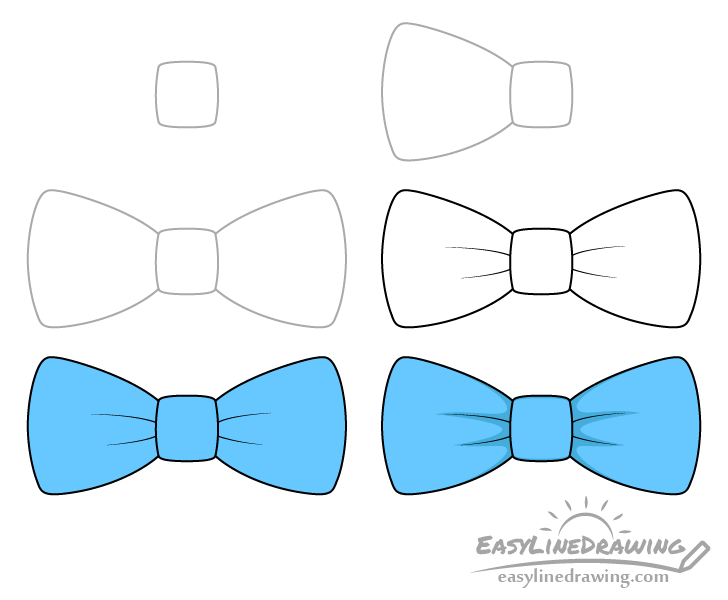
You can see a preview of all of the drawing steps in the image above. The bow tie shown is very simple. However, the last examples shows how you can add some very basic shading to make the drawing look less flat and more interesting.
Start the tutorial in pencils and make light lines that you can easily erase (in case of a mistake). You can darken them later on with a black pen/marker.
Step 1 – Draw the Center/Knot of the Bow Tie
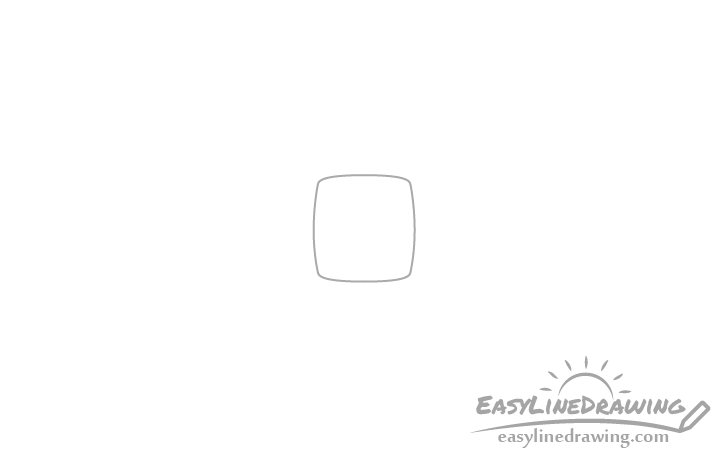
Begin the drawing by outlining the knot at the center of the bow tie. You can draw each of it’s sides with a nice smooth curve and give the shape somewhat rounded corners.
Step 2 – Draw the First Loop
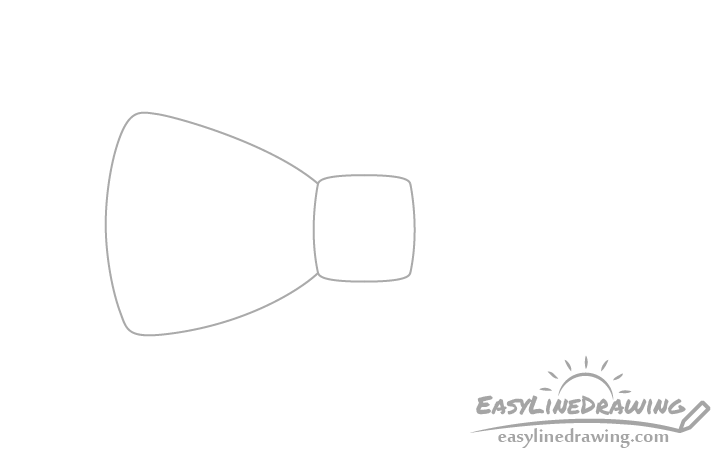
Coming out of one side of the knot draw the first loop of the tie. Make it narrower towards the knot and wider as it goes. You can again draw it as set of fairly smooth and curved lines and give it rounded corners.
Step 3 – Draw the Second Loop
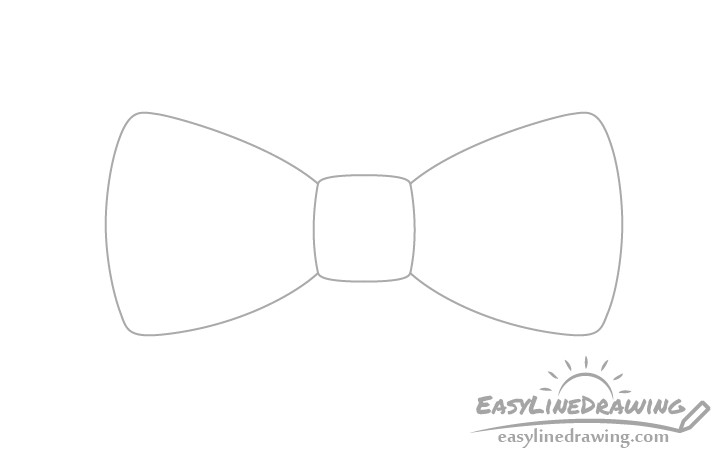
Similar to the first loop draw the second one on the other side of the knot. The loops don’t need to be perfectly symmetrical but for a nicer looking bow tie you do want them to be similar in shape.
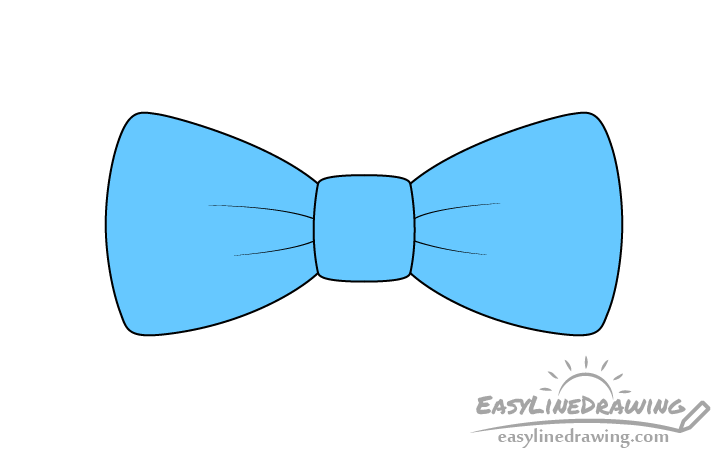
Step 4 – Add Some Wrinkles/Folds & Finish the Line Drawing
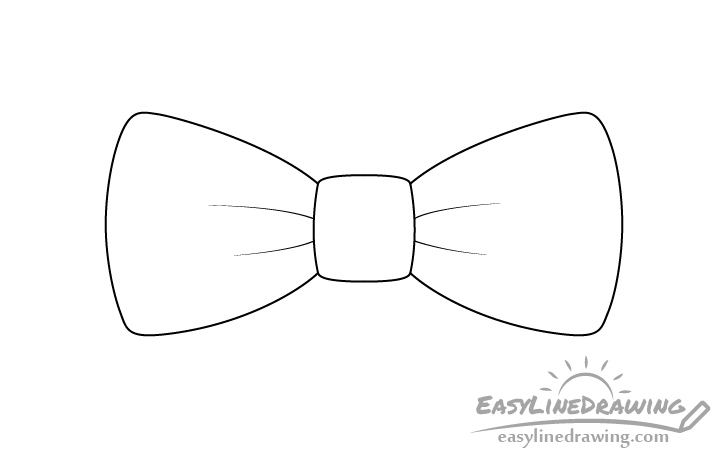
To finish the line part of the drawing first give the bow tie a few folds/wrinkles. Add these in a way where they look like they are coming out of the knot. Try and make them slightly different on each side so that they don’t look symmetrical.
Step 5 – Add Color
To color the bow tie you can use any medium you like for this (paints, markers, colored pencils, etc…). In this case it will be blue but you can use just about any other color.
Step 6 – Add Shading & Finish the Bow Tie Drawing
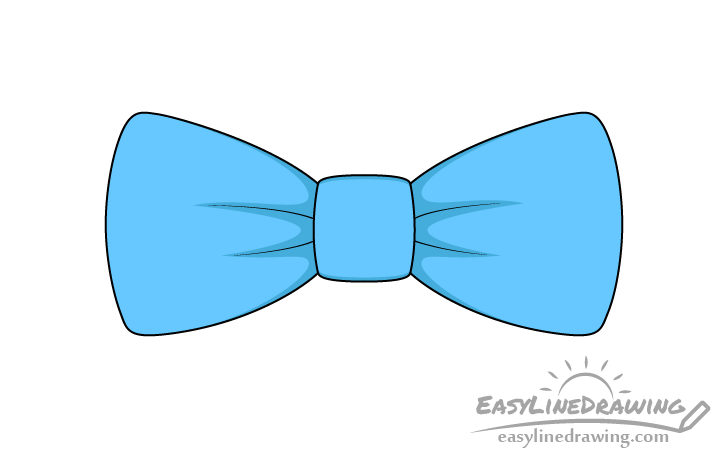
You may notice that the colored drawing in the previous step looks a bit plain and a little flat. You can fix this by giving the tie some very simple shading as shown in the example above.
Use either a darker blue or even just a regular pencil to darken the areas around the folds/wrinkles. Make the shadows thicker towards the knot and thinner near the ends of the wrinkle lines. You can extend the shading just a bit past the wrinkles. You can also give a thin strip of shading to the knot at the top and bottom.
Conclusion
This tutorial shows how to draw a fairly simple but nice looking bow tie. As was mentioned at the start of the tutorial and is shown in the last example, some very simple shading can make an otherwise flat looking drawing appear a lot more interesting and three dimensional. At the same it also does not require too much extra effort.
If you enjoyed this tutorial and would like to try a few more like it also see:
- How to Draw a Ribbon Step by Step
- How to Draw a Tie Step by Step
- How to Draw a Towel or Cloth Step by Step
- How to Draw a Pen Step by Step
- How to Draw a Briefcase in Six Steps
- How to Draw a Flag Step by Step