How to Draw a Pen Step by Step
This tutorial shows how to draw a common type of pen in eight steps. It includes simple illustrated drawing examples and quick instructions.
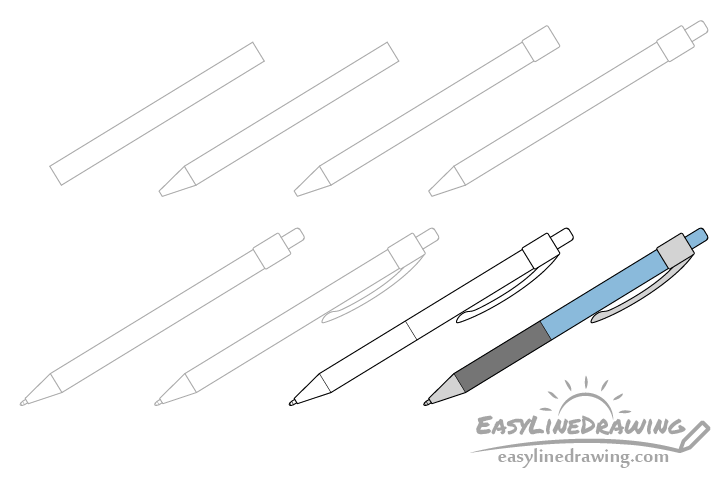
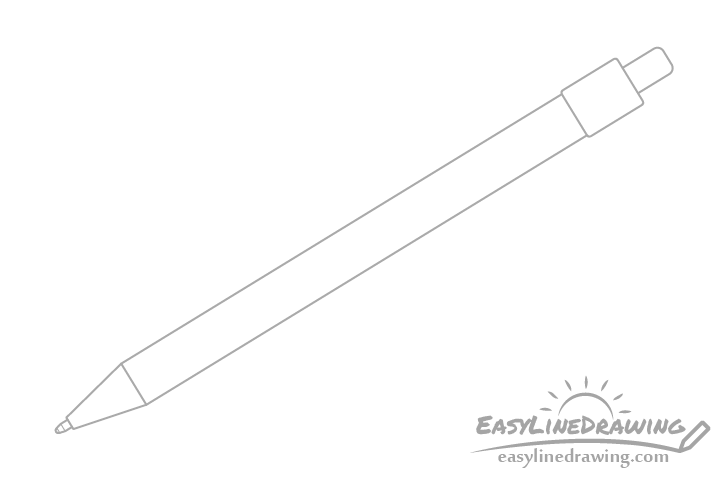
The pen in this case is a common ball point or gel pen. You an see a preview of the drawing steps for it above.
Start the tutorial in pencil and make light lines that you can easily erase. You may wish to use a ruler to help you make some of the long straight lines. You may also want to have a black pen or marker to darken your lines later on (but you can also do it with the pencil).
Step 1 – Draw the Barrel of the Pen
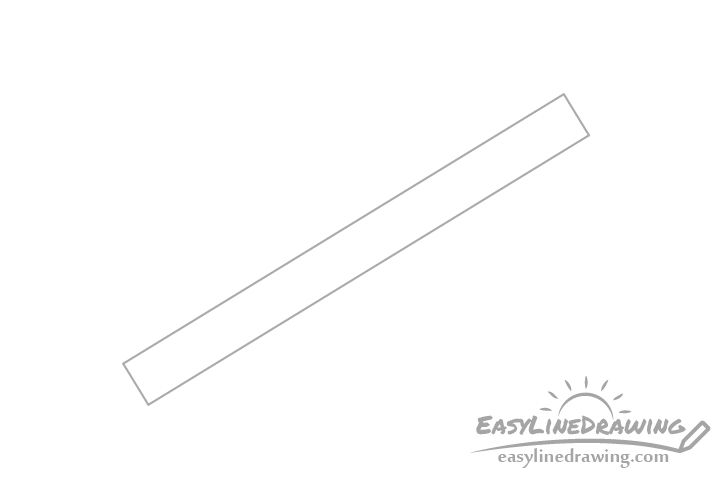
Begin by drawing the barrel of the pen. In this case it will just look like a long and thin rectangle.
Step 2 – Draw the Front
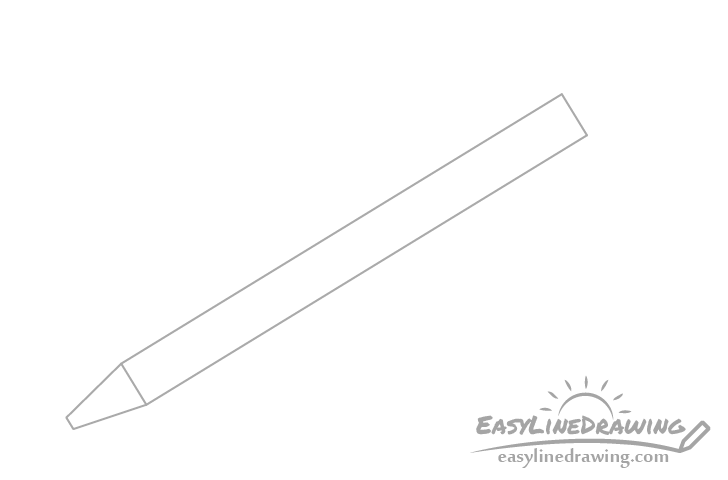
Onto the barrel add the front part of the pen that the tip will be coming out of. Make this narrower towards the tip and as wide as the barrel at it’s base.
Step 3 – Draw the Back of the Pen
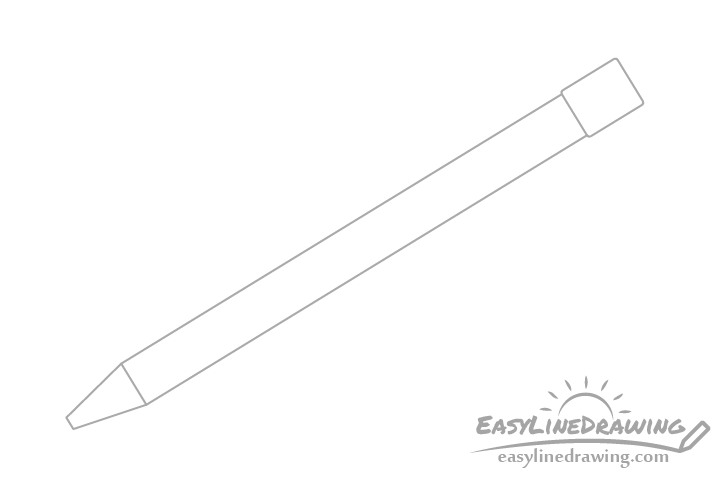
At the back of the barrel add a wider section that the clip will be attached to (drawn in a later step). Draw it shaped like a short rectangle with slightly rounded corners.
Step 4 – Draw the Button

At the top of the pen add the button that brings out the tip. Make this roughly half the width of the barrel with rounded corners at it’s top.
Step 5 – Draw the Tip
Coming out of the front side of the pen add the tip.
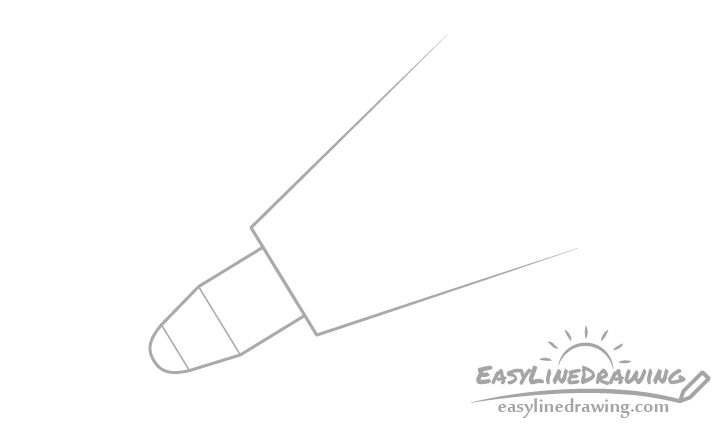
You can see a slightly simplified close up drawing of a pen tip in the example above.
Step 6 – Draw the Clip
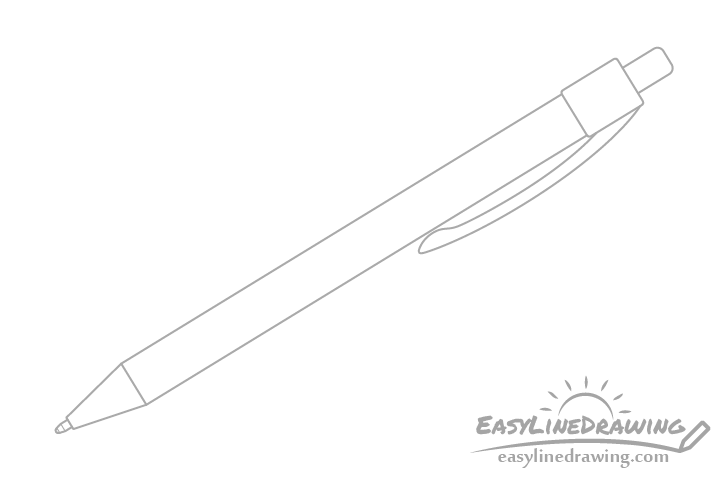
Attached to the back of the pen add the clip. Position it starting form the wider section added in step three and going just slightly less than halfway down the barrel. Draw the clip with a light curve and small bump near it’s end that faces towards the pen.
Step 7 – Draw the Tip & Finish the Line Drawing
To finish the line drawing add a little divider line slightly less than halfway up the pen to indicate a rubber grip area.
Next confirm that your drawing looks the way you want it to and darken your lines by tracing over them with a darker pencil stroke or a thin maker/black pen.
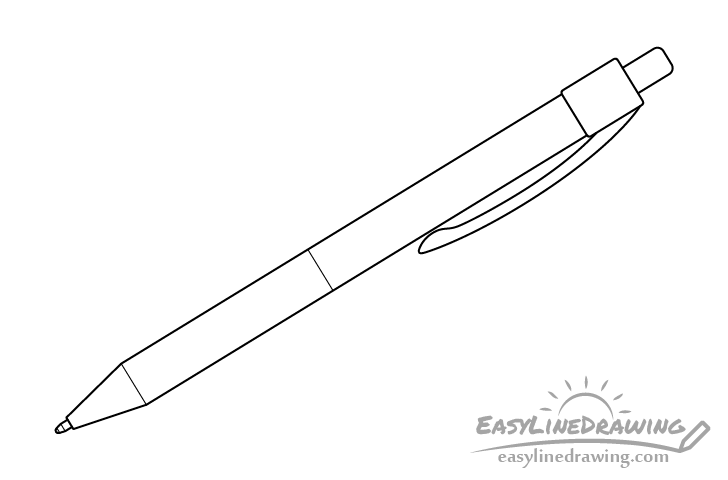
Step 8 – Finish the Pen Drawing
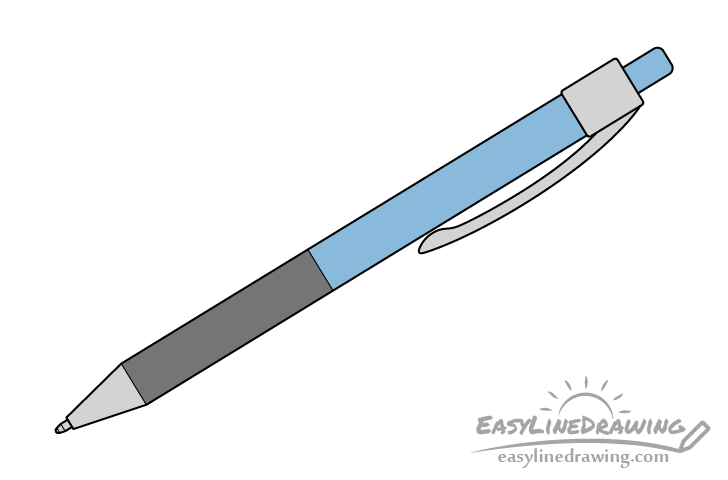
You can color the pen with pretty much any medium (or a mix of several) such as colored pencils, paints, markers, etc…
In this case the colors will be distributed as follow:
- The tip, front and clip will be a light grey.
- The rubber grip will be a dark grey (you can also just make it black).
- The rest of the pen will be blue.
You can of course use a different color combination if you prefer.
Once done coloring the pen you should be done with the tutorial.
Conclusion
There are many variations of pen designs out there. This tutorial can help you draw one with fairly common features but you can also apply the same or similar steps to drawing other pens.
If you liked this tutorial you may also wish to try:
- How to Draw a Pencil Step by Step
- How to Draw a Marker Step by Step
- How to Draw a Screwdriver Step by Step
- How to Draw a Light Bulb Step by Step
- How to Draw a Toothbrush Step by Step
- How to Draw a Monitor Step by Step


