How to Draw a Screwdriver Step by Step
This tutorial shows how to draw a simple screwdriver in just four steps. It provides easy to follow examples with a couple of drawing options.
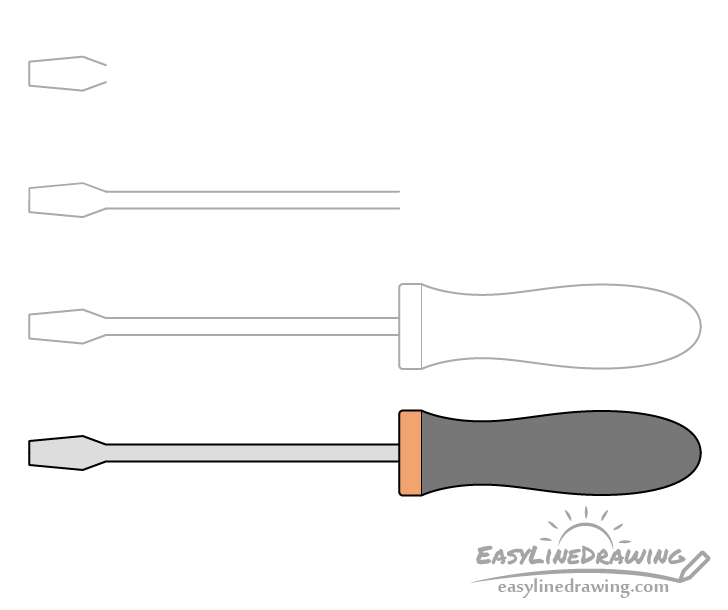
You can see a preview of the different stages of the the screwdriver drawing in the example above.
Start the drawing in pencil and make light lines that you can easily erase in case you make a mistake. You can darken them later on using a black pen or marker.
Step 1 – Draw the Blade of the Screwdriver

To make the drawing look a bit more interesting you can position the screwdriver on an angle.
The part you can start with is its blade, however, before drawing it you may also wish to make a guide line as shown in the example below.
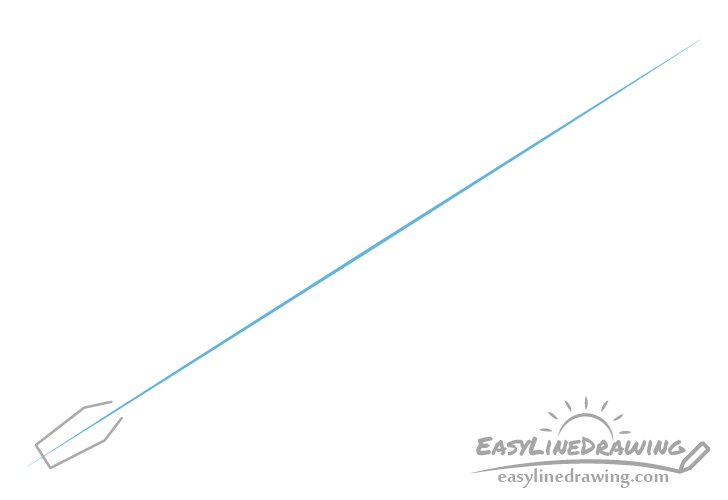
This line (shown in blue) can help you insure that the screwdriver is straight and that your drawing does not get overly skewed to one side.
If you do want to use the guide line be sure to make it very light (in pencil) so that you can erase it once your done with the drawing. You may also wish to use a ruler to help you draw it to make sure that the line is actually straight.
Step 2 – Draw the Shank
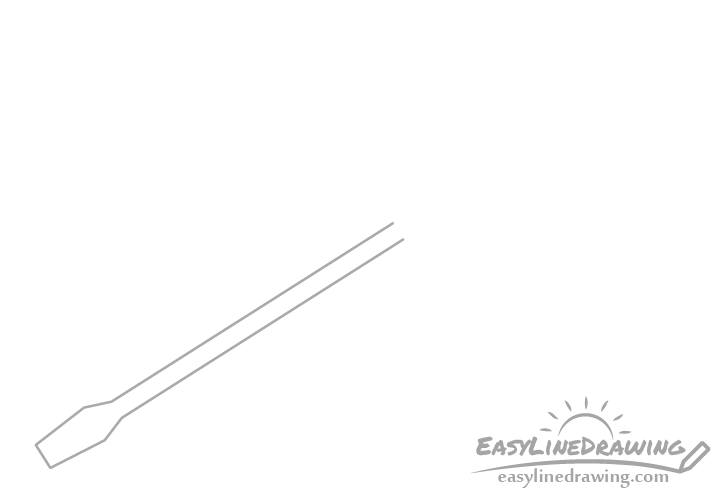
Going up from the blade add the shank. You can draw this with just two parallel lines.

Again, if you want to draw the center line your drawing can look something like the example above.
Step 3 – Draw the Handle & Finish the Line Drawing

Finally finish line drawing of the screwdriver by adding the handle.
Add a little hand guard section at the front of the handle (keeps the hand from slipping off). Make the handle slightly narrower going up from that, then wider, and then again narrower with a rounded end.
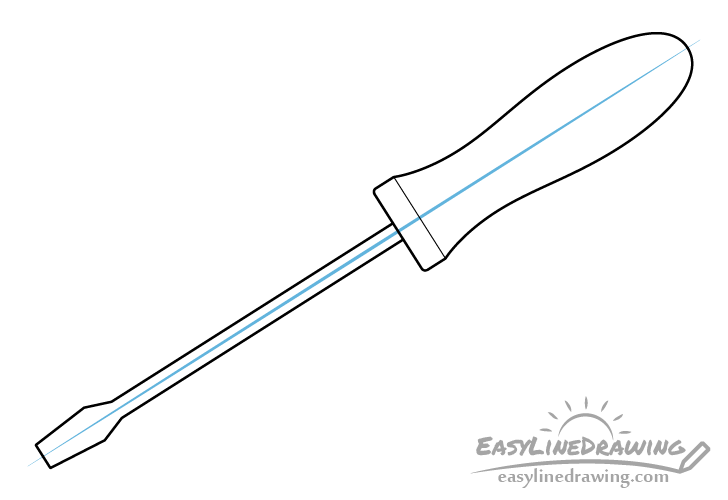
The guide line may be particularly useful when drawing the handle as it can help you see if both sides of it are even in width.
To finish the line drawing you can trace over it with a black pen/marker or simply darken your lines with the pencil. If you chose to use the center guide line you can carefully erase it so that your drawing looks something like the previous example.
Step 4 – Color the Screwdriver
Finally you can color the screwdriver with just about any medium you wish (paints, colored pencils, markers etc…).
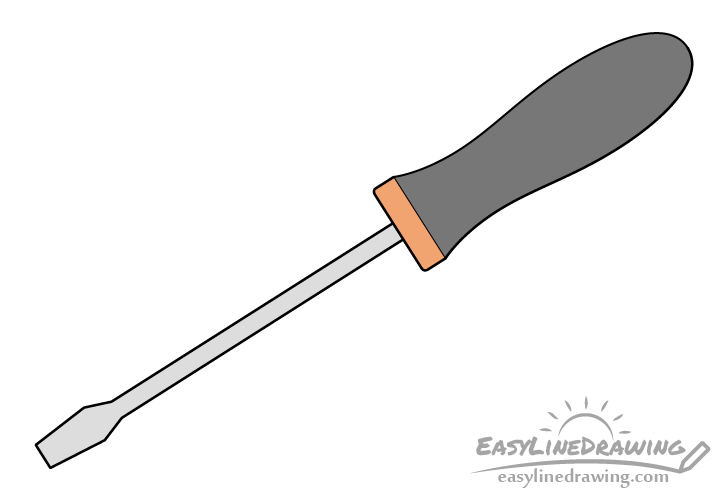
Make the blade/shank area a light grey (to show that they are metallic) and make the handle orange and dark grey as shown in the example.
Once done coloring you should have a finished drawing of the screwdriver.
Conclusion
A screwdriver is a fairly simple tool. While screwdrivers can vary in shape this tutorial shows how you can draw a fairly generic looking one by taking some of it’s most characteristic parts and shapes.
If you liked this tutorial and would like to try some more that are similar also see:
- How to Draw a Wrench Step by Step
- How to Draw a Hammer Step by Step
- How to Draw an Axe Step by Step
- How to Draw a Paint Brush Step by Step
- How to Draw a Shovel Step by Step
- How to Draw a Light Bulb Step by Step


")


