How to Draw Scissors Step by Step
This tutorial shows how to draw a pair of scissors in six easy steps. It provides simple illustrated examples and straightforward instructions.
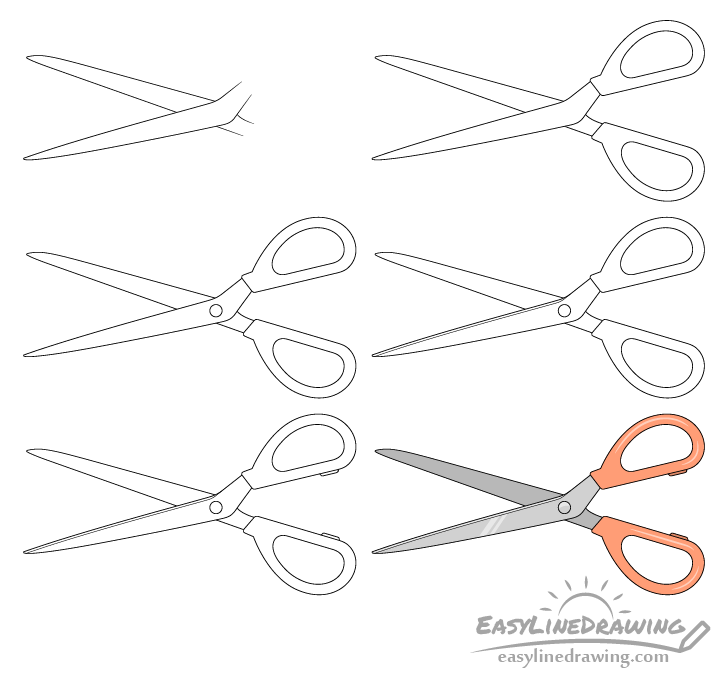
The scissors used as the example are drawn with a fairly basic design to make the tutorial beginner friendly. At the same time it’s also one that is very characteristic of such a cutting tool. You can see the step by step breakdown of drawing them in the preview image above. There are also a few additional examples provided below.
It’s recommended that you start the tutorial in pencil and make light lines that are easy to erase in case you make a mistake. You can darken them before coloring with a black pen or marker.
In addition to the line drawing the tutorial also shows how to apply some basic coloring/shading. The handles (bows) in the example are orange but you can use any color you like or have available. The blade can just be shaded using a regular pencil.
Step 1 – Draw the Blades
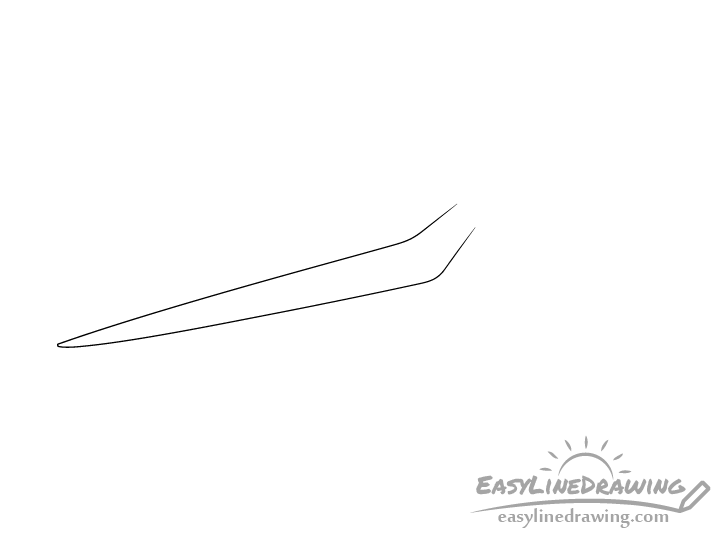
Begin the scissors drawing with the blades. Start with the one in the front. In this case it is the blade connected to the upper bow (handle).
Make the blade wider as it goes from the tip towards the base and give it an upwards bend near it’s end. From the bend on make it narrower.
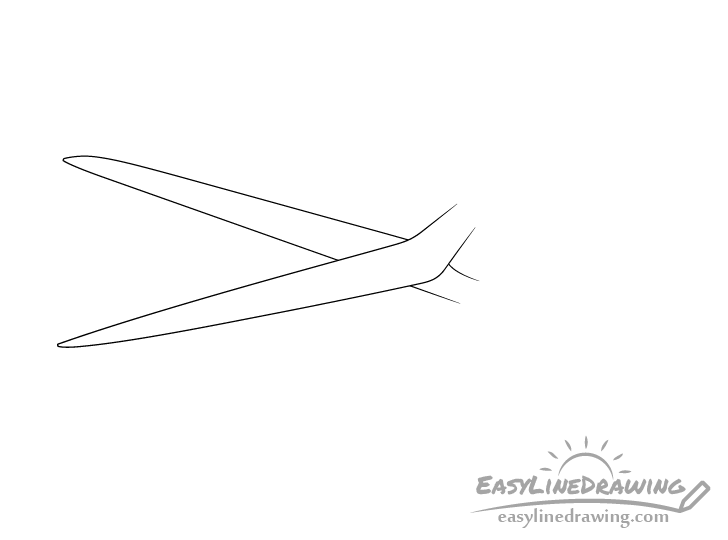
Next, draw the second. Make this slightly wider near the tip as compared to the first one and also draw it without a bend at it’s base. Do however also make it a little narrower as it goes past the pivot point.
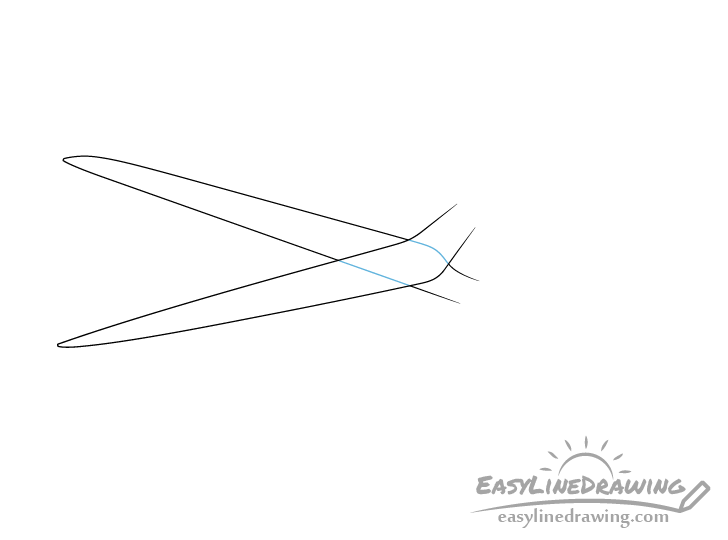
Also, please note that it can be helpful to draw the second blade as though the first one is see through (as shown in the example above) and erase the parts of it that should be hidden afterwards (shown in blue).
Step 2 – Draw the Bows (Handles/Finger Holes)
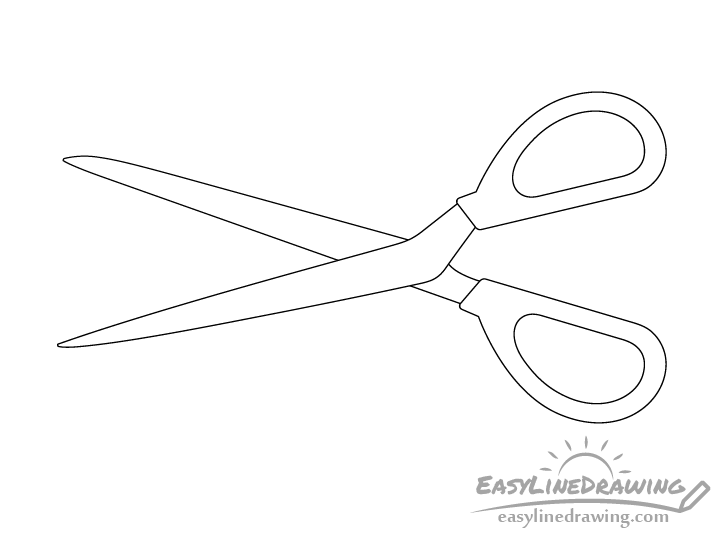
At the base of each blade draw a bow, these are the handles/finger holes of the scissors. In this case both have the same shape (a mirror of one another).
When drawing the bows first outline the outer shape of each one and add the finger holes after you are happy with their placement.
Step 3 – Draw the Pivot Screw
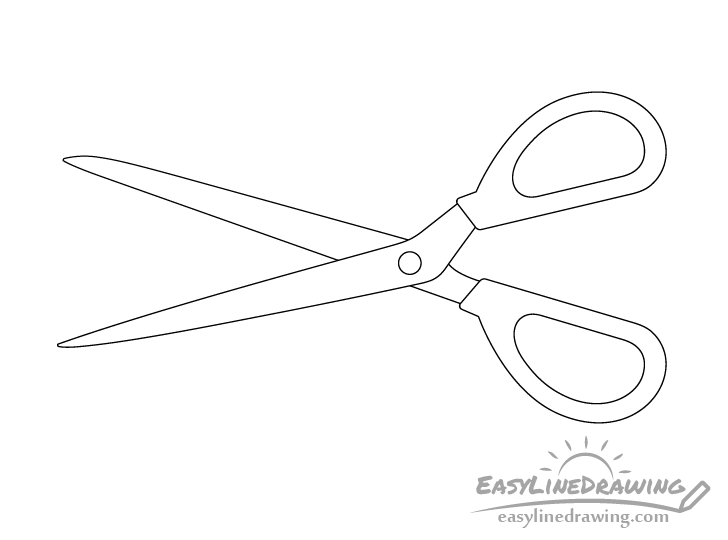
For this really simple step draw the screw that the that holds the scissors together and that they pivot around. Just make it round and place it where the two blades overlap.
Step 4 – Draw Edge
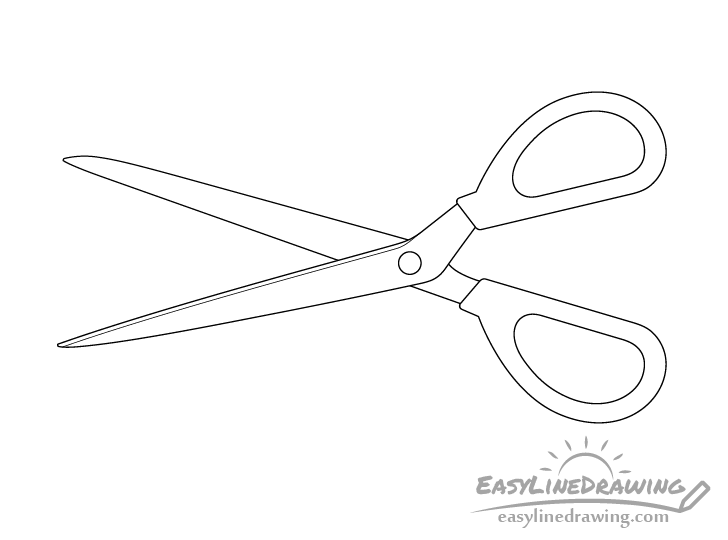
Draw the edge of the blade in the front. You don’t need to worry about the edge of the other blade is not visible because it’s facing away from the viewer.
Step 5 – Draw the Bumpers

For the last part of the scissors add the bumpers/silencers. These are the little bumps on the inner sides of the bows.
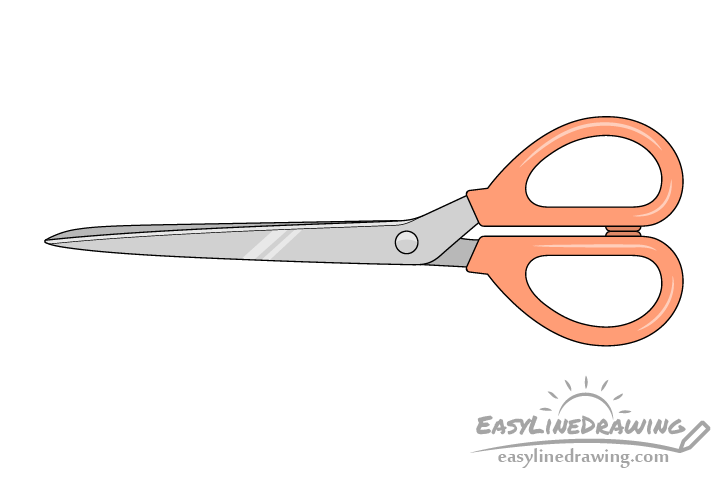
Step 6 – Color the Scissors

To finish the drawing add some color. Generally you can make the blades grey and the bows/handles whatever you prefer (in this case they are orange which goes well with the grey).
To make the drawing look nicer you can also give it some very basic shading and add a few highlights (reflections).
When coloring the bows leave a few light strips running along their curves (as shown in the example). This will show light reflecting from them and help convey that they have a smooth surface. You can first leave these white when coloring and then lightly go over them with the same color you use for the handles (so that they don’t look overly bright). Shade the bumpers to be slightly darker than the rest of the bows.
Leave a few light streaks along the blade in the front as well as a light area along the upper part of the screw. Make these a slightly lighter grey as compared to the rest of the blade. You can make it’s edge the same lighter grey as well. Make the blade in the background slightly darker grey.
As mentioned at the start of the tutorial you can simply use a regular pencil to create the greys and apply more or less pressure to it to make them lighter or darker.
The scissors in the initial example are drawn open but you can see what the same pair can look like when closed in the example above (in case you would like to try drawing them in that state).
Conclusion
Drawing simple objects can be a good way to improve as an artist, especially if you are a beginner. The scissors shown as the example in this tutorial have a fairly basic design but also one that is characteristic of such a tool.
By giving the drawing some very basic shading you can also help make the scissors appear more three dimensional and give a hint of their texture.
If you like these kinds of helpful tips and easy to follow step by step examples be sure to also try the following tutorials:
- How to Draw a Fork Step by Step
- How to Draw a Knife Step by Step
- How to Draw a Lighter Step by Step
- How to Draw a Nail Step by Step
- How to Draw a Lock Step by Step

")


