How to Draw a Lighter Step by Step
This tutorial shows how to draw a lighter. It provides simple step by step examples and easy to follow instructions.
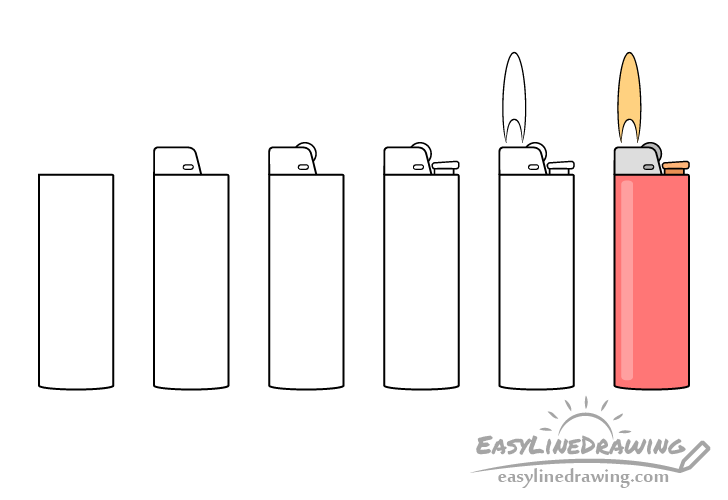
The lighter in this example is a sparkwheel type. The guide shows how to draw all of the most common parts of such an item as well as an easy way to add a flame coming out of it. You can see a preview of these in the image above.
It’s recommended that you start the tutorial in pencil and make light lines that are easy to erase in case you make a mistake. You can darken them later on with a black pen or marker.
For drawing a match see the following tutorial:
How to Draw a Match Step by Step
Step 1 – Draw the Body of the Lighter
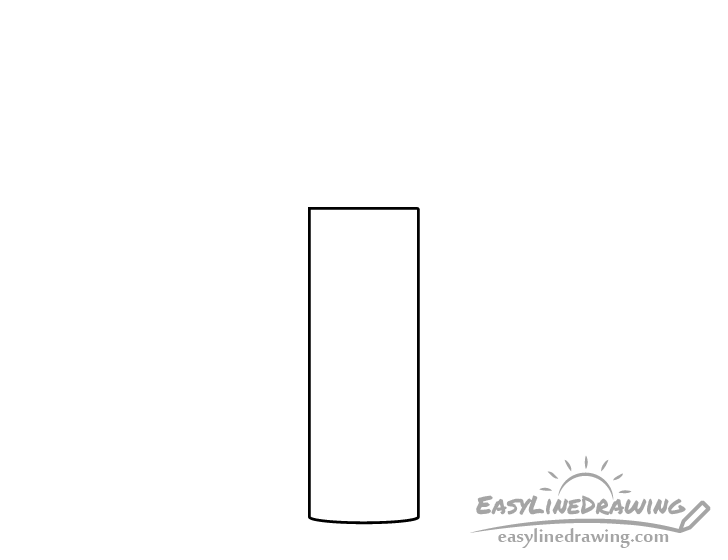
Begin by outlining the main body of the lighter. It’s shape should be similar to a rectangle but with a rounded bottom.
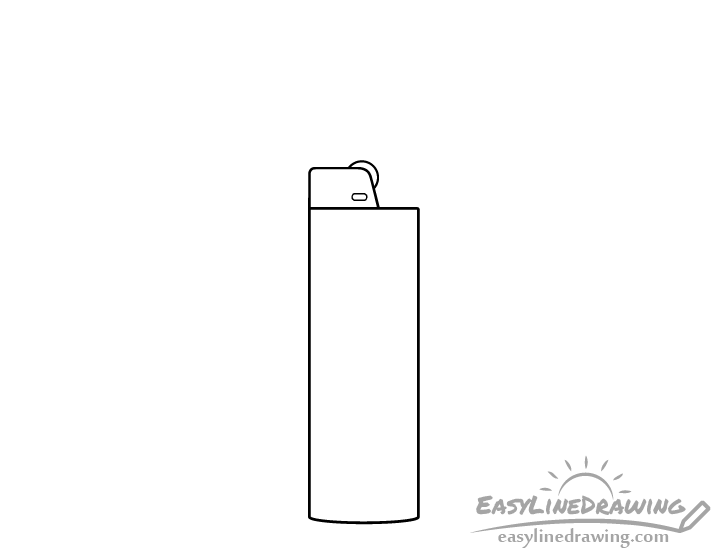
Step 2 – Draw the Metallic Hood
On top of the body add the metallic hood. Draw this lined up with the lighter’s main body on one side and a slope on the other that goes just a little past it’s middle.
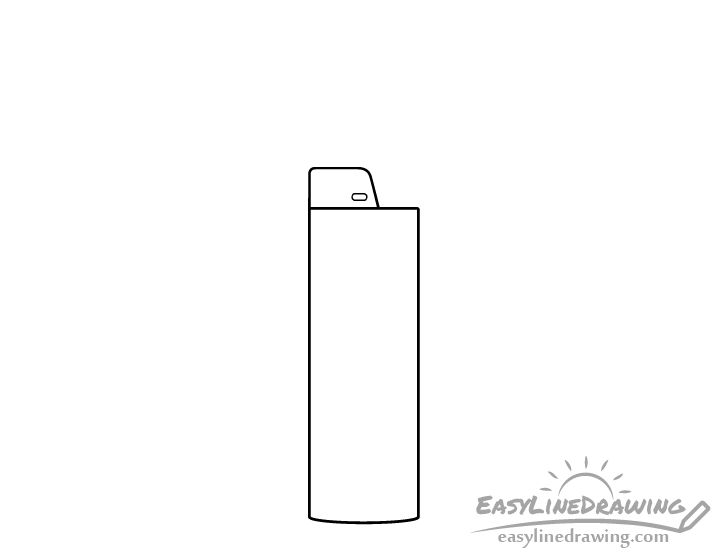
Step 3 – Draw the Sparkwheel Wheel
Coming out of the corner of the hood add the sparkwheel. Although most of it is hidden keep in mind that it should be circular in shape.
Step 4 – Draw the Button
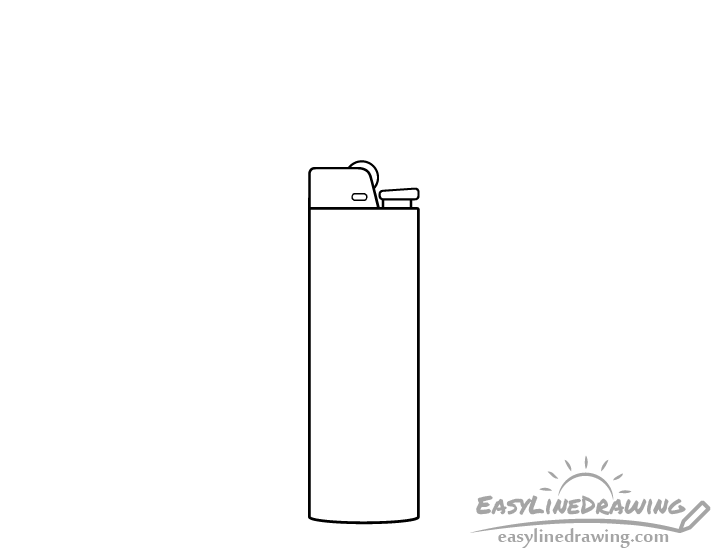
For the last part of the lighter add the ignition button. Place it next to the hood. Give the button a narrower base and a wider top that is slightly sloped towards it.
Step 5 – Draw the Flame
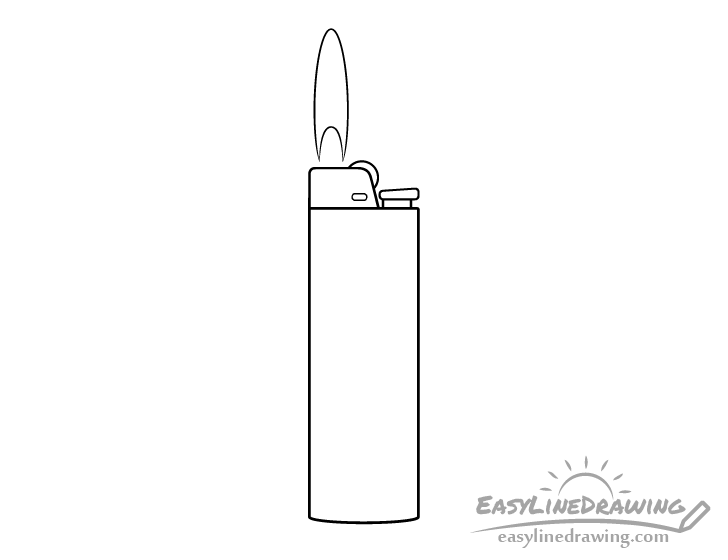
With all parts of the lighter outlined add a flame coming out from the top of the hood (just in front of the sparkwheel). You can think of the flame’s shape as a really stretched out vertical oval that has a bite taken out of it at the base.
Once the flame is outlined you are nearly done with the line drawing part of the tutorial. The only thing left to do should be to darken your lines with a black pen or marker. If you don’t have one of those around just do it with the pencil.
Step 6 – Color the Lighter
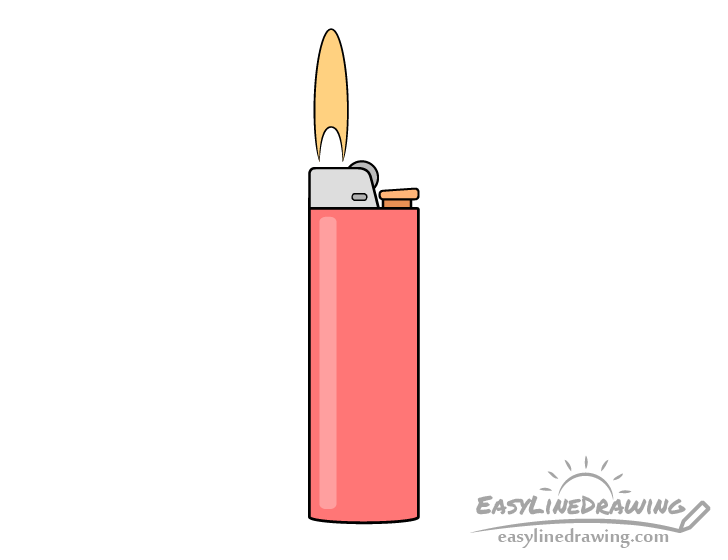
You can color the lighter as follows:
- Main body – red (with a lighter strip on one side for the reflection)
- Hood – grey
- Sparkwheel – a slightly darker grey
- Ignition button – orange (with a slightly darker orange at the base)
- Flame – orange/yellow
Conclusion
A sparkwheel lighter like the one in this example is fairly easy to draw (from the side view). Start with it’s largest part (the main body) and then add the smaller parts one at a time. You can also add a flame coming out of the lighter to make the drawing a little more interesting.
If you like these kinds of simple step by step guides also try the following:
- How to Draw Scissors Step by Step
- How to Draw a Flashlight Step by Step
- How to Draw Fire Step by Step
- How to Draw a Torch Step by Step
- How to Draw a Knife Step by Step
- How to Draw a Nail Step by Step

")


