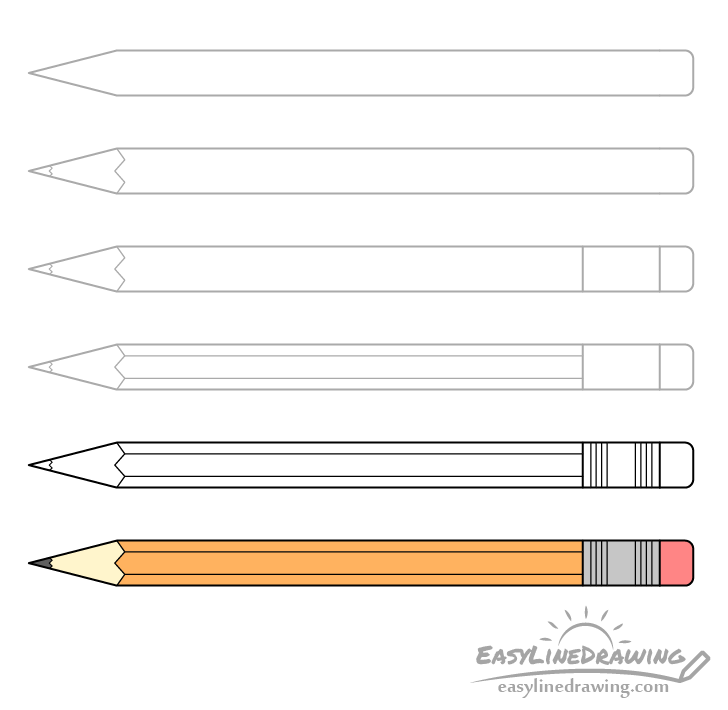
How to Draw a Pencil Step by Step
This easy tutorial shows how to draw a regular pencil in six steps. It includes simple drawing examples with quick explanations.
The main challenge of this tutorial might be drawing the long straight lines that define the pencil. If you find this difficult you may want to use a ruler to help you.
It’s also recommended that you start the drawing of the pencil with an actual pencil and make light lines so that you can erase any potential mistakes. You can darken your lines later either again with the pencil or by going over them with a black pen or marker.
Step 1 – Draw the Outline of the Pencil
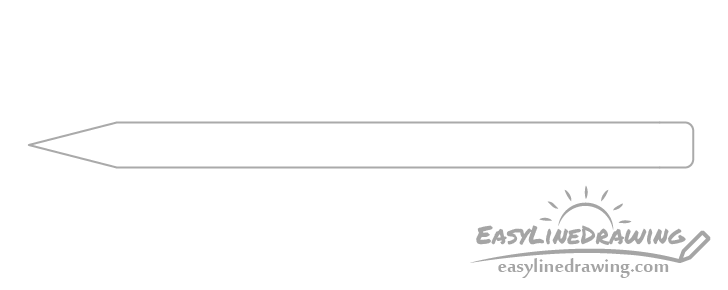
Begin by drawing the outline of the pencil. Give it a sharp tip on one end and rounded corners on the other (for the eraser).
Step 2 – Draw the Tip of the Pencil

Define the tip of the pencil with a jagged line as shown in the example. Afterwards do the same for the lead.
Step 3 – Draw the Part that Holds the Erase in Place
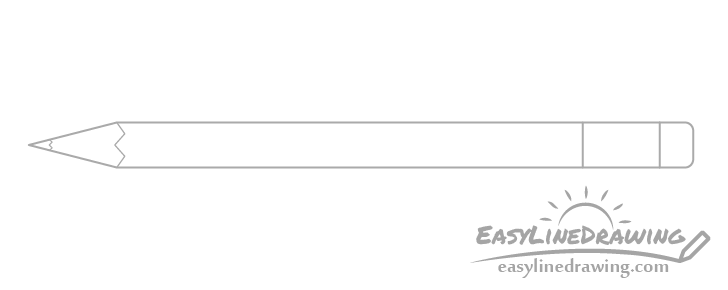
Towards the back of the pencil add the metallic part that holds the eraser in place. You can do this with juts a pair of lines that set it’s width.
Step 4 – Draw the Edges of the Pencil
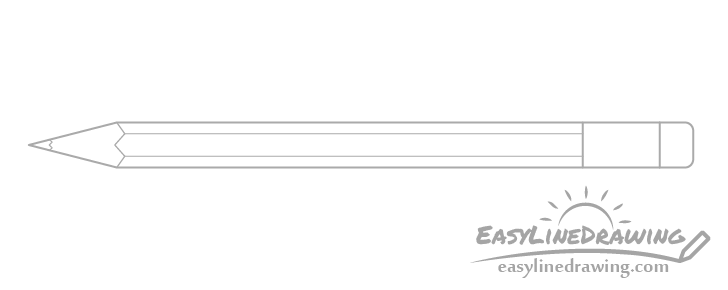
Pencils often have a hexagonal shape (six sides) to make them easier to grip. You can show this by drawing a couple of it’s edges.
Add these by projecting a pair of straight lines from the “teeth” of the jagged line that defines the tip all the way to the part that holds the eraser.
Step 5 – Finish the Line Drawing
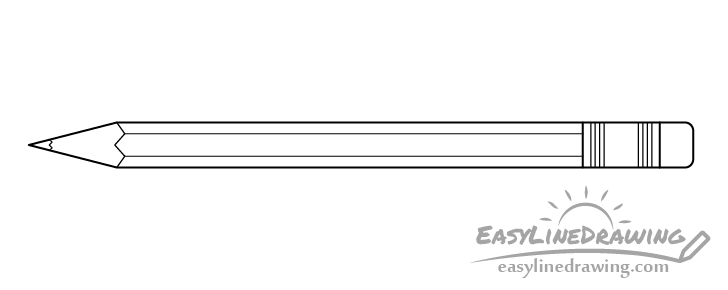
Finish the line drawing by adding the smaller details of the eraser holding bit. In this case these will be just sets of lines to each of it’s sides.
Once done you can trace over your drawing with a black pen/marker or simply darken your lines with a pencil.
Step 6 – Color the Pencil
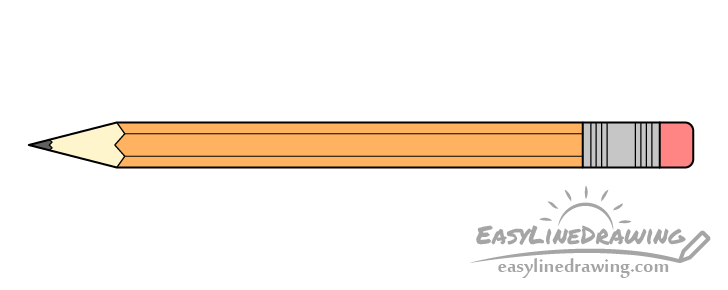
To color the pencil you can make the lead a dark grey, the pencil itself orange (as is very common for pencils), the metallic part grey and the eraser pink.
Alternatively you can make the pencil itself just about any color you like and the metallic part gold (mix yellow and brown colors).
Conclusion
This is a very simple tutorial that should be easy enough even for complete beginners. As mentioned at the start the biggest challenge might be drawing the long straight lines that make up the pencil. If you like a challenge you can do this by hand but if you want to have an easier time you can use a ruler to help you.
If you like this tutorial and would like to try some more like it also see:
- How to Draw a Pen Step by Step
- How to Draw a Marker Step by Step
- How to Draw an Artist’s Brush Step by Step
- How to Draw a House Step by Step
- How to Draw a Cloud Step by Step
- How to Draw Balloons Step by Step


