How to Draw a Marker Step by Step
This tutorial shows how to draw a marker in six steps with simple illustrated examples and quick explanations for each of them.
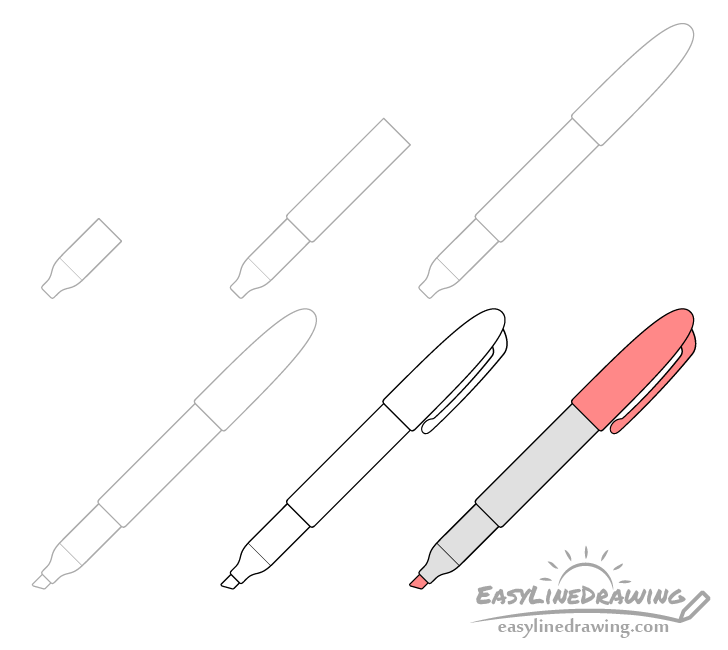
The type of marker that is shown in this example is generally used as a highlighter but can also be used for other things. You can see a preview of the drawing stages for it in the example above.
Start the tutorial in pencil and make light lines that are easy to erase in case you happen to make a mistake. You can darken them later on with a black pen or marker.
Step 1 – Draw the Bottom Part of the Marker

Begin by drawing the bottom portion of the marker. Give it a narrower bit at the very bottom (where the tip comes out of). From there draw it getting wider and transitioning into the part that the cap usually goes onto. This bit is usually narrower than the rest of the marker. Also be sure to leave plenty of room at the top of the page/drawing area so that you can fit in the other parts.
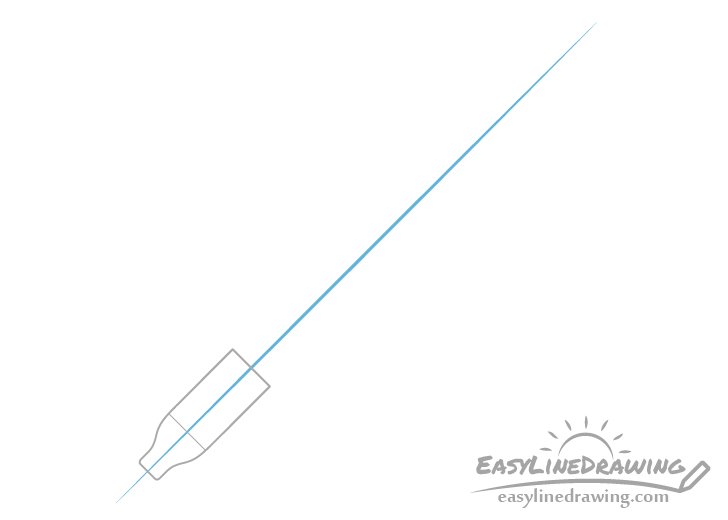
If you wish you may draw a straight line that runs through the middle of the marker to help you insure that it’s overall shape is straight and that both halves are even in width. If you would like to use the centerline draw it very lightly in pencil and keep it until you are done with step four.
Step 2 – Draw the Main Body
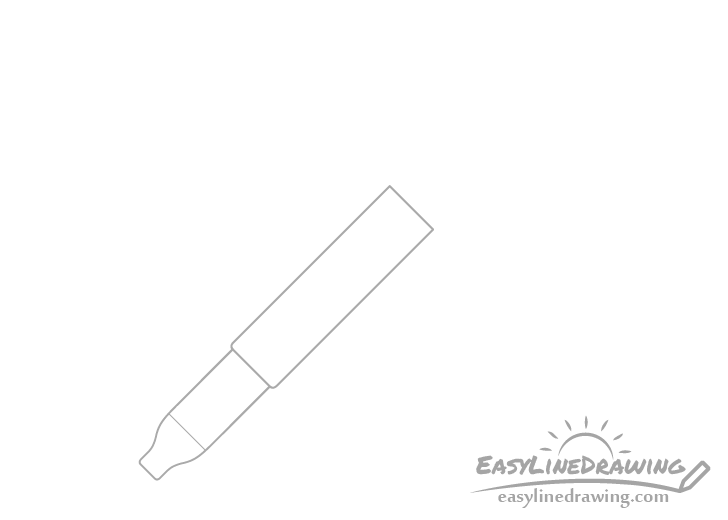
Draw the main body of the marker on top of the section from the previous step. Make this slightly wider and much longer. Give it slightly rounded corners at the bottom and sharp corners at the top.
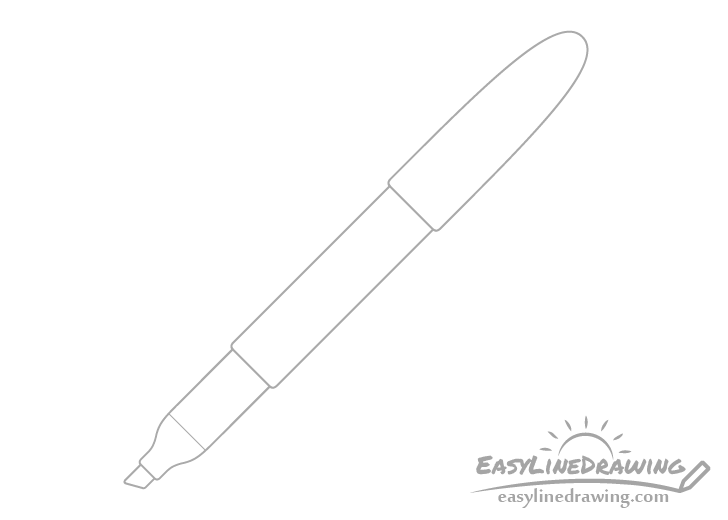
Step 3 – Draw the Cap

In this case the cap will be off of the tip of the marker and will be sitting on the back/top (a common place to keep it when you are using one).
Draw the cap flat at it’s base and make it narrower as it goes toward it’s tip. Make the end of the cap rounded.
Step 4 – Draw the Tip
At the bottom of the marker draw the tip. As mentioned in this case the marker will be a highlighter so instead of giving it a regular pointy tip you can draw an angled one as in the example.
If you chose to draw the centerline in step one you can erase once you are done with this one.
Step 5 – Draw the Clip & Finish the Line Drawing
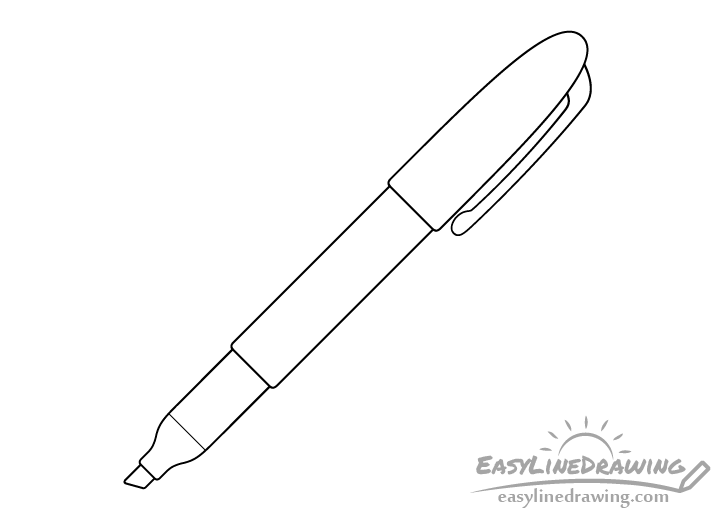
Finish the line drawing by first adding the clip. It should be attached to the cap near it’s tip and go towards the base with a slight curve in it’s shape. You can also give the clip a bit of a bump near the end.
Once done with the clip check to make sure your drawing looks good and/or make any necessary corrections. Afterwards you can trace over your lines with a black pen or marker. If you don’t have one around you can just darken them with the pencil.
Step 6 – Color the Marker
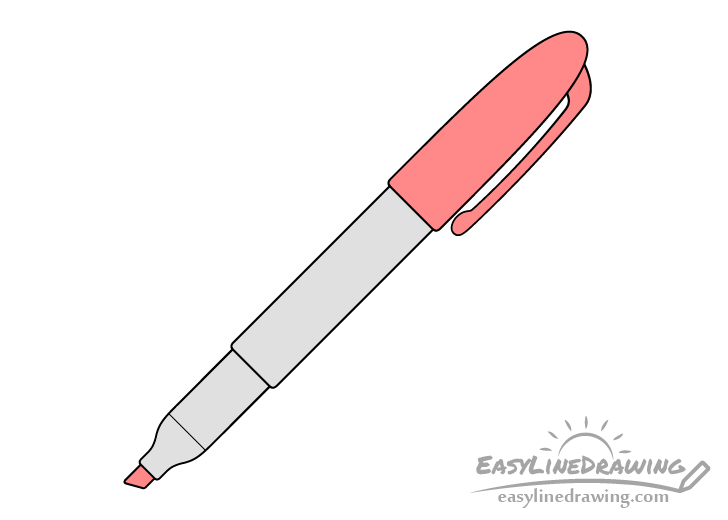
To color the marker you can make most of it a light grey.
In this case the tip and cap will be red but you can make them a different color if you prefer (any color that markers tend to have). Marker caps may often be the same color as that of the actual marker just so you are easily able to tell which marker is which.
You can use pretty much any medium you like for the actual coloring process (paints, markers, colored pencils, etc…). Once done you should have a finished with the drawing.
Conclusion
This tutorial shows how to draw a marker that is generally used for highlighting. For this reason it has the special angled tip instead of a pointy one. Drawing it is fairly straight forward and you can just follow along with the examples and instructions. If you want to show a different type of marker you can simply draw a different tip but you can keep the rest of it’s part pretty much the same.
For more similar tutorials also see:
- How to Draw a Pen Step by Step
- How to Draw a Pencil Step by Step
- How to Draw an Artist’s Brush Step by Step
- How to Draw Hand Sanitizer Step by Step

")


