How to Draw a Feather Step by Step
This tutorial explains how to draw a feather in six steps with easy to follow instructions and simple illustrated examples.
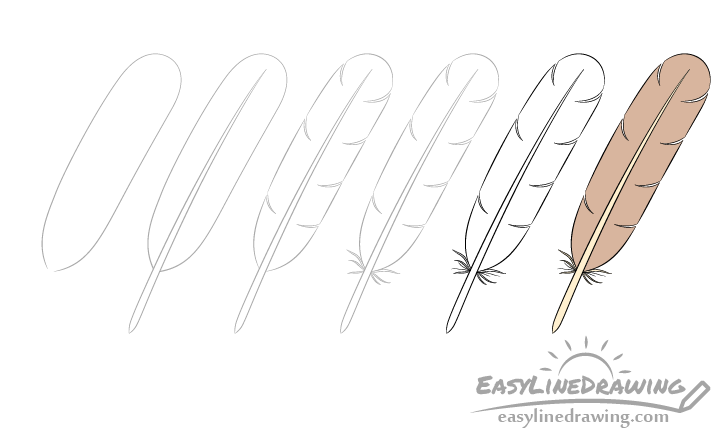
In this case it will be a fairly generic looking feather that can come from many types of birds. You can see a preview of the drawing steps for it in the examples above.
Start the tutorial in pencil and make light that are easy to erase lines in case you happen to make a mistake. You can darken them later on with a black pen or marker.
Step 1 – Draw an Outline of the Feather’s Shape
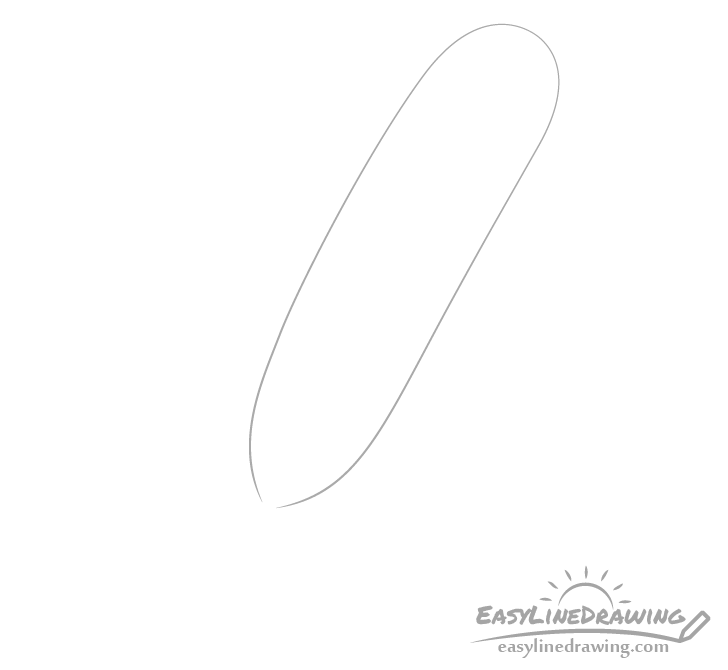
Begin by outlining the main shape of the feather. Draw it with a slight bend, a curved top and leave a tiny break in the outline at the bottom (for the shaft).
Step 2 – Draw the Shaft
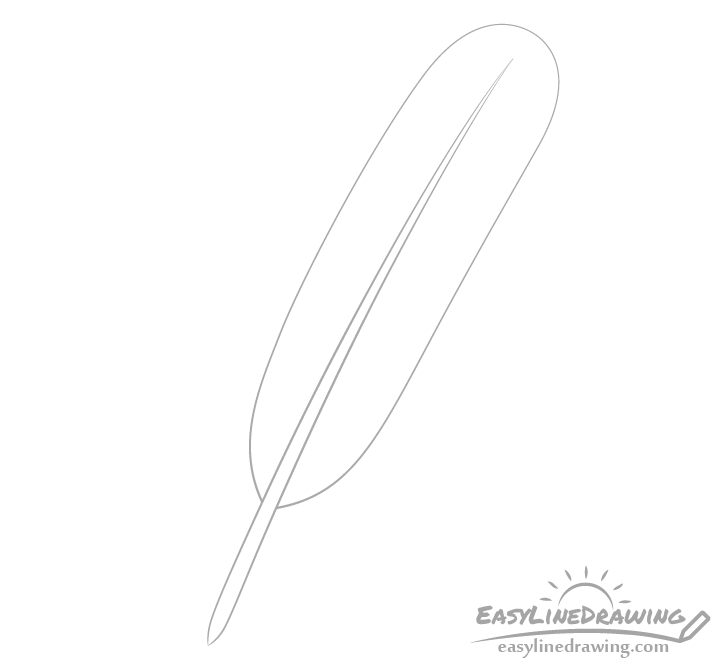
Draw the shaft with a pointy bottom tip and make it narrower as it goes up through the middle of the feather. Leave a little bit of space between it’s upper end and the top of the feather so that it doesn’t touch the outline. The shaft should also have pretty much the same curve to it’s shape as the outline of the feather.
Step 3 – Draw the Splits
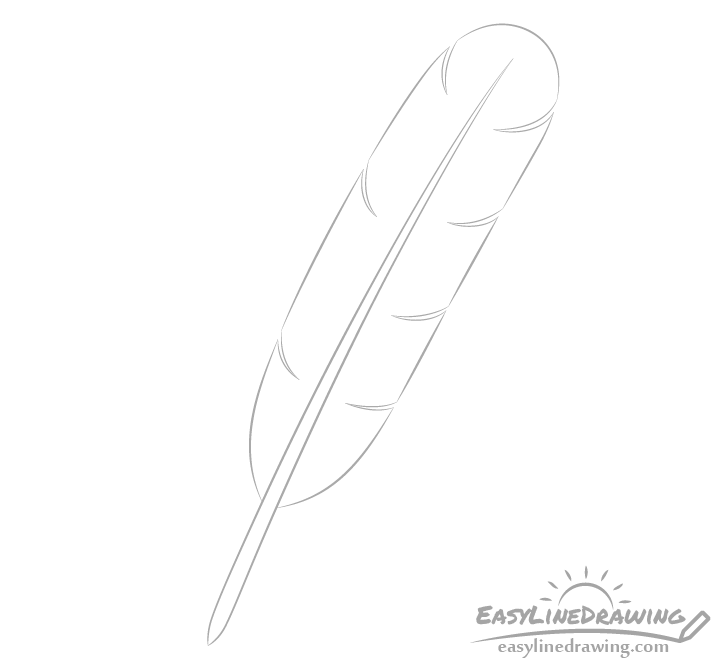
The little barbs that make the up feather often tend to have some splits in them. You can show these as a series of little curved “cut ins” on the sides as in the example.
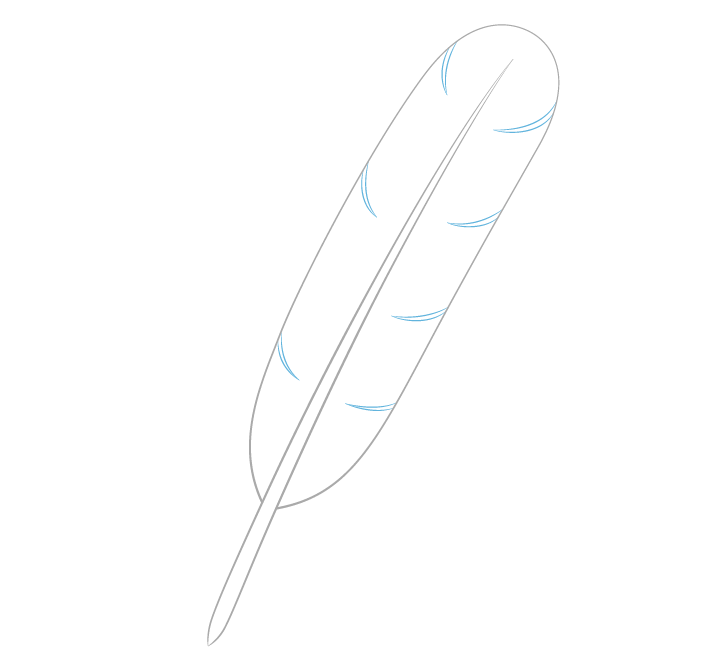
First draw the splits into the main outline of the feather as shown in the example above in blue. Afterwards erase the small bit’s of the outline where these are inserted. Eventually you want to have a clean drawing like the previous example.
Step 4 – Draw the Fluff

At the bottom of the feather add some fluff/down that they usually have in that area. You can draw each little bit of fluff with two lines that join at the tip. Also draw each one with a bit of a curve or a wave in it’s shape.
Step 5 – Add More Fluff & Finish the Line Drawing
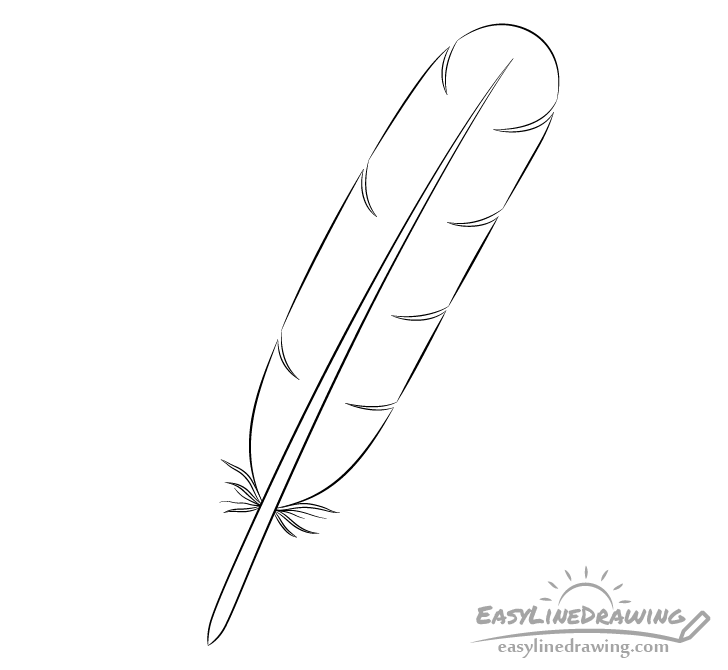
Finish the drawing by adding a few thinner bits off fluff. You can draw these with just one line each.
Afterwards if you are happy with the way your drawing looks up to this point trace over it with a black pen or marker. If you dont’ have one of those handy simply darken your lines with the pencil instead.
Step 6 – Color the Feather
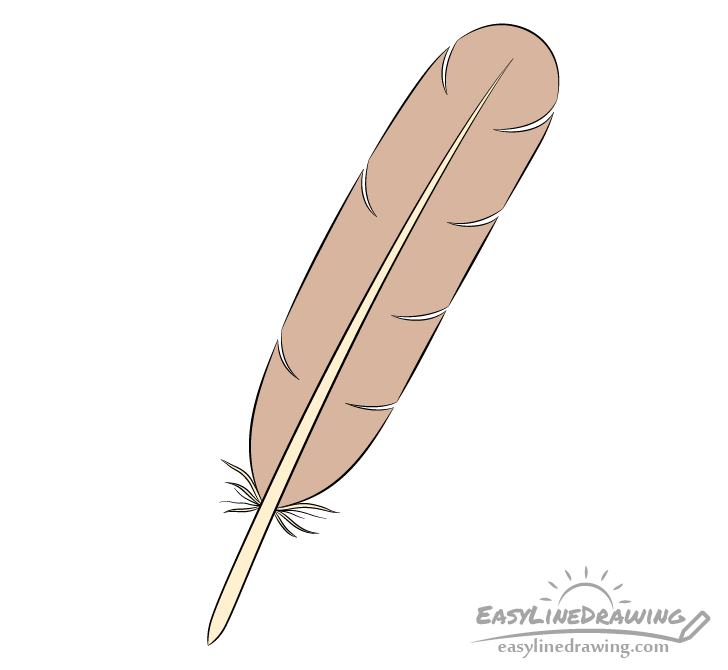
Feathers come in many different colors and patterns. In this case it will be brown with a yellow shaft/fluff but you can use a different color combination if you prefer.
For the actual coloring process you can use any medium you like such a colored pencils, markers or paints.
Conclusion
Feathers with a shape similar to the one shown in this tutorial can come from a variety of different birds. You can help show the kind of feather it might be by using particular colors. For example an eagle feather might be brown while a parrot’s might be green.
If you enjoyed this tutorial you might also like some of the following:
- How to Draw a Bird Step by Step
- How to Draw an Owl Step by Step
- How to Draw Shells Step by Step
- How to Draw a Paper Airplane Step by Step
- How to Draw a Scroll Step by Step
- How to Draw Earrings Step by Step

")


