How to Draw an Owl Step by Step
This tutorial shows an easy way to draw a cartoon horned owl in nine steps. It provides simple examples and quick instructions.
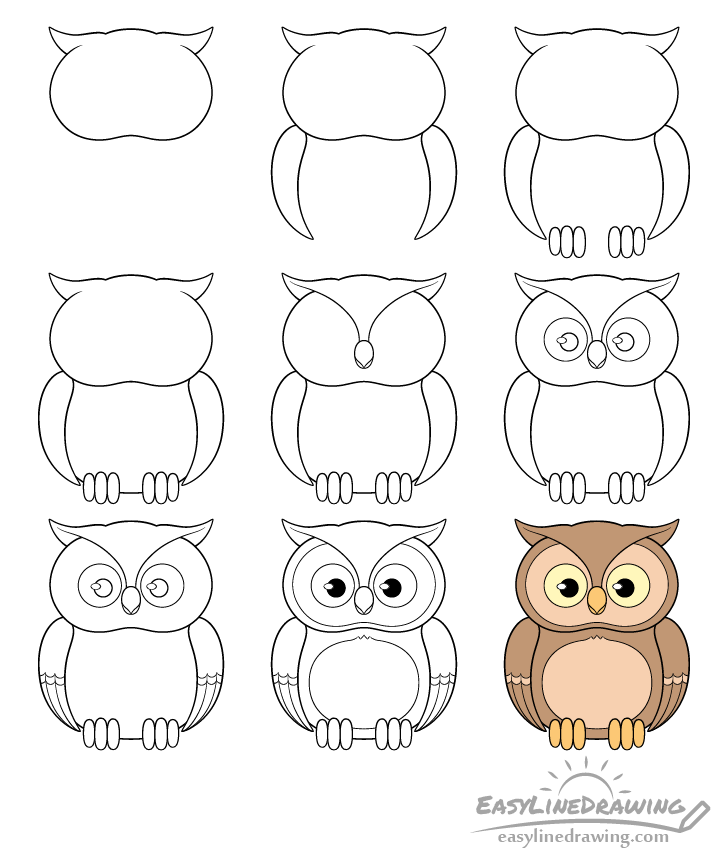
The owl in the example is a drawn in a very simple style to make the tutorial beginner friendly. You can see a preview of it in the image above.
It’s recommended that you start the tutorial in pencil and make light and easy to erase lines. You can darken them before coloring once you have all of the part of the owl in place.
Step 1 – Draw the Owl’s Head
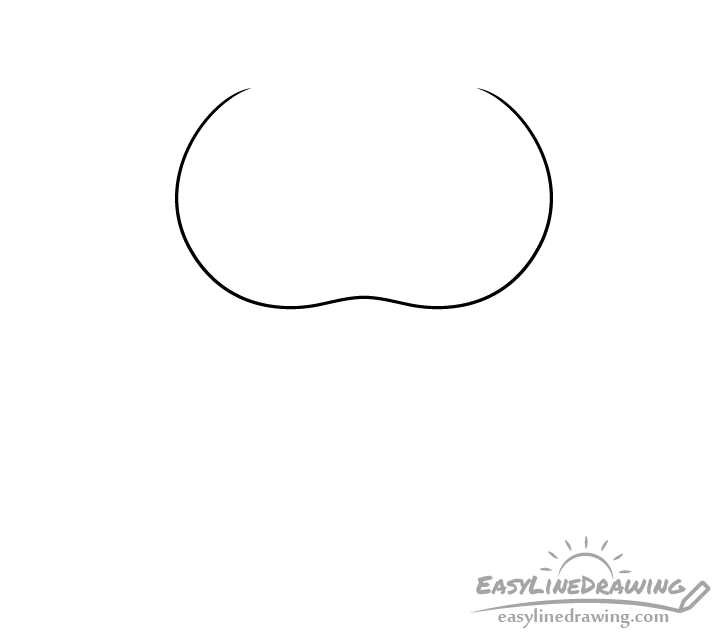
First draw the lower part of the head. Make it rounded on the sides with an upwards curve at the bottom/middle.
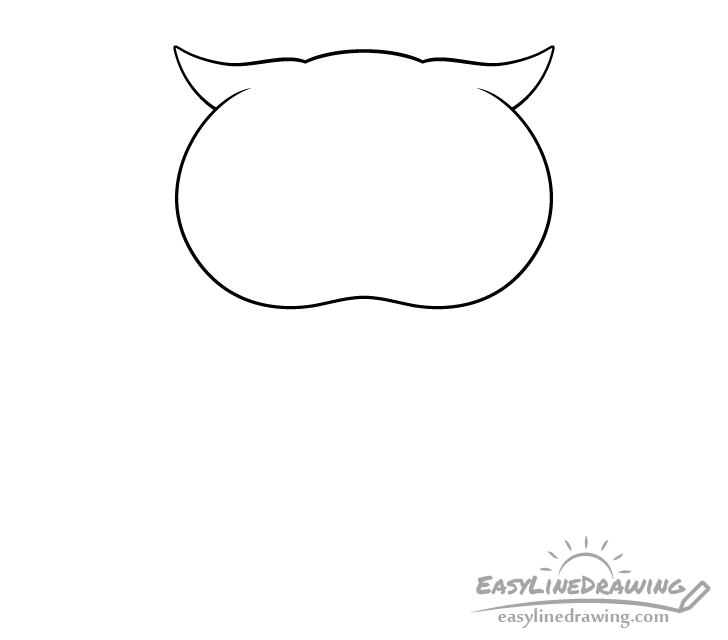
Next add the “horns” on the top of the head (really these are just feathers) with a bump like curve between them.
Step 2 – Draw the Wings
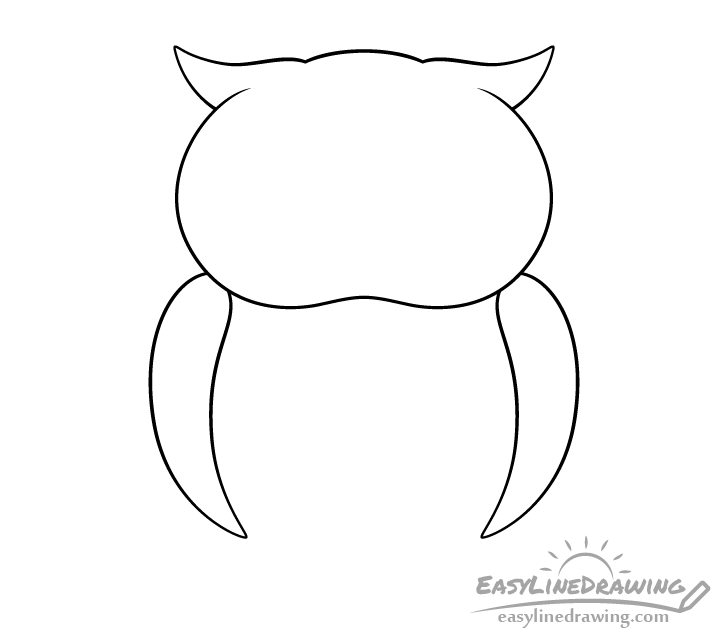
Going down from the sides of the head draw the wings. Make these wider towards the top and narrower as they go down. Their overall shapes should also be slightly curved.
Step 3 – Draw the Feet
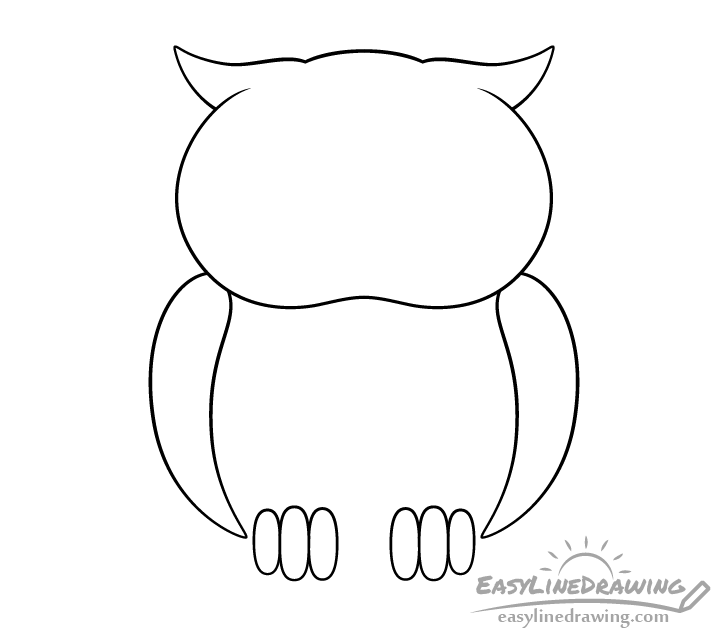
Between the wings (near their bottoms) add the feet. Draw them with three toes each where the middle toe is the largest and the ones on the sides are slightly smaller.
Step 4 – Draw the Body
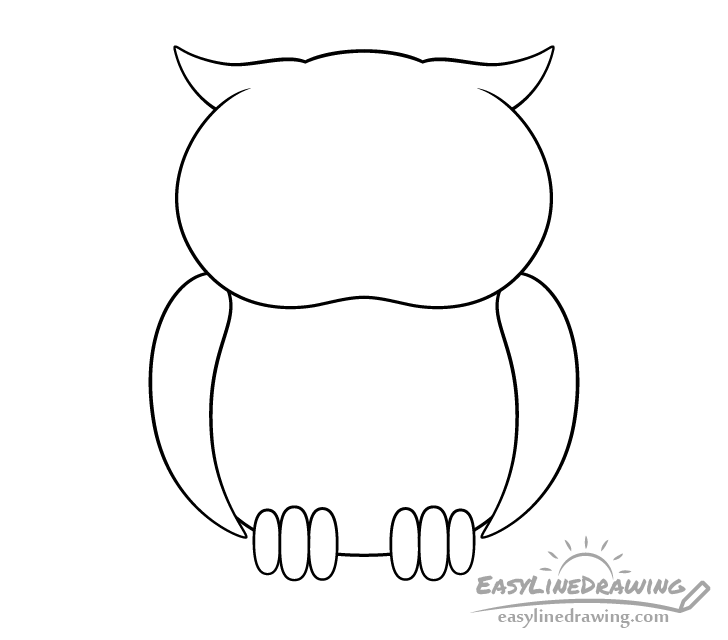
Add the curve of the lower part of the body. You can either draw it in segments between the wings and feet or as one continues line and then erase the parts where the feet overlap it.
Step 5 – Draw the Beak
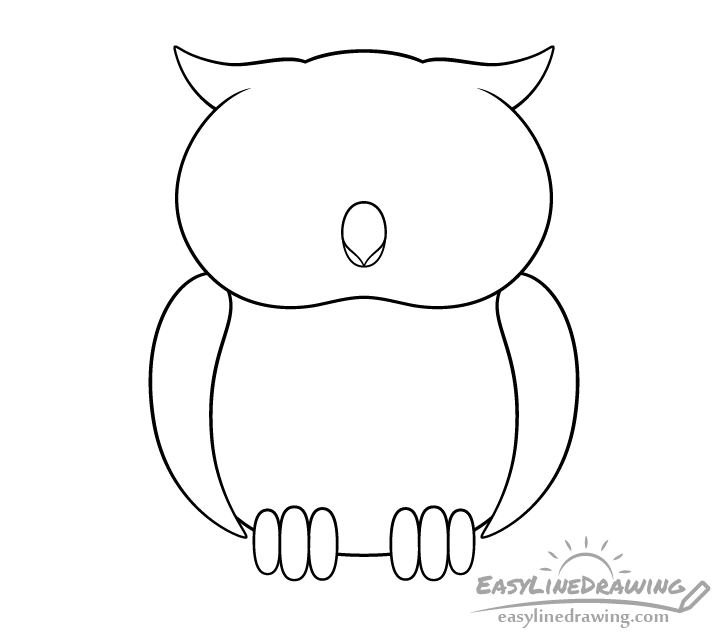
In the middle of the head add the beak. First, draw a small vertical oval. Next outline it’s pointy upper part with it’s tip touching the bottom of the oval.

Finally, draw a curved line running down from the each horn towards the upper part of the break (as shown in the example) to finish this step.
Step 6 – Draw the Eyes
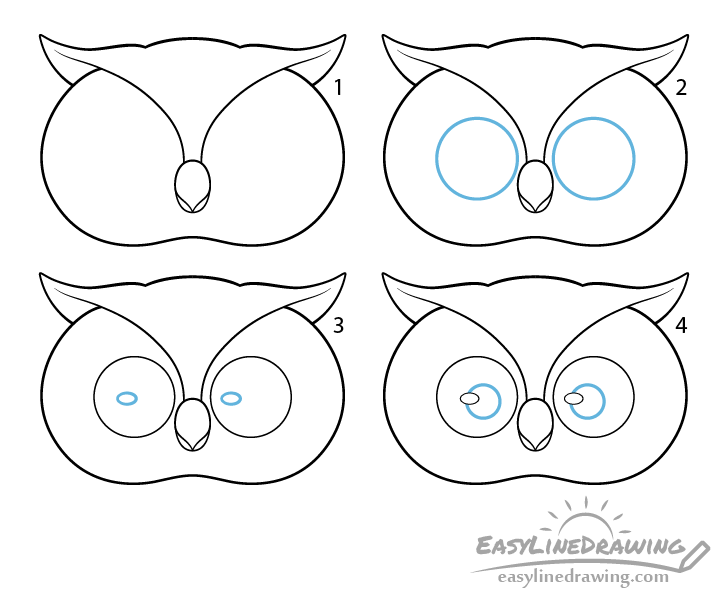
Draw a pair of large round eyes that are so characteristic of an owl.
Begin with a pair of large circles for the outline of each eye. Inside each of these draw a small oval shaped highlight to help show that the eyes are smooth and reflective. Next, add a smaller circle inside each of the larger ones to create the pupils. These should be overlapped by the oval highlights.
Once the eyes are added you should have the main parts of the owl outlined and your drawing looking something like the example above.
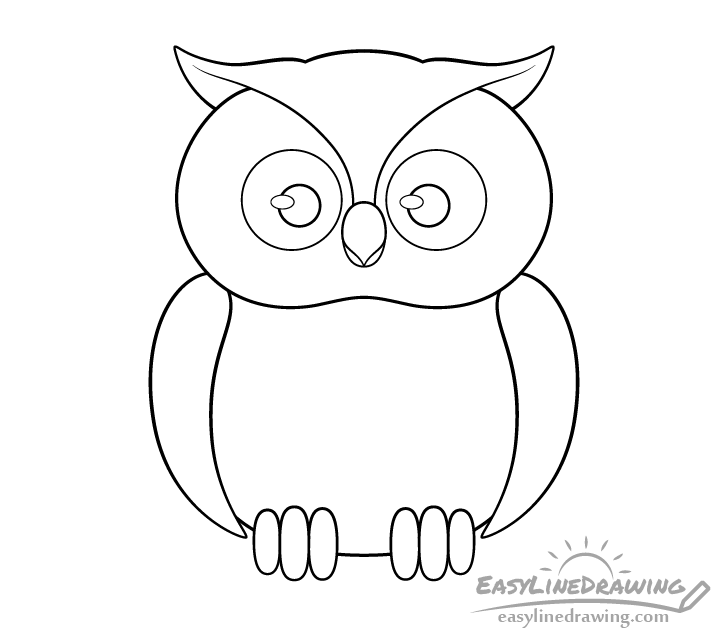
Step 7 – Draw the Feathers
For this step you can add some feathers to each of the wings. However, if you would like to keep your drawing simple you can just leave these out.
To add the feathers first draw two sets of curves (3 curves per set) around the vertical middle of each wing. Next draw a pair of lines running from between the curves down to the tip of the wing.
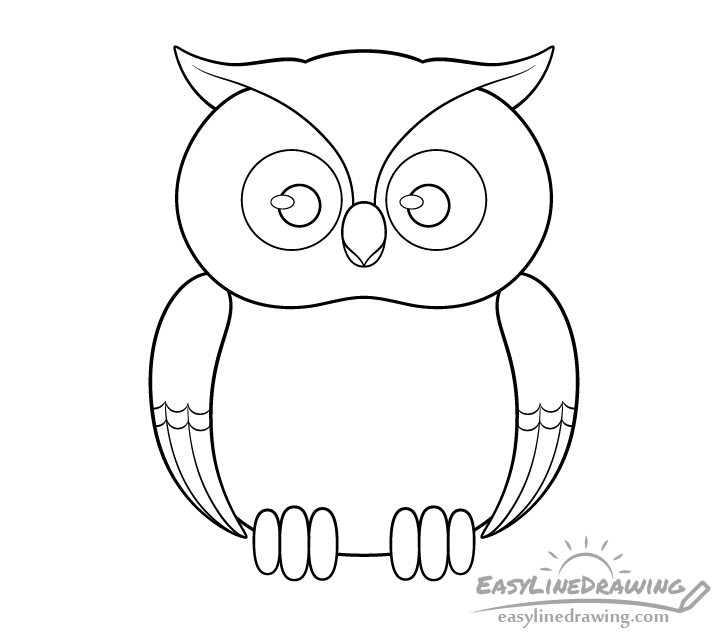
Step 8 – Finish the Line Drawing

Outline the areas along the owl’s head and body that will have feathers of a different color. On the head draw a smaller inner shape that somewhat follows it’s main outline. Next, draw an oval like shape on the chest stomach area. You can also a add a little zigzag at the top of the oval to give a slight hint of feathers.
Once done with the above you should have all of the details of the owl outlined. If everything looks good you can trace over your drawing with a black pen/marker or darken your lines with the pencil. You can also fill in the pupils of the eyes with black or dark pencil shading (leave the highlights white).
Step 9 – Color the Owl
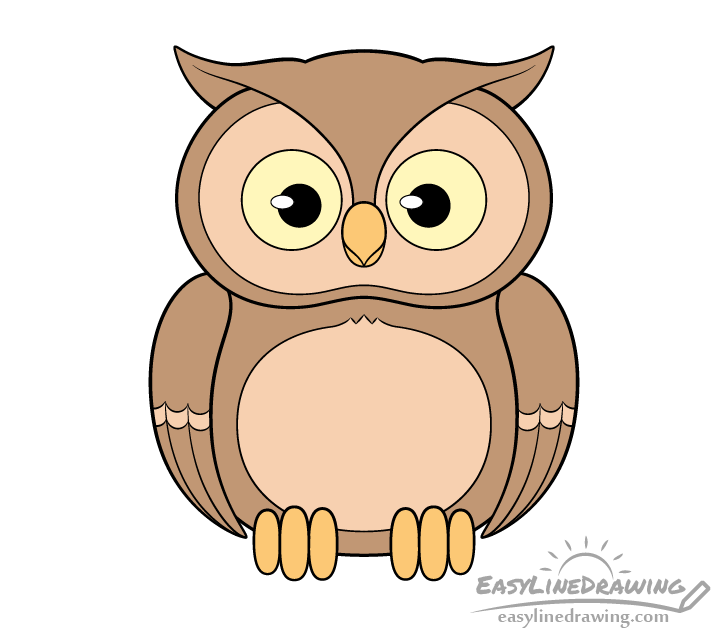
To color the owl you can use whatever you have available (paints, markers, colored pencils, etc…). You can also mix different mediums.
Make the owl’s body brown with lighter brown areas on the parts outlined in the previous step. You can color the strips of feathers along the wings a lighter brown as well (if you chose to add those in). Color the beak and feet orange and the eyes yellow.
Alternatively you can make the main body grey and the lighter areas a light grey.
When done coloring you should have a finished drawing of a horned owl.
Conclusion
Drawing a stylized cartoon owl like the one in this tutorial is fairly easy and can be fun practice for beginners. As was shown in the step by step breakdown it’s generally good to first outline the larger and more important shapes of your subject and work your way down to the smaller details.
Hopefully you’ve found this guide helpful and easy to follow. For more similar tutorial also see the following:
- How to Draw a Penguin Step by Step
- How to Draw a Swan Step by Step
- How to Draw a Bird Step by Step
- How to Draw a Dog Step by Step
- How to Draw a Cat Step by Step


