How to Draw a Swan Step by Step
This tutorial shows an easy way to draw a swan in nine steps in a cartoon style. It can be great for kids and beginners that want to draw something fun.

It’s recommended that you start the tutorial in pencil and draw fairly light lines until you finish all of the different parts of the swan. Afterwards you can darken your lines by tracing over them either again in pencil or with a black pen/marker.
You might also want to have an orange/blue pencil or marker if you want to add a bit of color to the drawing (as shown in the final step).
Step 1 – Draw the Head of the Swan
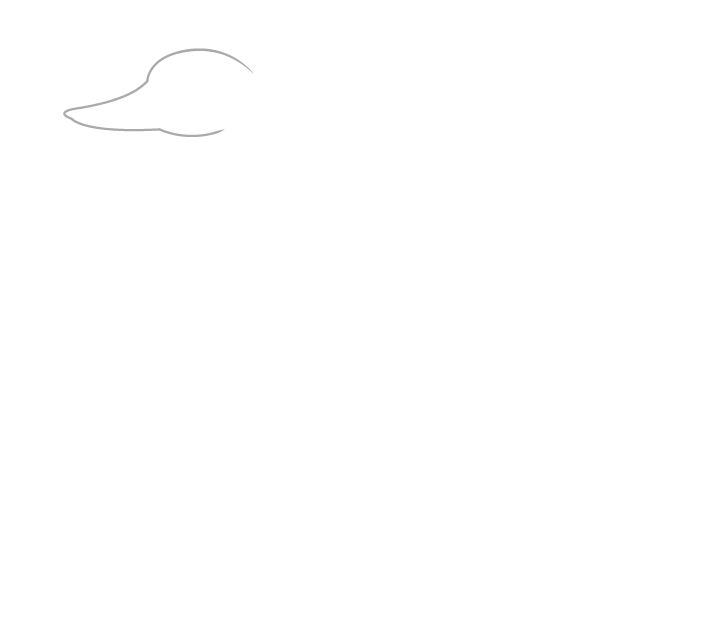
Begin drawing the swan with an outline of the head/beak. At the start you can pretty much draw the head with two curves and then add the bill. make it thicker near the base and narrower near the tip.
Step 2 – Draw the Neck
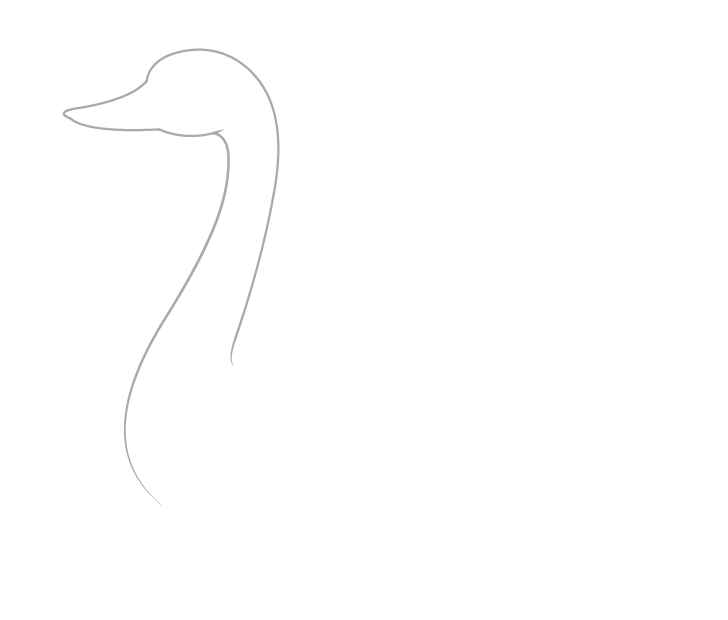
Going down from the head draw the neck with two wave like lines so that it’s overall shape resembles a question mark. Make the neck more slender near the head and thicker as it goes down.
Step 3 – Draw the Body
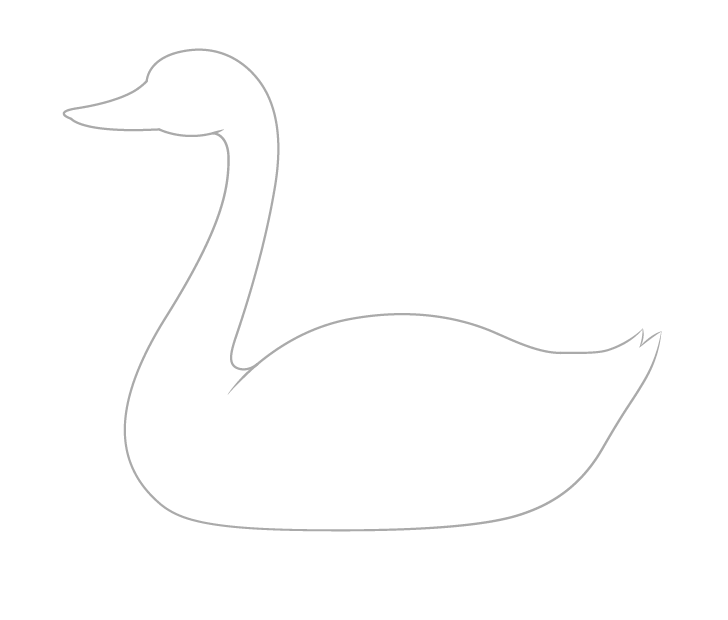
To finish the main outline of the swan add the body. Make the upper part (where the wing will be located) a little more curved and the bottom a little more flat (as it’s submerged in water).
Finally add a little split at the end for the tail to give a hint of feathers sticking out.
Step 4 – Draw the Bill Details
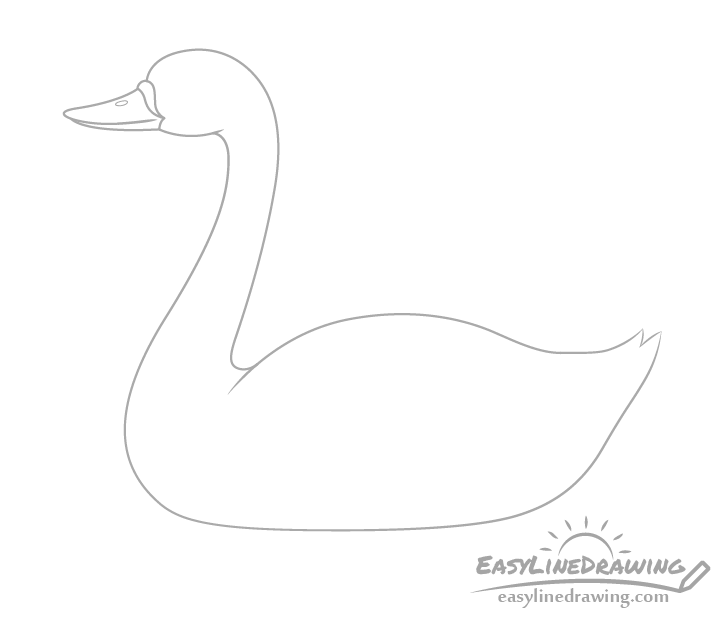
Begin drawing the smaller details of the swan with the bill. Add a little knob between it and the head (you may need to erase a tiny part of the drawing to do this).
Next draw the split between the upper and lower part of the bill. Finally finish with a little oval shaped nostril.
Step 5 – Draw the Eye
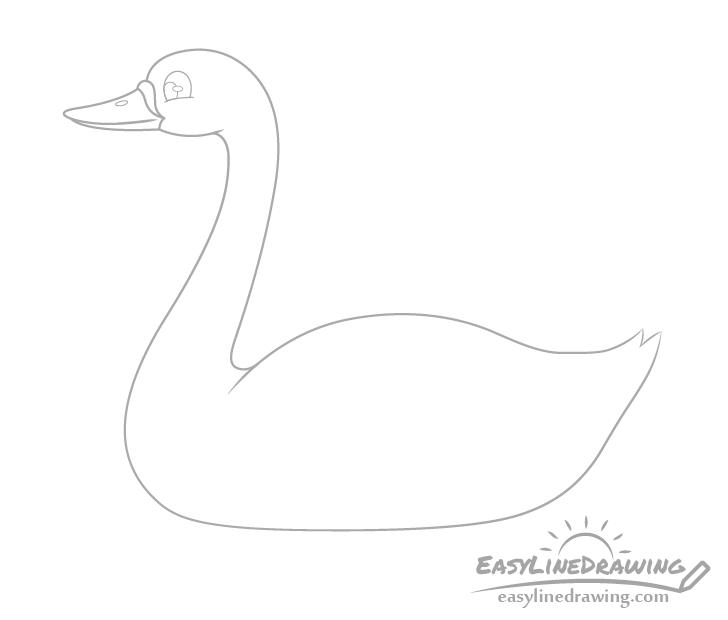
In this case the eye will be drawn more like that of a cartoon character than a real swan to make it look more interesting.
Draw the upper pat of the eye with one big curve and then join its two sides with another curved line at the bottom. Towards the front of the eye draw the iris. It should be similar in shape but smaller. Finally draw a little over shaped highlight slightly overlapping the iris. You can erase the part of it that the highlight overlaps.
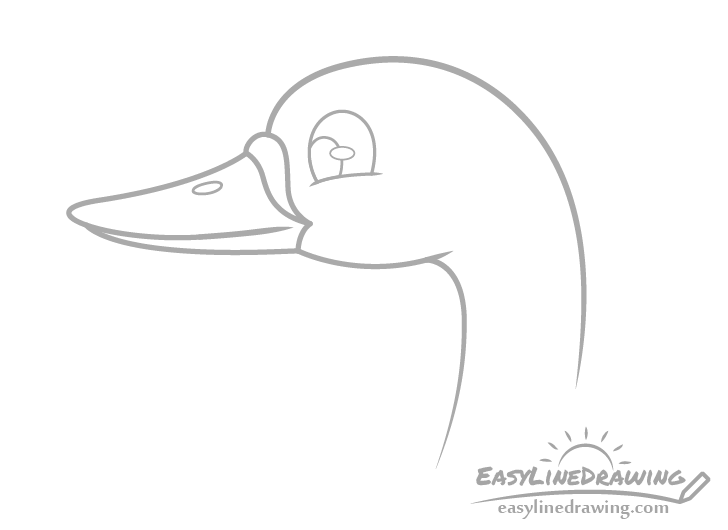
Above is a larger drawing of the swans head that can make it a bit easier to see all of the smaller details.
Step 6 – Draw Some Feathers
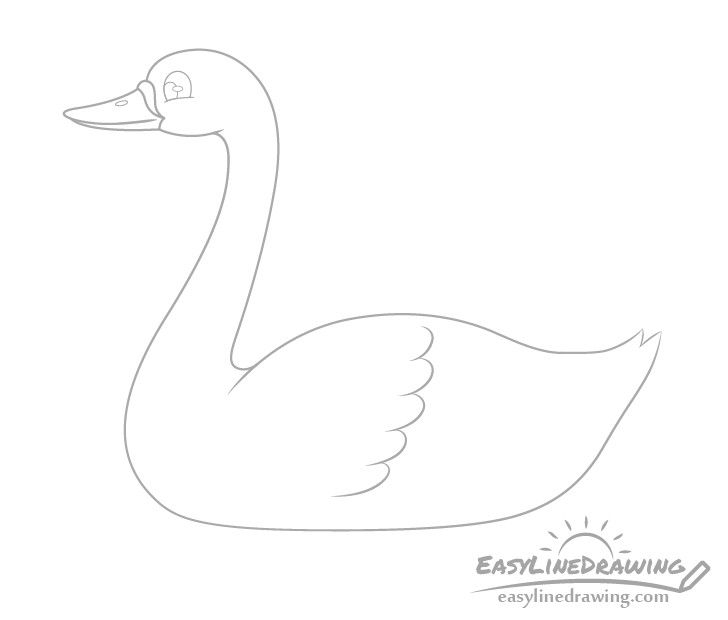
In this step you can begin adding some of the wing feathers. Draw these as pretty much a “stack” of curves on a slightly angle as shown in the example.
Step 7 – Draw More Wing Feathers
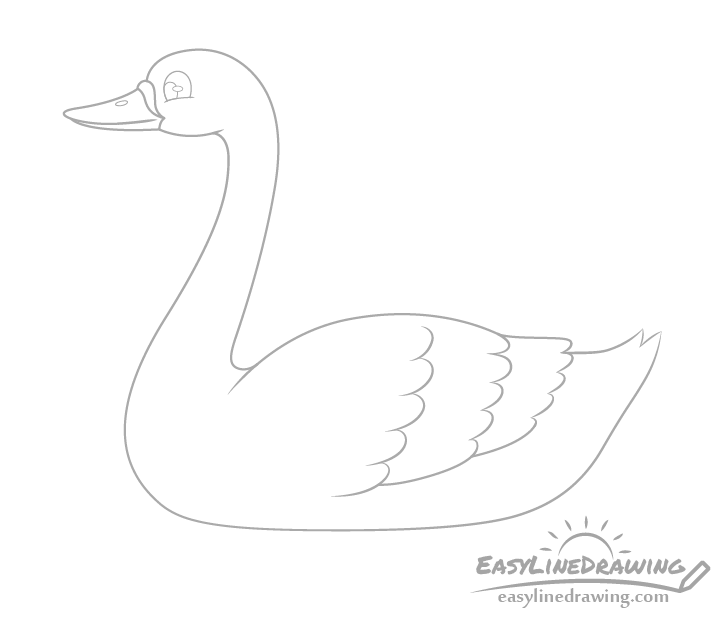
Add more rows of feather curves and connect them to the each other at the bottom. You can also make the feather stick out a bit towards the tail. Simply erase a small part of the body outline and add that in.
Step 8 – Finish the Line Drawing
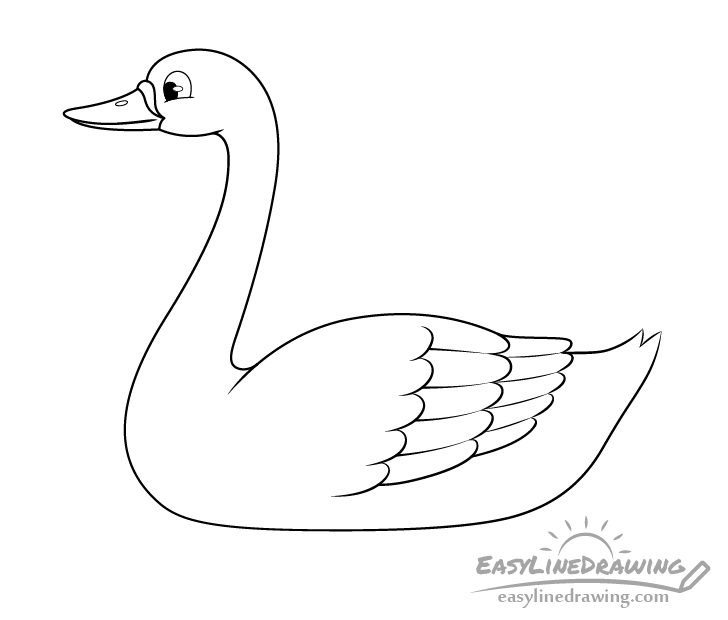
Add in some separation lines between the curves to finish the feathers. Afterwards you can go over your drawing withe darker pencil lines a back pen or marker (as was suggested at the start of the tutorial). You can also fully darken the iris but leave the little highlight area white.
Step 9 – Color the Swan Drawing
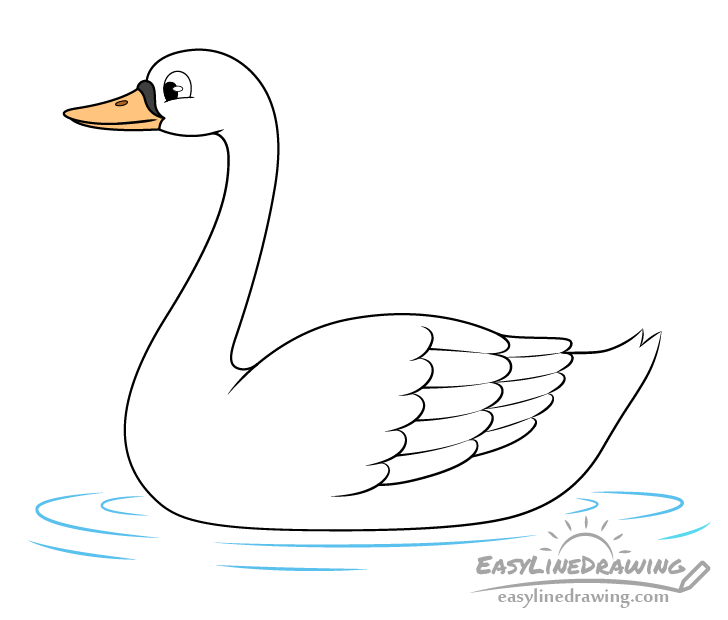
To finish the wan you can add a tiny bit of color. Make the bill orange with a slightly darker orange for the nostril (you can shade it in using a pencil after coloring the bill).
Make the knob (bump near the bill) either black or a dark grey.
Finally you can draw some water ripples around the swan to show that it’s floating/swimming. You can simply make these with a color pencil or marker right away. If you want to be on the safe side you can first draw them in using a regular pencil with very light lines that will then just blend into the color.
Conclusion
Drawing a cartoon swan like the one in this tutorial is not very difficult, especially if you follow a step by step approach. Just remember to start your drawing in pencil and to check if everything looks right before darkening your lines and adding color.
If you enjoyed drawing the swan you may also like these other similar tutorials:
- How to Draw a Duck Step by Step
- How to Draw a Penguin Step by Step
- How to Draw a Toucan Step by Step
- How to Draw a Dolphin Step by Step
- How to Draw a Seahorse Step by Step


")


