How to Draw a Toucan Step by Step
This tutorial shows how to draw a cartoon toucan in twelve steps with a very detailed and easy to follow breakdown of the drawing process.
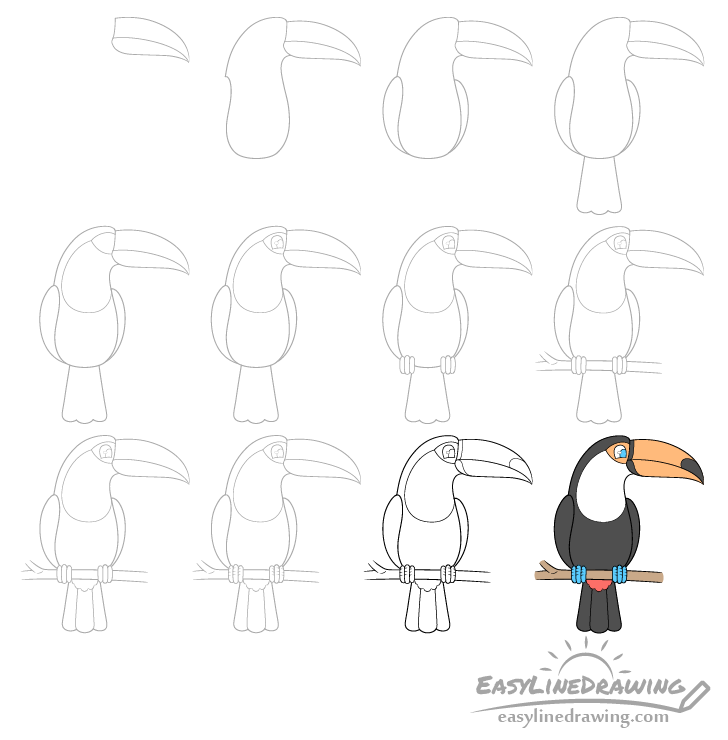
As shown in the above preview image in this case the toucan will be sitting on a branch with it’s head facing sideways. Drawing this particular bird in this pose will make it easier to show it’s most characteristic feature, the beak.
Start the tutorial in pencil and make light lines as you will need to erase parts of the drawing in some of the steps. You trace over your drawing with a black pen or marker later on.
Step 1 – Draw the Beak of the Toucan
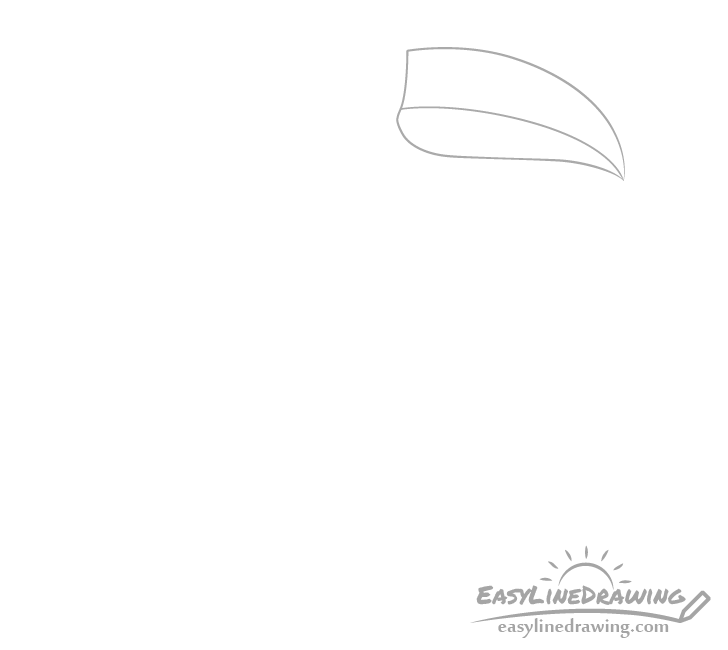
Begin the drawing with the toucan’s large beak. Make it curved with a pointy tip and also make it slightly narrower at the base than in the middle.
First outline it’s main shape and then split it into the top and bottom with a curved line. Draw it in such a way where the bottom of the beak is slightly smaller/narrower than the top.
Step 2 – Draw the Body
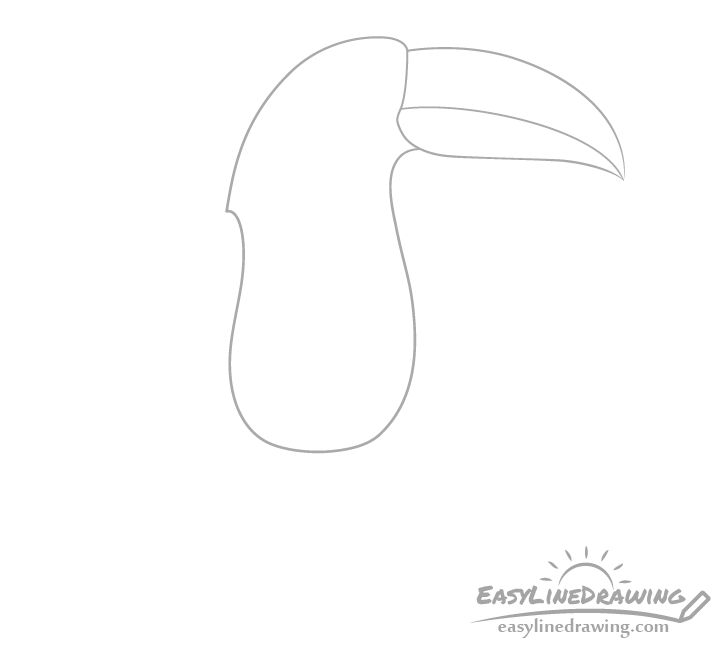
The beak should transition into the head/neck which should then in turn transition into the body. You can draw these shaped as shown in the example.
Step 3 – Draw the Wings
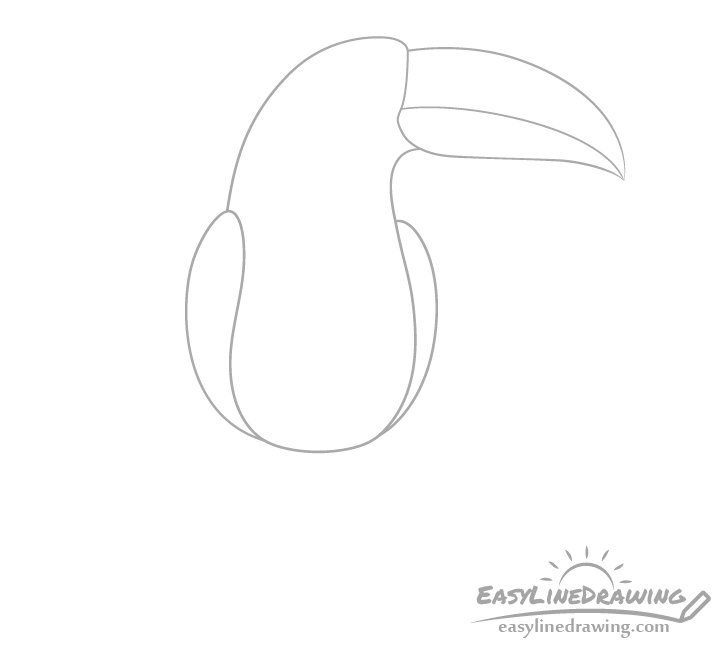
Onto the sides of the body add the wings. These should be wider at the top and narrower at the bottom.
Step 4 – Draw the Tail
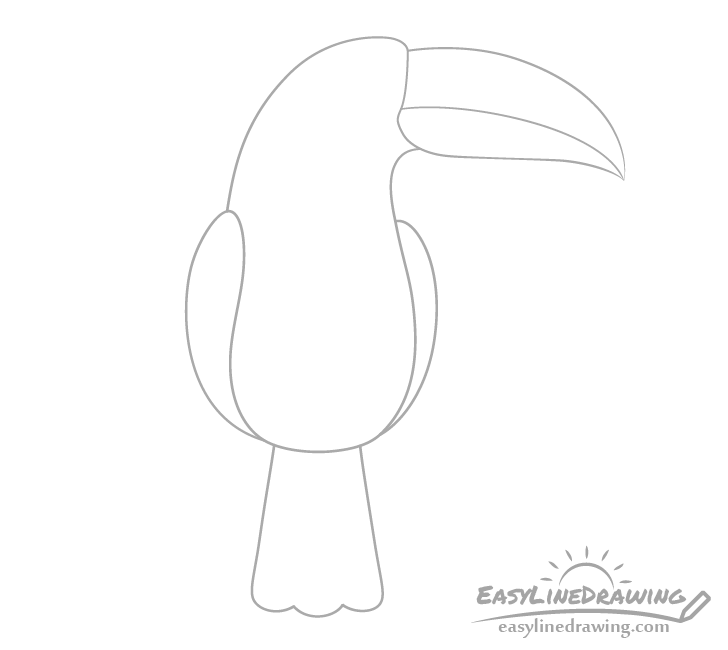
Going down from the middle of the body add the tail. Make it narrower at the top and wider at the bottom ending with a few curves to give a hint of the feathers.
Step 5 – Draw the Feather Pattern
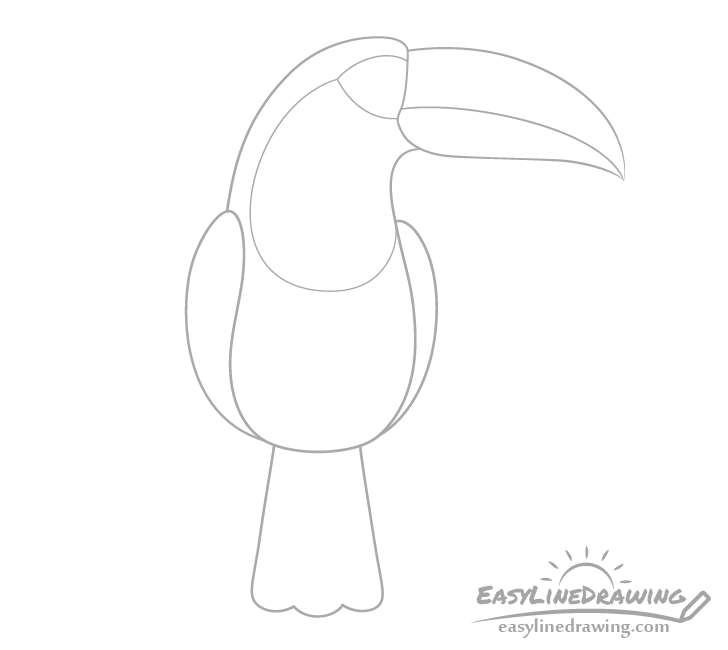
Outline the toucan’s feather pattern as shown above with one part around the eye and the other around on the neck.
Step 6 – Draw the Eye
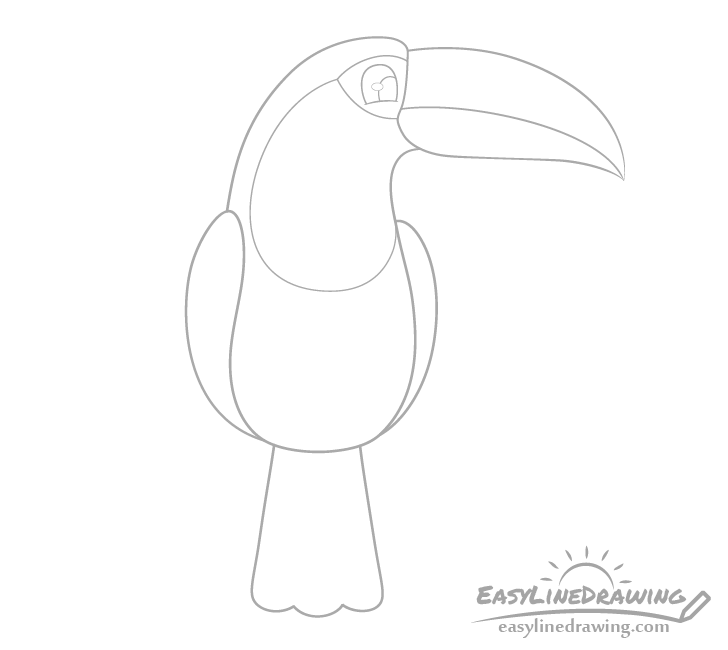
Draw the outline of the eye with a smooth and tall curve that’s cut off by another much flatter curved at the bottom. Inside that draw the pupil overlapped by a little oval highlight (light reflecting from the eye).
Step 7 – Draw the Feet
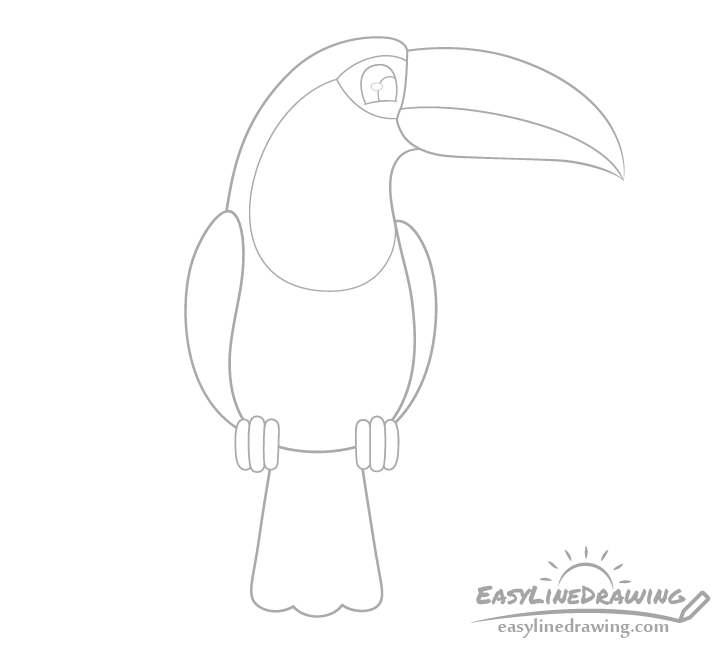
At the bottom of the body draw the feet. As these will overlap parts of the body you can erase small parts of the lines drawn in the preview steps when adding them.
Step 8 – Draw the Branch
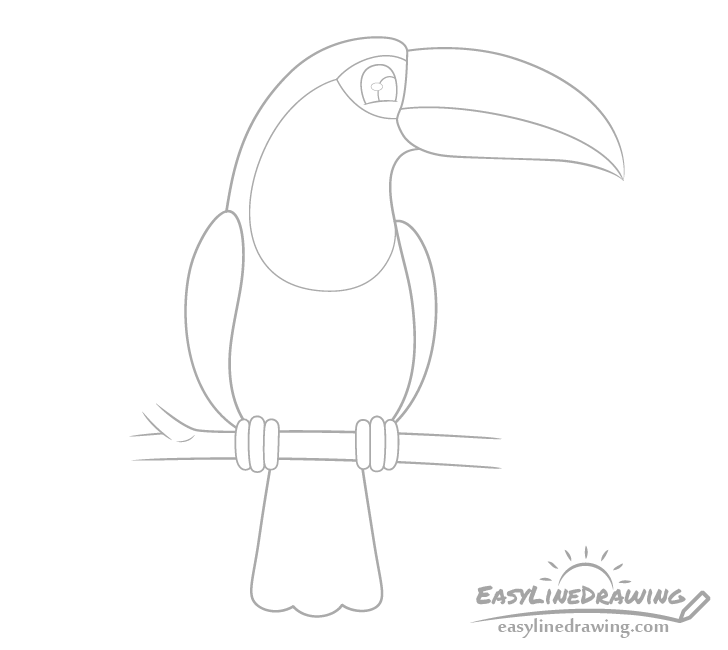
Going between the feet draw the branch. You can again erase a small part of the body to fit it into drawing.
Step 9 – Draw the Tail Feathers
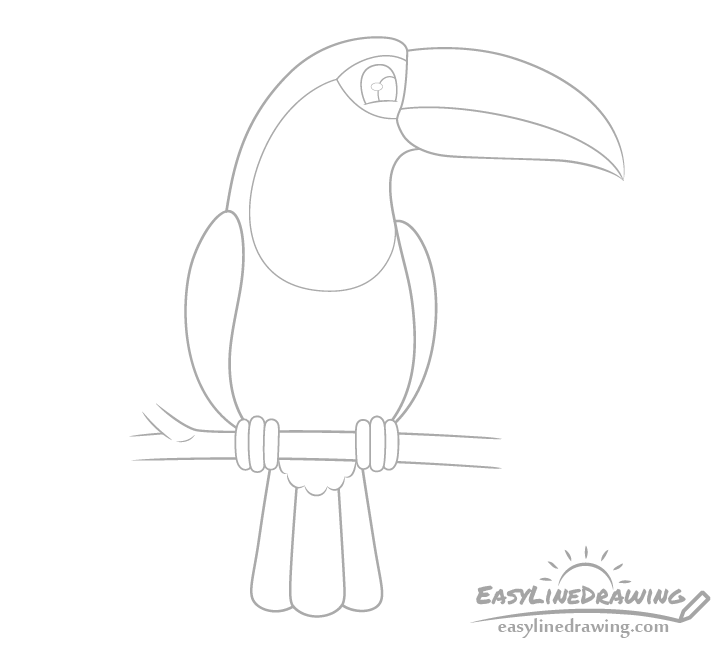
Give the tail a bit more detail with some smaller feathers at the top (draw as a series of curves) and some splits to better define the individual large feathers.
Step 10 – Draw the Feet Details
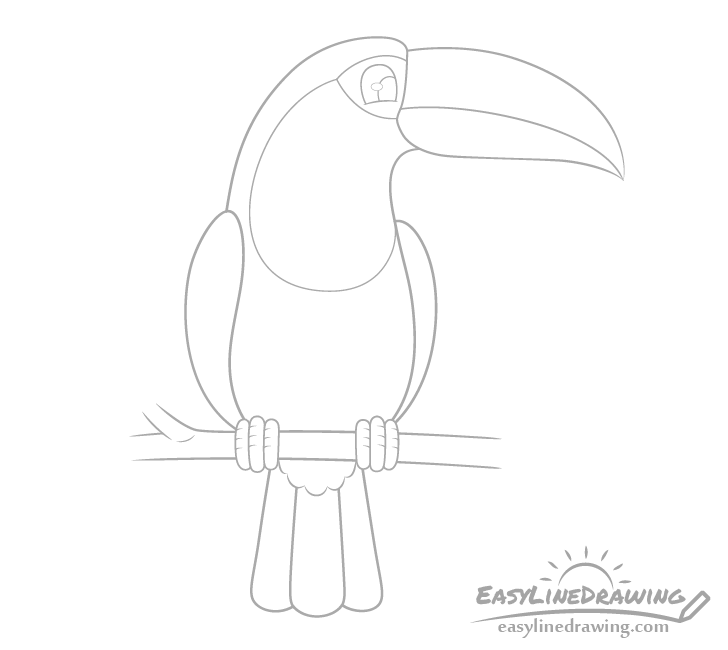
Add a few small curves on the sides of the toes to give them a bit of a texture that bird feet often have.
Step 11 – Draw the Beak Details & Finish the Line Drawing
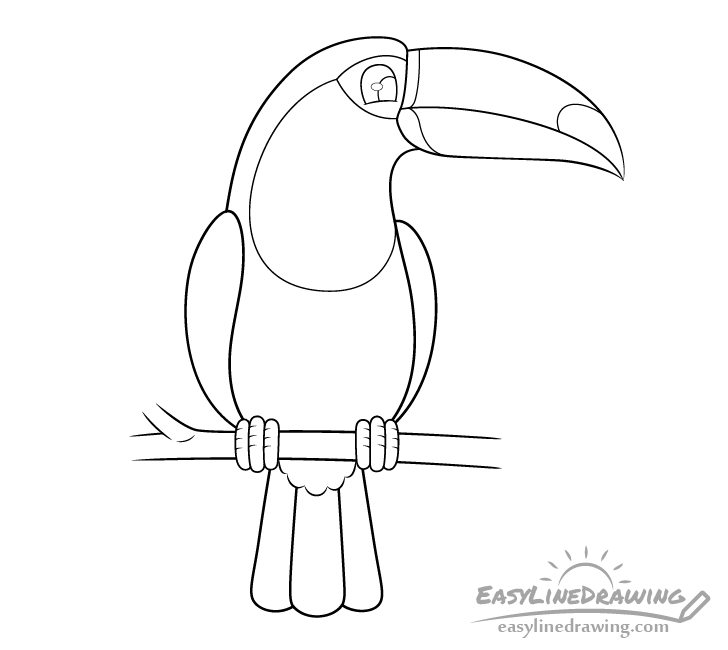
For the last part of the drawing add the details of the beak. These will be near it’s base and tip (see example).
Once done adding this last set of details you confirm that you are happy with your drawing thus far. If so you can go ahead and trace over it with a black pen/marker or darker pencil lines.
Step 12 – Color the Toucan
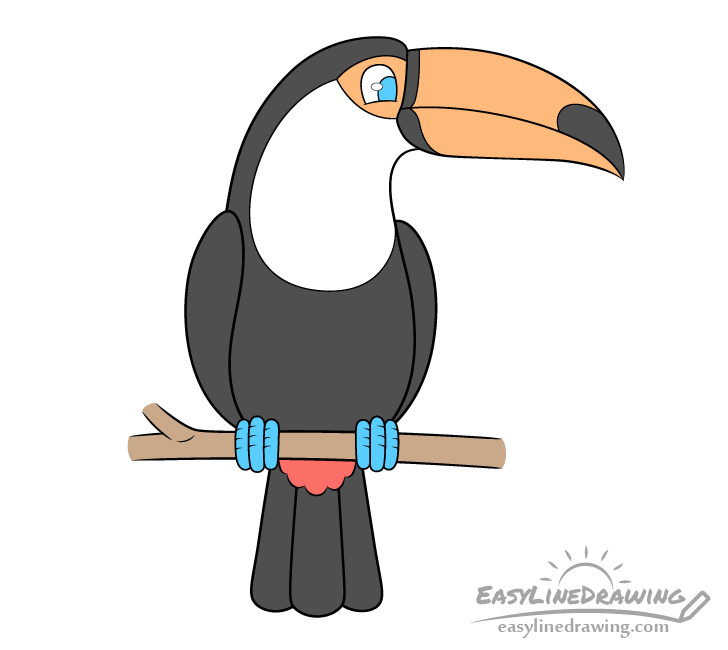
You can use just about any medium you like or even a combination of a few of them to color the toucan. Paints, markers and colored pencils can all be good options.
In this example the colors will be distributed as follows:
- Orange beak (with some dark grey/black parts)
- Dark grey main body/wings/tail
- Blue eye
- Orange area around the eye
- White neck
- Blue feet
- Red feathers at the base of the tail
Once done coloring you should be finished with the drawing.
Conclusion
A toucan is a somewhat unusual looking bird due to it’s large beak and bright colors. This can make it fairly interesting and fun to draw, especially if you have some detailed examples such as those provided in this tutorial to help guide you. Hopefully you’ve found it easy to follow along.
For more similar tutorials also see the following:
- How to Draw a Penguin Step by Step
- How to Draw a Bird Step by Step
- How to Draw a Fox Step by Step
- How to Draw a Butterfly Step by Step
- How to Draw a Tortoise Step by Step


