How to Draw a Suit Step by Step
This eight step tutorial shows how to draw the jacket of a suit with detailed but simple illustrated examples and easy to follow explanations.
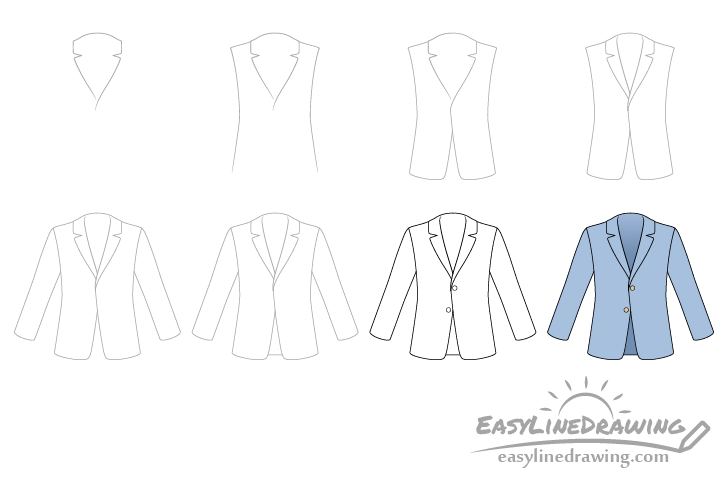
The jacket in this example has a fairly standard two-button design. You can see a preview of the drawing stages for it in the image above.
Start the tutorial in pencil and make light lines that are easy to erase in case you make a mistake. You can darken them later on with a black pen or marker.
Step 1 – Draw the Outline of the Suit’s Lapel

Begin the drawing with a quick outline of the lapel (the collar) of the jacket. Position it towards the top of your drawing area so that you have plenty of room for the rest of the jacket below.
Step 2 – Draw the Sides of the Main Body

Going down from the lapel add the shoulders and then the sides.
Draw each side curving inwards towards the middle of the jacket as shown in the example.
Step 3 – Draw the Bottom the Main Body
Down form the sides add the bottom portion followed by the inner part where the jacket will be button up. This should connect with the lapel on one of the sides.
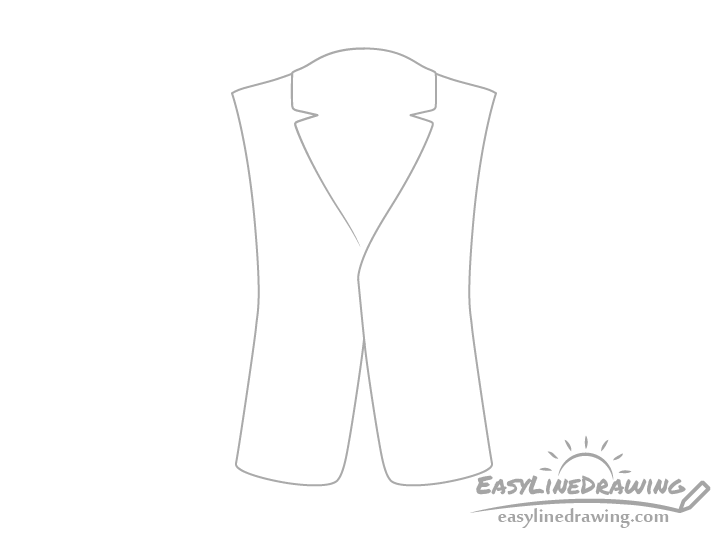
Step 4 – Draw the Inner Part of the Lapel
Draw the inner part of the lapel (the neck opening) to get something that pretty much looks like a vest.
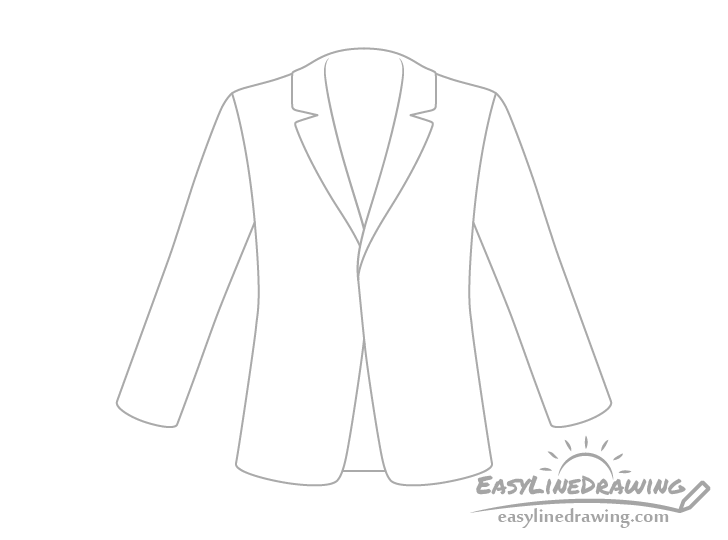
Step 5 – Draw the Sleeves

Coming out of each side of the “vest” add the sleeves. Make these slightly shorter than the main body.
Step 6 – Draw the Back
For this simple step add a line towards the bottom of the jacket to show it’s back/inner side.
Step 7 – Draw the Buttons & Finish the Line Drawing
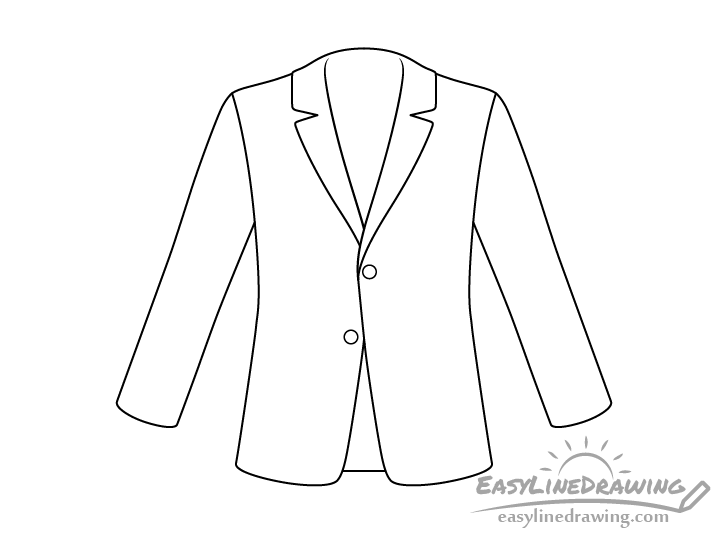
Finally add a pair of buttons with one just below the lapel and the other slightly lower down. Simply make these round in shape.
Once done drawing the buttons you can trace over your lines with a black pen or marker. If you don’t have one handy you can simply darken them with the pencil. Just be sure you are happy with the way your drawing looks before doing so.
Step 8 – Color the Suit
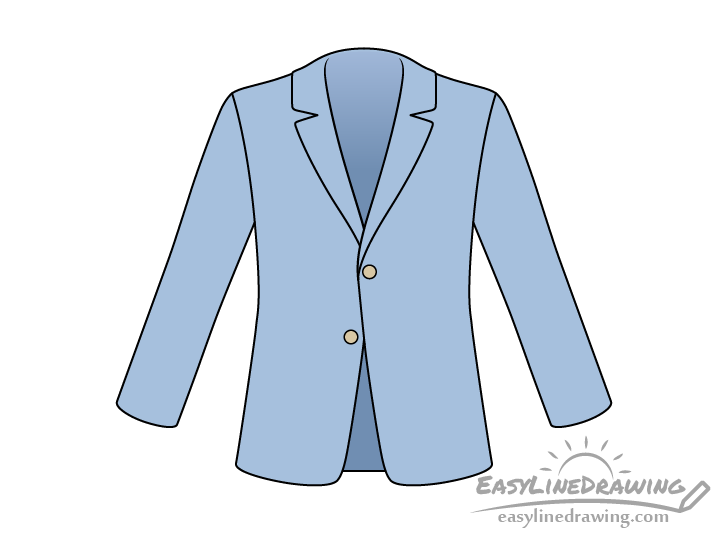
To color the suit you can use any colors that are appropriate for such clothing. In this case it will be blue with a little bit of grey and the buttons will be grey with a bit of orange.
The inner part of jacket will also be slightly darker with a dark to light transition at the top (neck area).
An easy way to get these colors and gradients is by using colored pencils. For example you can get the darker blue by pressing slightly harder on one and/or also by lightly going over it with a regular pencil.
Conclusion
This tutorial shows how to draw a common looking two-button jacket. It’s design is not particularly complex and if you simply follow the provided steps you should hopefully get a fairly nice looking drawing.
If you’ve found this tutorial helpful and would like to later try a few more like it also see the following:
- How to Draw a Scarf Step by Step
- How to Draw a Bow Tie Step by Step
- How to Draw a Tie Step by Step
- How to Draw a Dress Step by Step
- How to Draw Jeans (Easy 8 Step Guide)