How to Draw Jeans (Easy 8 Step Guide)
This tutrial shows how to draw a pair of jeans with simple and easy to follow step by step illustrations and instructions
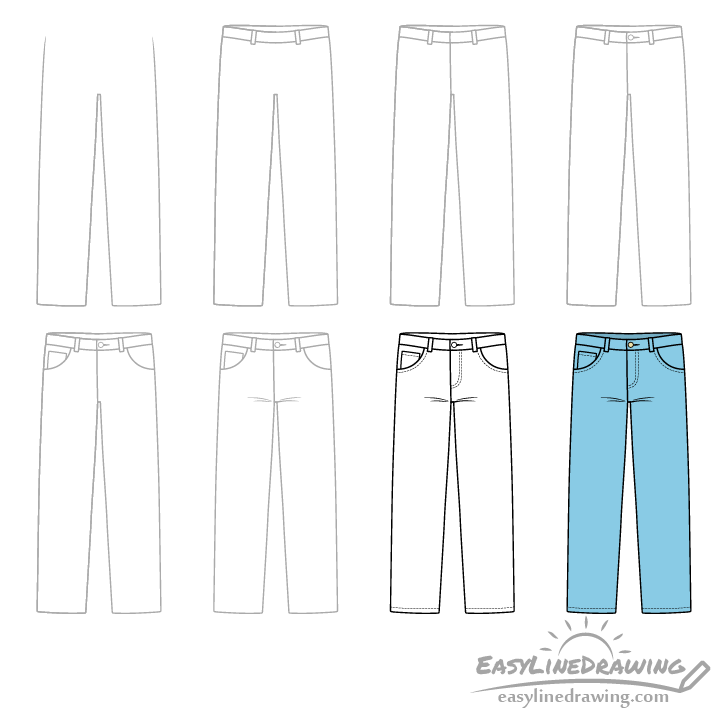
As mentioned, the tutorial is fairly simple and beginner friend. At the same time it shows how you can create a nice looking and fairly detailed drawing of the jeans. You can see a preview of it’s main steps in the image above. I addition to these there are also few close up examples of the smaller details in some of the steps.
It’s recommended that you start the drawing in pencil and make light lines that are easy to erase (in case you make a mistake). You can darken them later on with a black pen or marker. If you are going to color the jeans you might want to have some blue paints, pencils or markers.
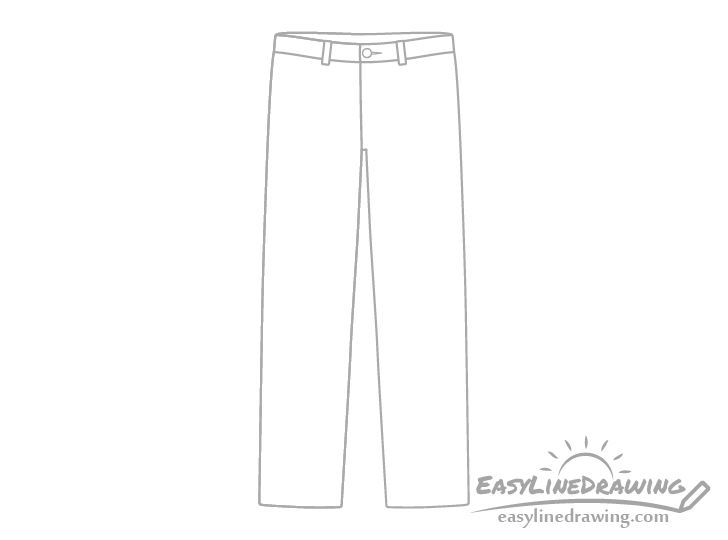
Step 1 – Outline the Shape of the Jeans
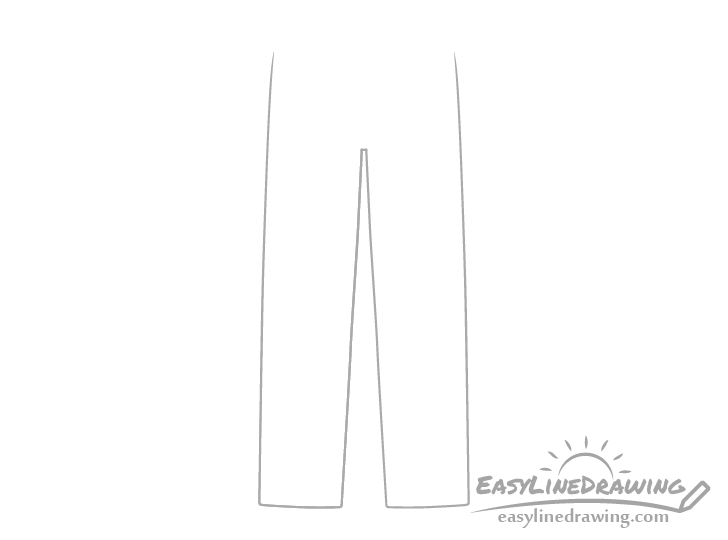
Begin by outlining the shape of each leg of the jeans. Leave their upper part open to be added in the next step.
Step 2 – Draw The Waistband
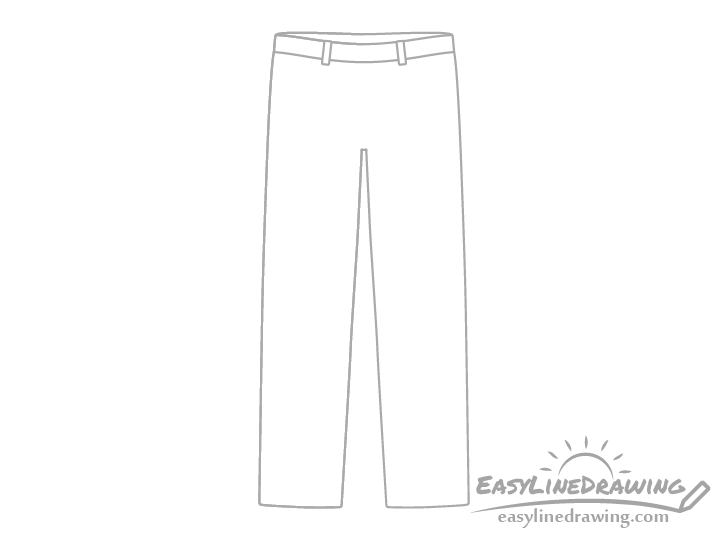
On top of the legs add the waistband. Draw it’s front side with a fairly noticeable “dip” near the middle. Draw the back side of the waistband a little higher up and with less of a “dip”. Afterwards add a pair of belt loops (the parts that hold a belt in place).
Step 3 – Draw the Fly
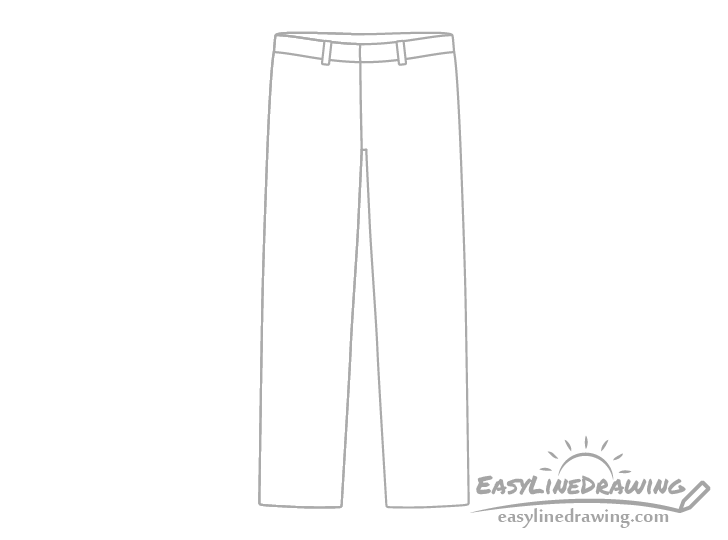
Draw the fly (the part with the zipper) near the middle of the jeans. At this stage of the drawing you can pretty much define it as just one vertical line.
Step 4 – Draw the Button
For this simple step draw the button. Make it round and place it near the middle of the waistband. Also show a little bit of the opening that it goes through.
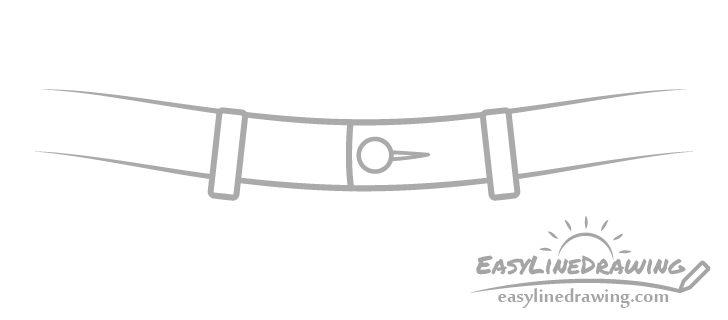
You can see a close up drawing of the waistband and button in the example above.
Step 5 – Draw the Pockets

When adding the pockets first draw the two large ones (one on each of the side of the jeans). Next add a small inner pocket inside one of them. The inner pocket is usually on the right side of the jeans (left side of drawing).
The shapes of jean pockets tend to somewhat very. In this case you can draw them as a pair of curves. Inner pockets are usually rectangular in shape and you can draw this one accordingly.
Step 6 – Draw the Folds

With all of the main parts of the jeans outline you can add a few folds. Draw these as shown in the example and place them at the bottom of the fly.
Step 7 – Draw the Stitches
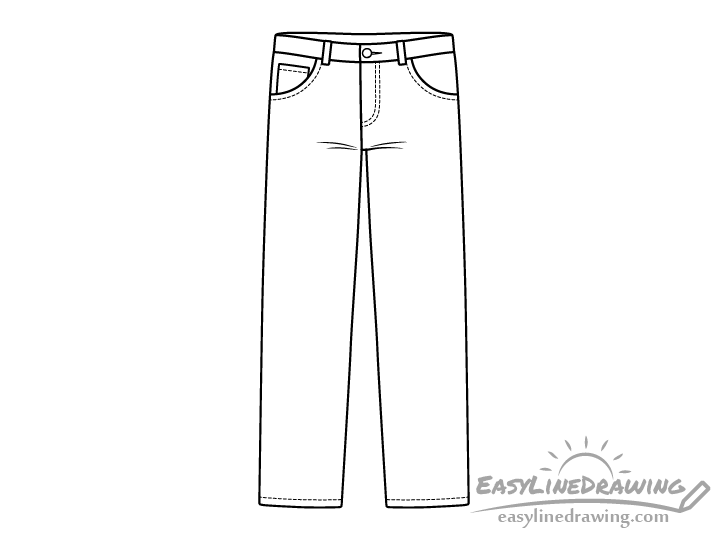
For the last set of details draw the stitches that are so characteristic of these types of pants.
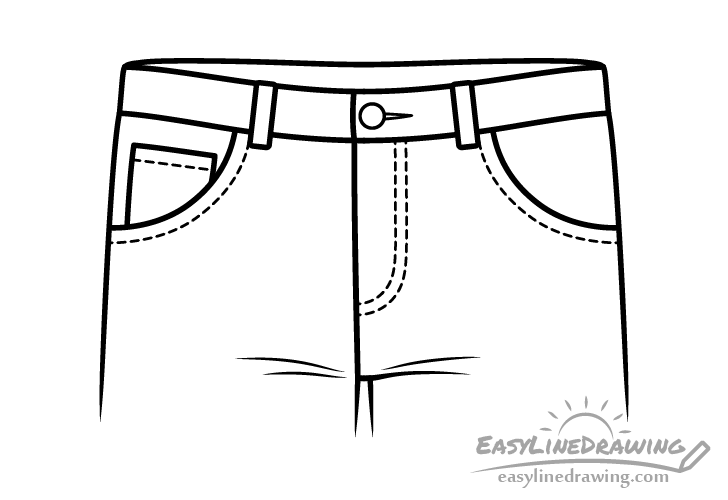
You can see the placement of the stitches along the upper part of the jeans in the example above. Draw the ones around the fly as two rows that first run in a curve around it’s bottom and then go straight up to the waistband. Draw the stitches around the pockets running along the bottoms of their openings as single lines.
Also add some stitches along the bottom of each leg (as shown in the previous example).
Once you have all parts of of the jeans and outlined and the stitches in place, you can trace over your drawing with a black pen or marker. Alternatively you can simply darken your lines with the pencil.
Step 8 – Color the Jeans
To color the jeans you can make the fabric blue and the button yellow or grey (for a gold or silver look). Make the inner part of the jeans (at the top) a slightly darker blue (as that area will usually have a bit of a shadow over it). You can do this by lightly shading over the blue with a regular pencil.
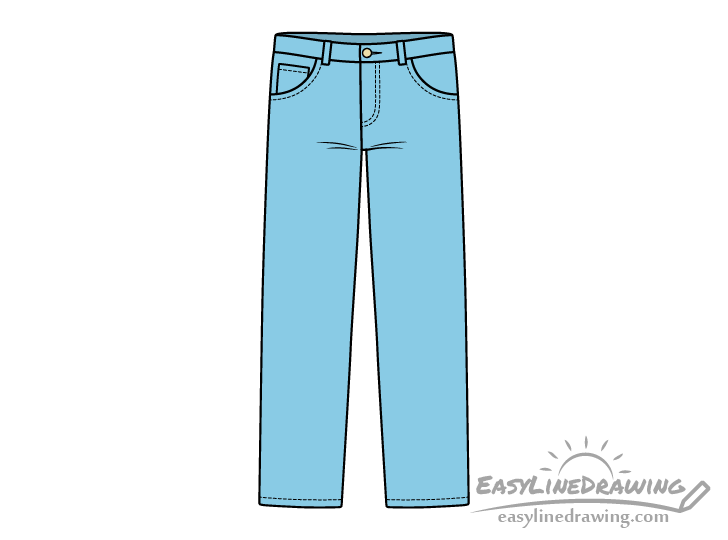
Once done coloring you should have a finished drawing of the jeans.
Conclusion
This tutorial shows how to draw a common pair of a jeans with an easy to follow step by step guide. When drawing just about anything (pants included) it’s good to approach it in a way where you start with the larger and most important parts first and then go down to the smaller details.
If you enjoy these types of easy to follow tutorials that teach a good approach to drawing you should also try the following:
- How to Draw a Baseball Cap Step by Step
- How to Draw a T-Shirt Step by Step
- How to Draw Shorts (8 Easy Steps)
- How to Draw a Girl Step by Step

")


