How to Draw Shorts (8 Easy Steps)
This simple tutorial shows how to draw a pair of shorts with an easy to follow, step by step illustrated guide.
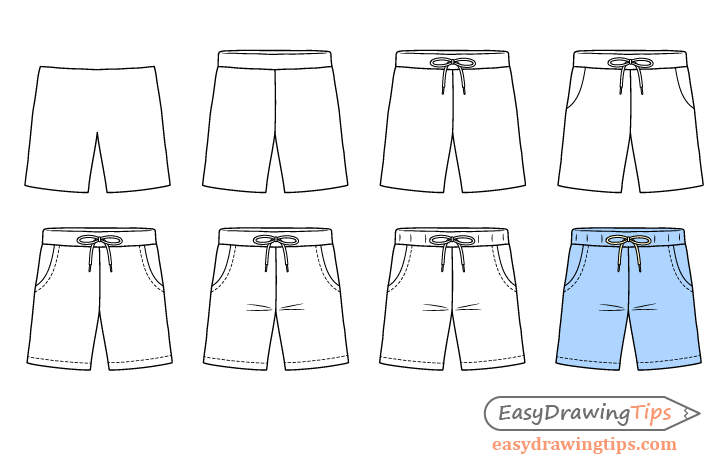
The shorts in the example have a fairly common design for this type of garment, one that is not too complex but at the same not overly plain. You see their various parts being added step by step in the preview image above. There is also a separate step by step example of drawing the drawstring. Be sure to start the tutorial in pencil as you will need to erase a bit of the waistband when adding that in. Also try and keep your lines light to make erasing them much easier. You can trace over your drawing with a back pen or marker once everything is in place.
Step 1 – Draw an Outline of the Shorts
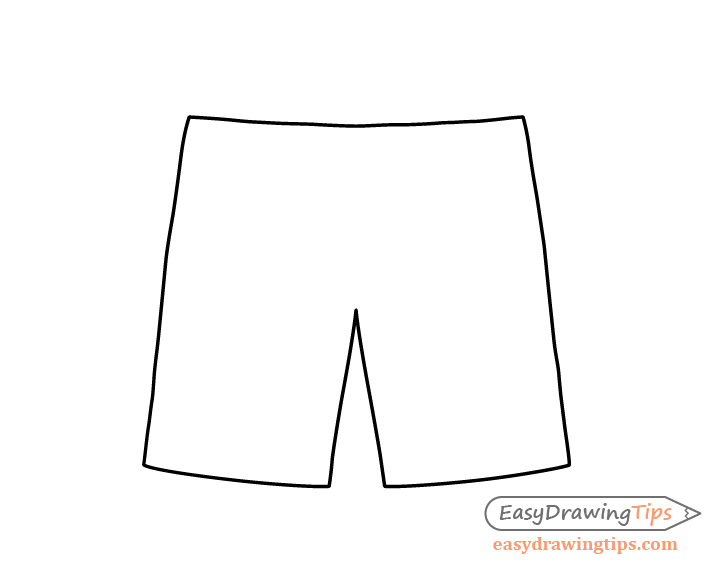
First outline the overall shape of the shorts without any of the smaller details. To show that the shorts are made of fabric (which tends to bend and fold) try and make the outline slightly wavy (especially on the sides). The shorts down need to be perfectly symmetrical but try and keep them fairly close in size and shape on both sides.
Step 2 – Draw the Waistband
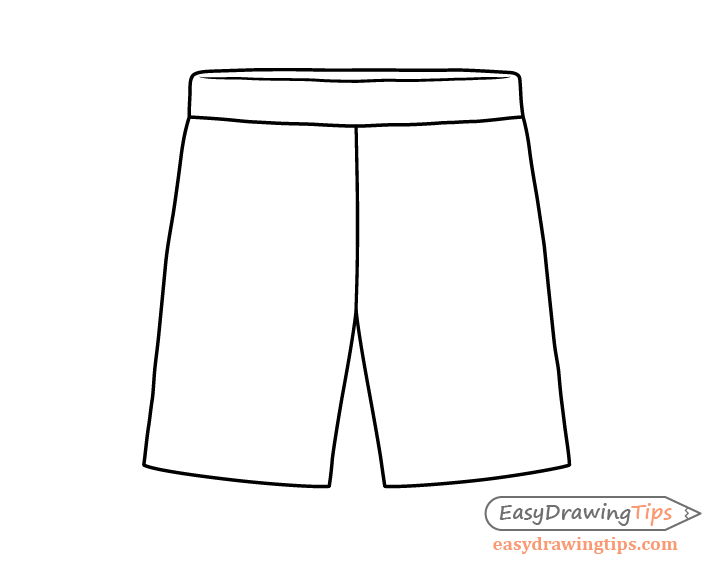
Add the waistband on top of the outline of the shorts and a split down their middle (where the two halves are connected). When drawing the waistband first outline it’s silhouette and then add another curved line towards it’s upper end to show the opening. Make sure that this line doesn’t quite touch the sides of the shorts. This will help show the thickness of the waistband (that it’s not paper thin).
Step 3 – Draw the Drawstring
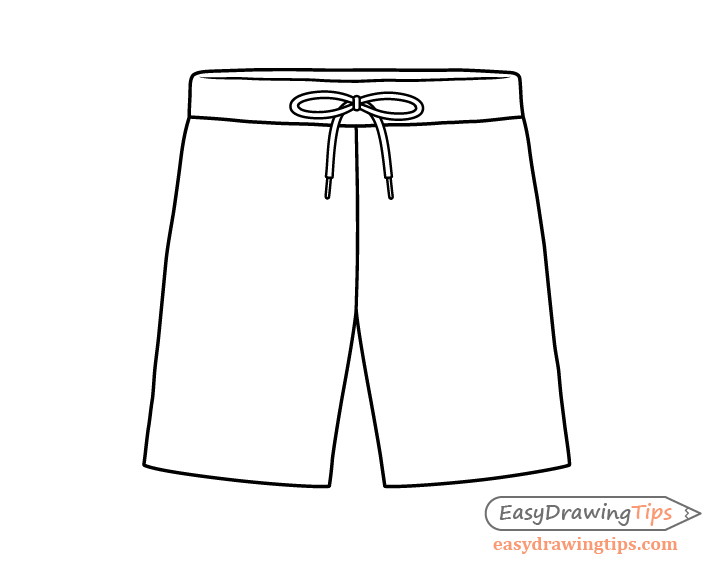
In the middle of the waistband draw a tied lace (also called a drawstring). You will need to erase a little bit of the outline of the waistband when adding
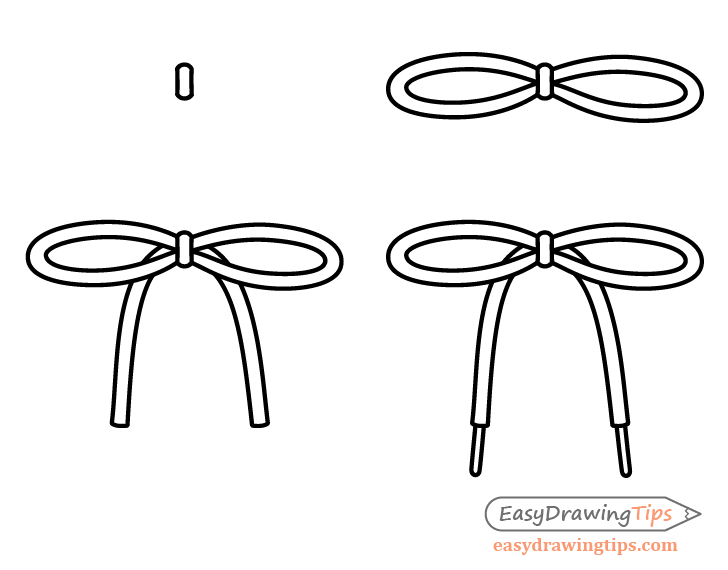
Draw the lace/drawstring tied like a ribbon in the following order:
- Outline the knot
- Coming out of the note add the hoops
- Going down from behind the knot/hoops draw the ends
- Add the aglets (metallic or plastic parts on the ends of a drawstring)
For drawing an actual ribbon see:
How to Draw a Ribbon Step by Step
Step 4 – Draw the Pockets

On each sides of the shorts outline a pocket. Try and keep these somewhat symmetrical.
Step 5 – Draw the Stitches
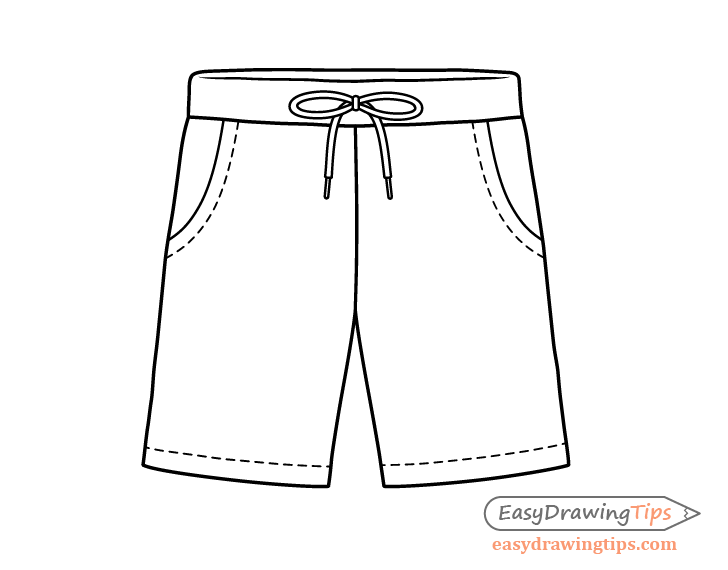
Add a series of stitches around the pockets and the bottom for the legs.
Step 6 – Draw the Folds

Draw a few lines around the split between the legs to show some folds that generally form in that area.
Step 7 – Finish the Line Drawing
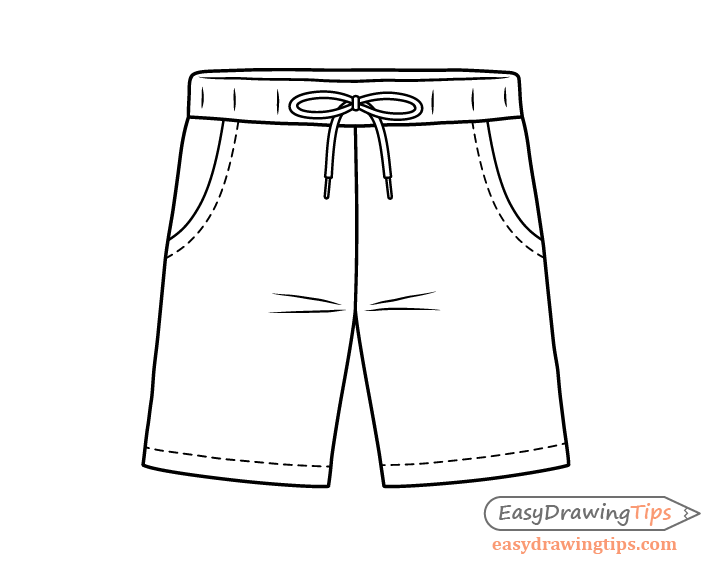
For the last set of details add some hints of folds to the waistband (created when it’s pulled together by the drawstring).
Once the above is done have a look at your drawing to make sure that everything is in the right place. Make any corrections if required and trace over your lines with a black pen or marker. If you don’t have one around then simply darken them with the pencil.
Step 8 – Color the Shorts

To color the drawing you can use any medium you like (markers, pencils, paints, etc…). In this case the shorts will be blue and the drawstring yellow (these colors go well together). You can of course use a different color combination if you prefer.
Once one coloring you should have a finished drawing of a pair of shorts.
Conclusion
The shorts shown in this tutorial are fairly simple but at the same time have enough features to make them look more interesting. Adding some details like a drawstring, pockets, stitches and folds takes a bit of extra time but it can make the finished drawing look much better than if you were to keep it more plain.
For more similar tutorials on drawing clothes also see the following:
- How to Draw a T-Shirt Step by Step
- How to Draw Jeans (Easy 8 Step Guide)
- How to Draw a Baseball Cap Step by Step

")


