How to Draw a Sports Car (12 Steps)
This tutorial shows how to draw a sports car with easy to follow, detailed, step by step instructions and illustrated examples.
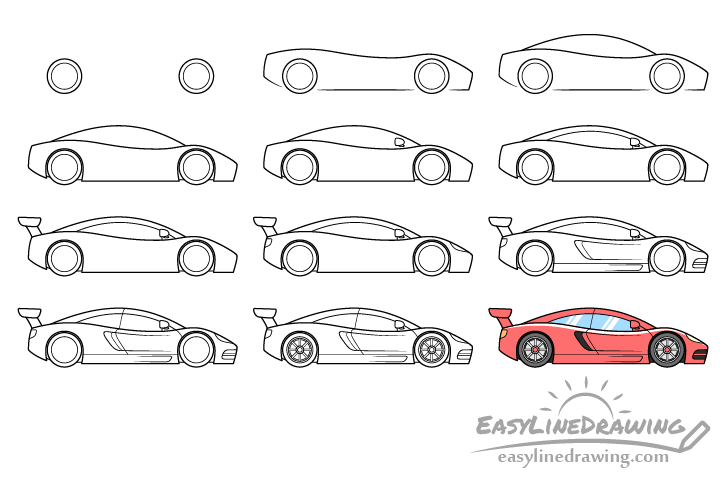
The car in the example is drawn in a fairly simple way. At the same time it’s also not too plain and can help you create a nice looking art piece.
A preview of the twelve main stages of the drawing is shown in the image above. However, there is also step by step example for the rims, as they are the most complex part of this drawing.
It’s recommended that you start the tutorial in pencil and make light lines that are easy to erase in case you make a mistake. You can darken them later on with a black pen or marker.
Step 1 – Draw the Wheels
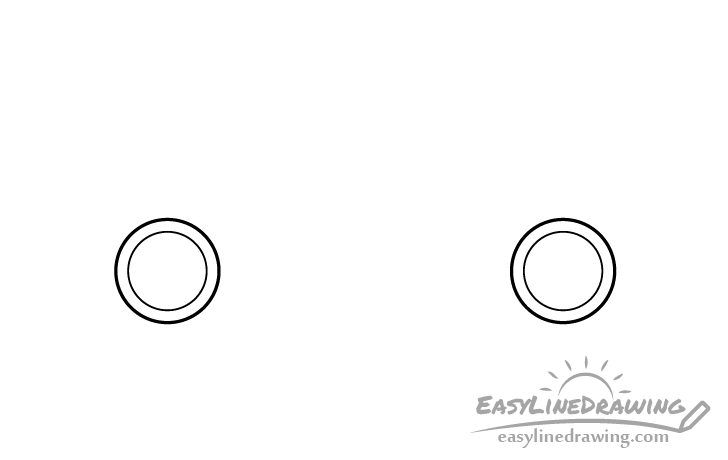
Begin by drawing the wheels of the sports car. From the side view these will just be a pair of circles. Be careful how you space them out as the distance between the wheels will determine the length of the car.
Inside each wheel draw a second smaller circle to outline the rims. As this is a sports car you can make the rims fairly large in relation to the wheels. At this step of the drawing you only want to get their overall size, leave the rest of the details for later.
Step 2 – Draw the Bottom of the Car’s Body
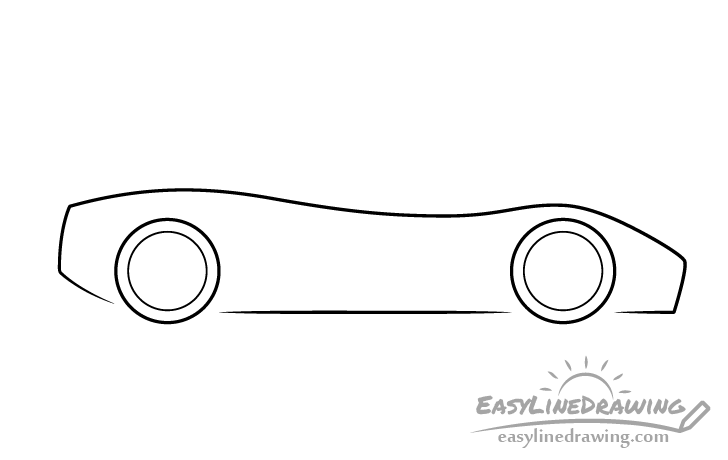
On top of the wheels add the lower part of the car’s body. As this is a sports car the body will be set fairly low (nearly touching the ground). You can define it’s bottom as pretty much a straight line (other than the upwards curve near the back). Leave a bit of open space around each of the wheels for the wheelhouses (to be added later).
Draw the upper part of this section somewhat like a wave that rises roughly over top of the wheels and lowers in the front, back and middle.
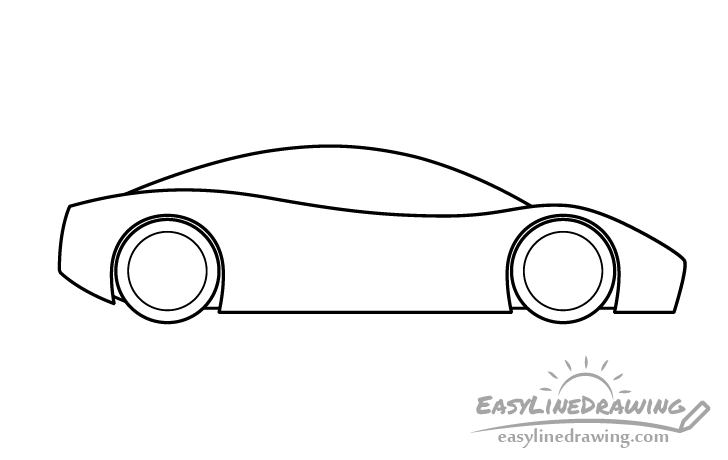
Step 3 – Draw the Top of the Car’s Body
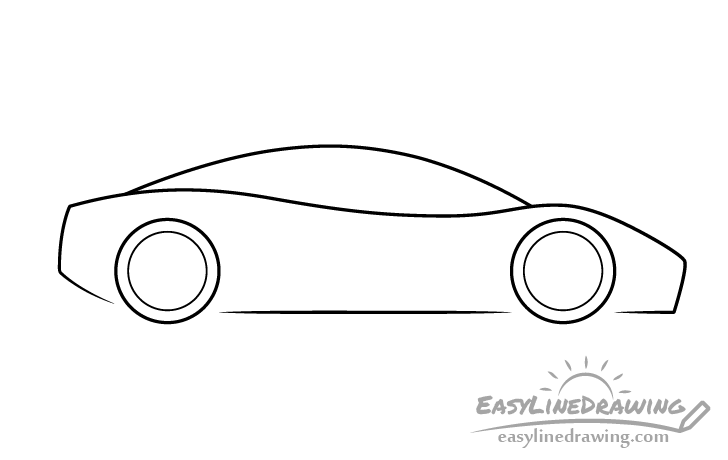
Draw the top of the body as a smooth curve positioned slightly more towards the back than the front.
Step 4 – Draw the Wheelhouses
Outline the wheelhouses around each of the wheels. make these slightly narrower as they go down. You can then draw a short pair of lines between the wheelhouse and each side of the wheel to show that the area behind them is not just empty space.
Step 5 – Draw the Rear View Mirror
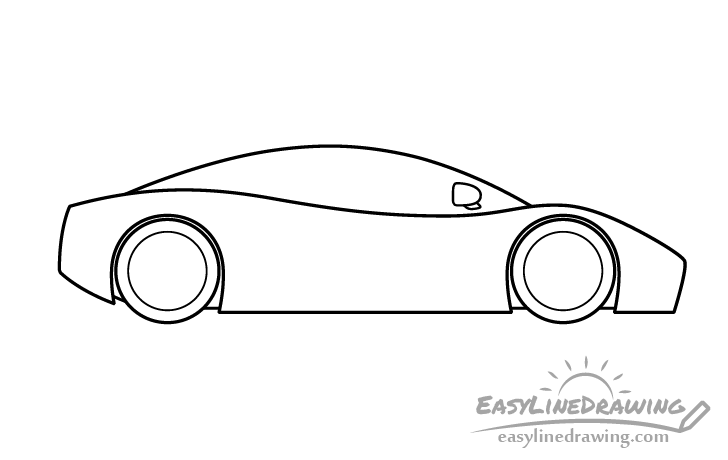
Add the rear view mirror by placing it near the front of the upper part of the car. Make it’s forward facing end rounded and the rear facing end (with the actual mirror) fairly flat. You can also add a little bit at the bottom that connects it to the car.
Step 6 – Draw the Windows
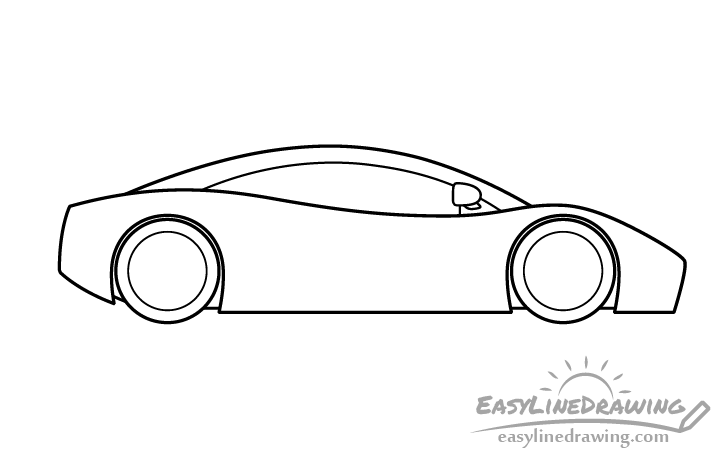
Add the window as one shape. Outline their upper end with yet another curve that somewhat follow the curve of the roof. You can also add a little line to separate the area where the rear view mirror is attached (this will usually be metallic and not glass).
Step 7 – Draw the Spoiler
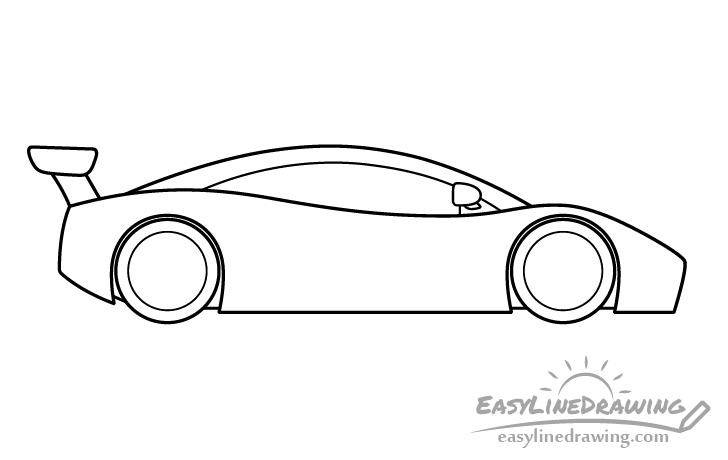
For a more characteristic sports or race car look add a spoiler at the back. Draw it tilted backwards as is fairly common for these part types.
Step 8 – Draw the Head & Tail Lights
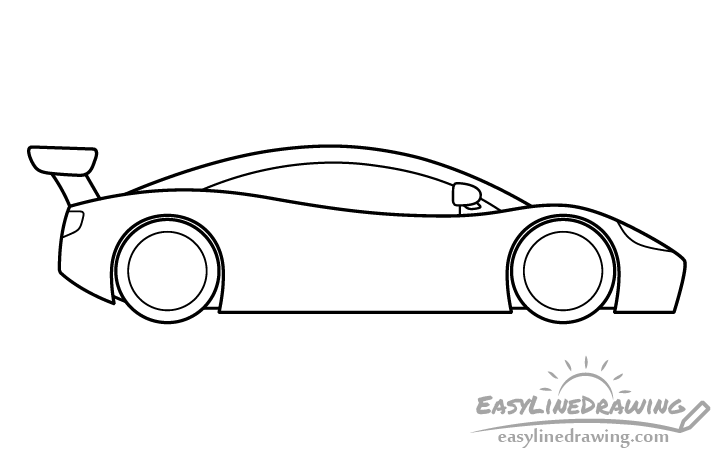
Outline the headlight and tail light at the front and back of the car. You can simply refer to the example above for their shapes.
Step 9 – Draw the Air Vents
Another very characteristic element of a sports/race car are the various airflow vents throughout it’s body. You can place one at the front below the headlight and two along the side.
Draw a straight horizontal line along the lower part of the car’s body between the two wheelhouses. At the upper part of this line draw a large air vent in a way where it somewhat flows along the shape of the car and tilts backwards. Afterwards, a second smaller vent below the same line going in the opposite directions.
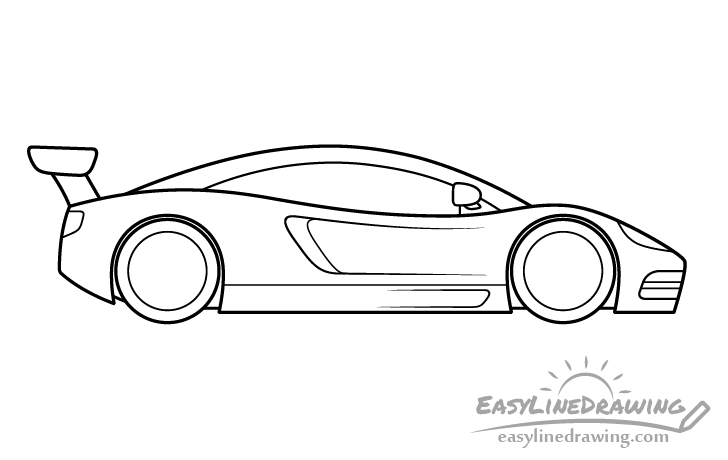
Step 10 – Draw the Door
Outline the door as shown in the example. Define it’s shape by first adding a line that runs from the roof down to the horizontal line drawn in the previous step. Next, draw a small curve that runs from the part where the rear view mirror is attached down to the front wheelhouse.
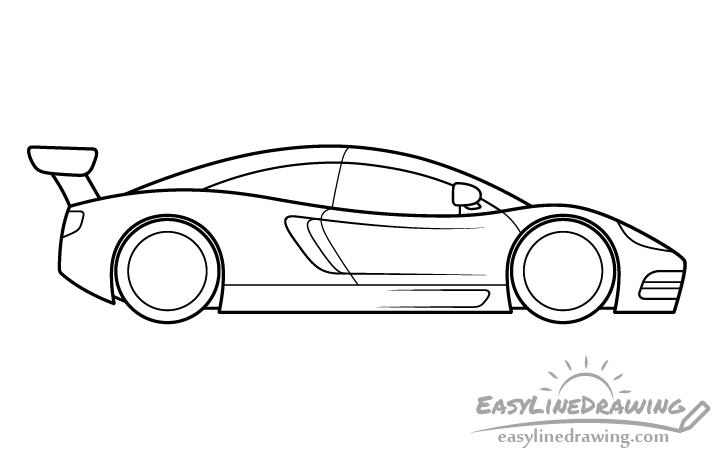
Step 11 – Draw the Rims
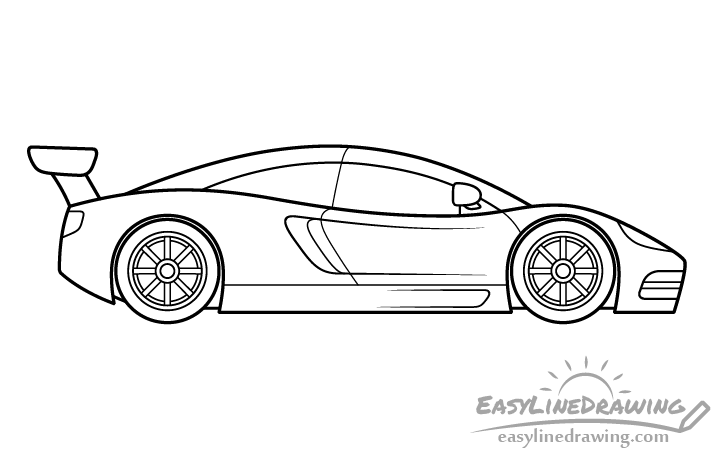
As already mentioned, sports cars tend to have large rims. The rims also tend to have more “flashy” designs as compared to regular cars.
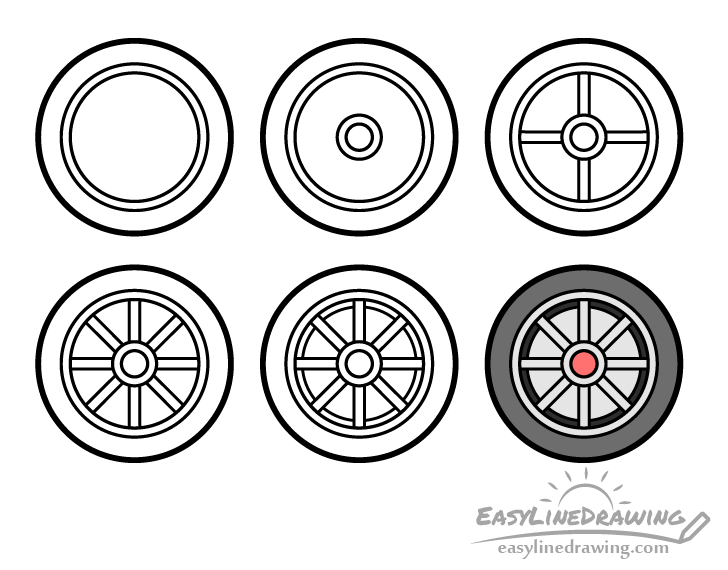
A step by step breakdown of drawing a rim is shown above.
Step 12 – Color the Sports Car
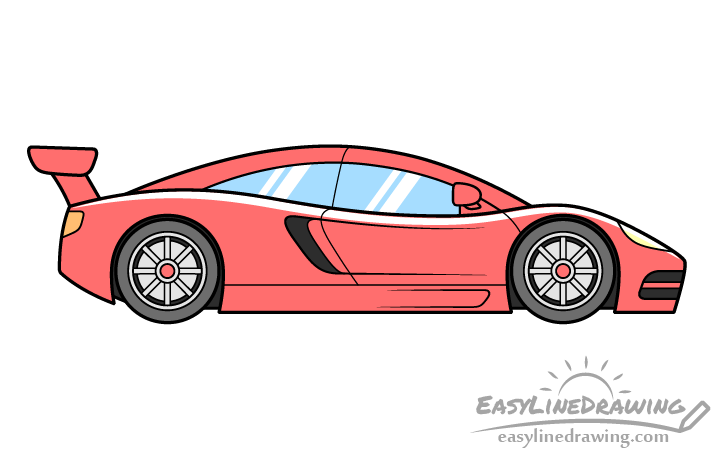
Red is a fairly common color for these types of vehicles (sports cars) so it’s a good choice to go with for the main body of the car. Of course you can also go with something else (blue and yellow can also be good options). You can use whatever medium you prefer (paints, markers, colored pencils, etc…)
When coloring the bottom part of the body (drawn in step 2) leave a white streak running along it’s upper end. This will show light reflecting from the car’s smooth surface and make it look shiny.
Color the rest of the car as follows:
- Windows – blue (with white streaks to show reflections)
- Headlight – yellow
- Taillight – orange
- Vent openings – dark grey
- Wheelhouses – dark grey
- Wheels – medium grey
- Rims – light grey (with red or whatever color you choose for the body in the center)
- Rim background – dark grey
You can create the various colors of grey with a regular pencil, for the dark grey you can also go with black (black marker for example).
Conclusion
Cars, especially sports cars, tend to have a lot of details making them somewhat difficult to draw. To help this tutorial gives a detailed breakdown of drawing each part of such a vehicle. To keep things simple it also only adds a minimum amount of detail (just enough to make the design look believable).
If you like these kinds of detailed step by step drawing guides you should also try the following:
- How to Draw a Bike Step by Step
- How to Draw a Car in 12 Steps (Easy Guide)
- How to Draw A Boat Step by Step
- How to Draw a Burger Step by Step

")


