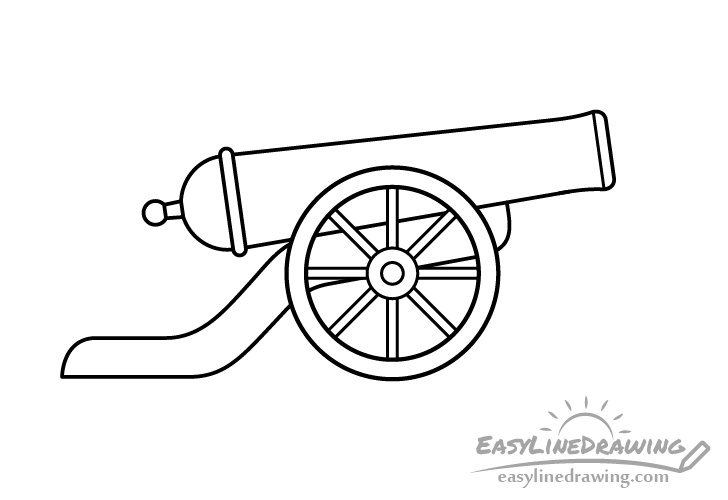
How to Draw a Cannon Step by Step
This tutorial shows how to draw a cannon with cannonballs in eight steps. It provides very easy to follow instructions and illustrated examples.
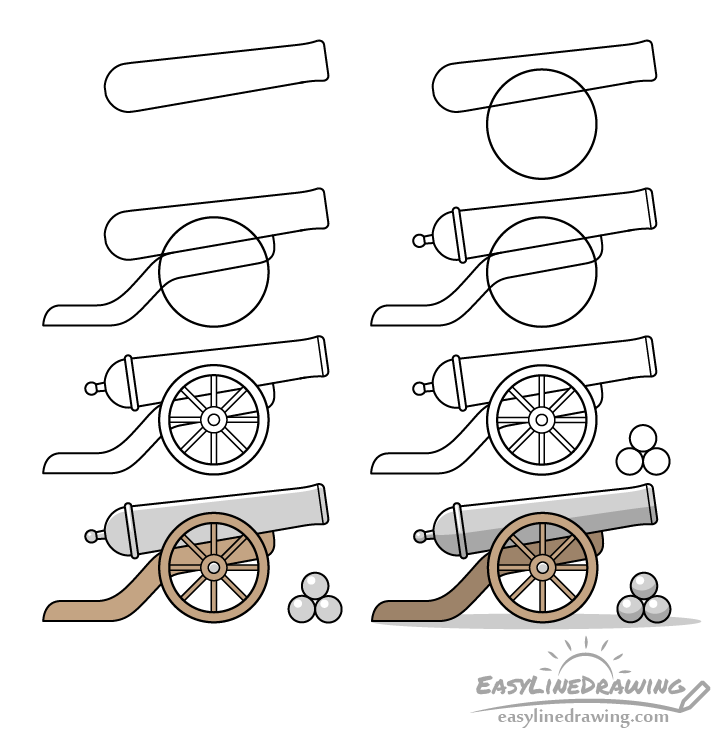
The design of the cannon used as the example is fairly simple. For this reason the tutorial can be good practice for beginners or just something something fun to draw.
To make things even easier there is also a step by step breakdown of drawing the wheel (shown lower down). As it’s the most complex part of the cannon.
Please note that you will need to erase parts of the drawing in one of the steps so be sure to start the tutorial in pencil and to make light lines (so they don’t leave marks once erased). You can trace over your lines with a black pen or marker before coloring.
Step 1 – Outline the Barrel of the Cannon
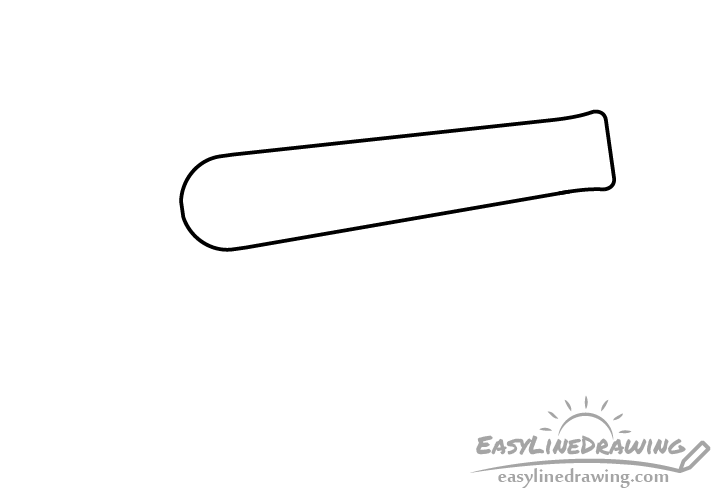
Begin by making an outline drawing of the barrel. For this step the goal is to get it’s overall shape without any of the smaller details.
Draw the barrel on a slight angle as is common for cannons of this type. Make it wider towards the back, narrower towards the front and then again wider near the end (for the muzzle).
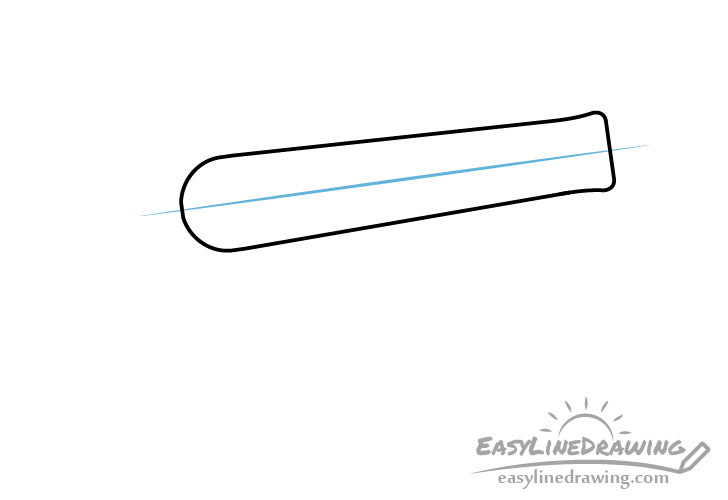
Optionally you can make a straight line at the angle at which you wish to have the barrel to act as a guide. This can make it easier to see if it’s shape is symmetrical.
You can the erase the guide line once done the outline.
Step 2 – Outline the Wheel
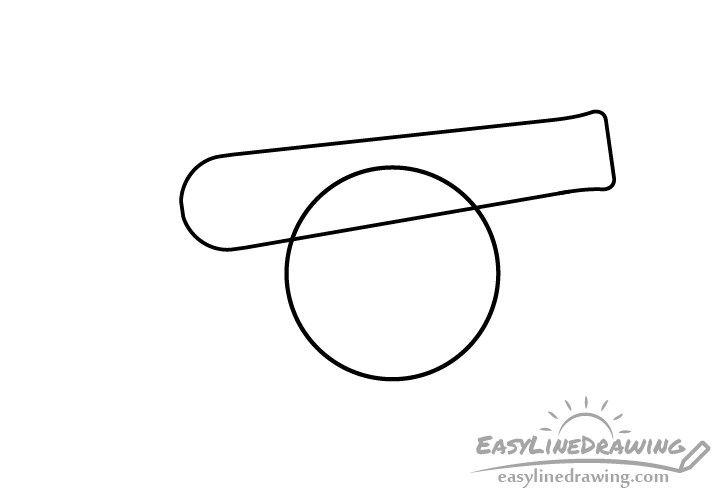
For this simple step draw the circle of the wheel overlapping the outline the barrel.
Step 3 – Draw the Carriage

Outline carriage (the wooden part that supports the cannon). At this stage of the drawing outline it’s entire shape, even the part that should be hidden behind the wheel.
Step 4 – Add the Knob & Muzzle

At the back of the cannon add the knob and at the front draw a line that defines the forward face of the muzzle.
Step 5 – Draw the Details of the Wheel
Draw the details of the wheel. You can erase bits of the outlines of the other parts of the cannon as needed when adding these.
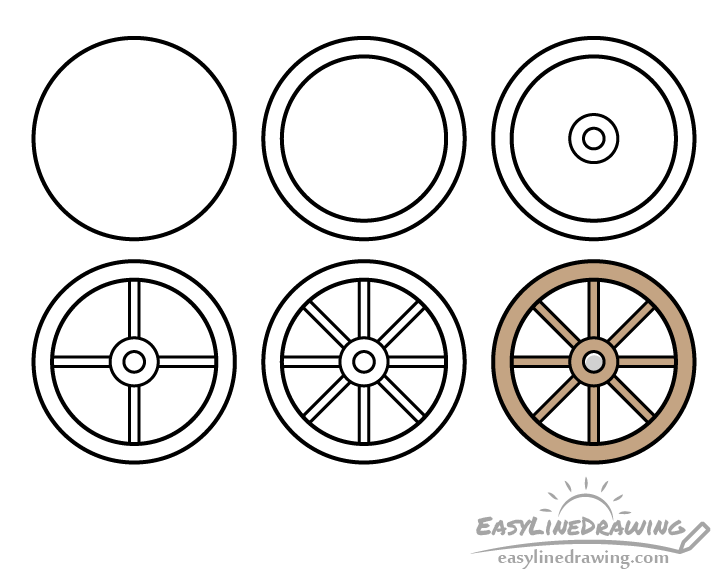
As the wheel is the most detailed part of the cannon an extra step by step breakdown of drawing it is shown above (as was mentioned at the start of the tutorial). However, hold on coloring it until you get to step seven.
Step 6 – Draw the Cannonballs
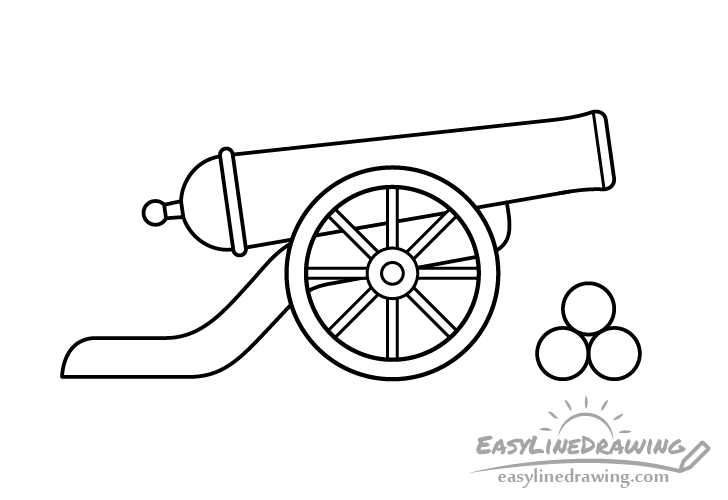
To make the drawing look a little more interesting add a small stack of cannonballs next to the cannon. Be careful not to make them too large so that they look like they can actually fit inside the barrel.
Once you have the cannonballs in place go over your drawing to make sure that everything looks good (make corrections if required). Afterwards, trace over your lines with a black pen/marker or simply darken them with the pencil.
Step 7 – Add Color

Make the barrel and cannon balls a grey (so that they look like metal) and make the wheel and the part the carriage brown (so that they look like wood).
When coloring be sure to leave a white strip along the top of the cannon and round white spots inside the knob and each of the cannon balls. You can also leave a little white strip along the upper par of the metallic center of the wheel. These white ares will show light reflecting from the smooth metallic surfaces and will help make them look shiny. You can either lightly outline the reflections beforehand or simply create them as you go.
Step 8 – Add the Shadows
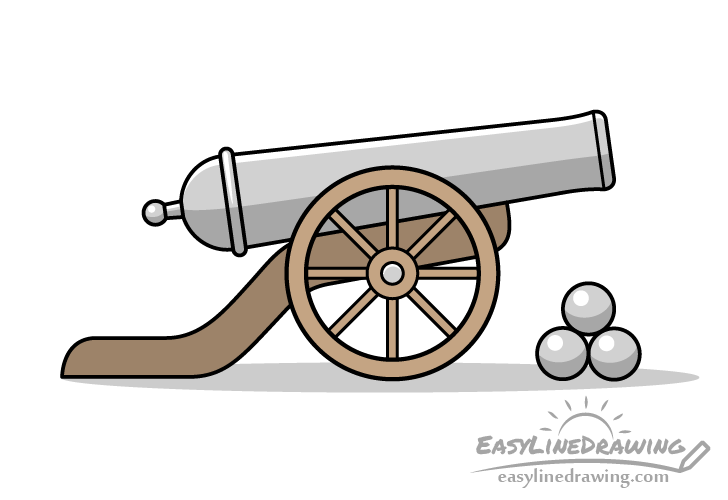
You may notice that the drawing in the previous example looks a little flat. To fix this add some very basic shading. Simply darken the lower part of the cannon’s barrel, the carriage and the lower part of each cannonball. You can then (optionally) add a shadow below the cannon and cannonballs. The shadow will help make it appear as though they are actually sitting on a surface.
Conclusion
As mentioned at the start the tutorial the cannon in the example is fairly simple. At the same time it’s not overly plain. By adding just enough detail and some simple shading you can make the cannon drawing stand out and be much more interesting to look at.
If you like these kinds of drawing guides with useful tips and easy to follow instructions be sure to also try the following:
- How to Draw a Car in 12 Steps (Easy Guide)
- How to Draw a Sports Car (12 Steps)
- How to Draw a Sword Step by Step
- How to Draw a Bike Step by Step

")


