How to Draw a Baseball Cap Step by Step
This tutorial shows how to draw a common baseball cap in six steps. Each step includes drawing tips along with an illustrated example.
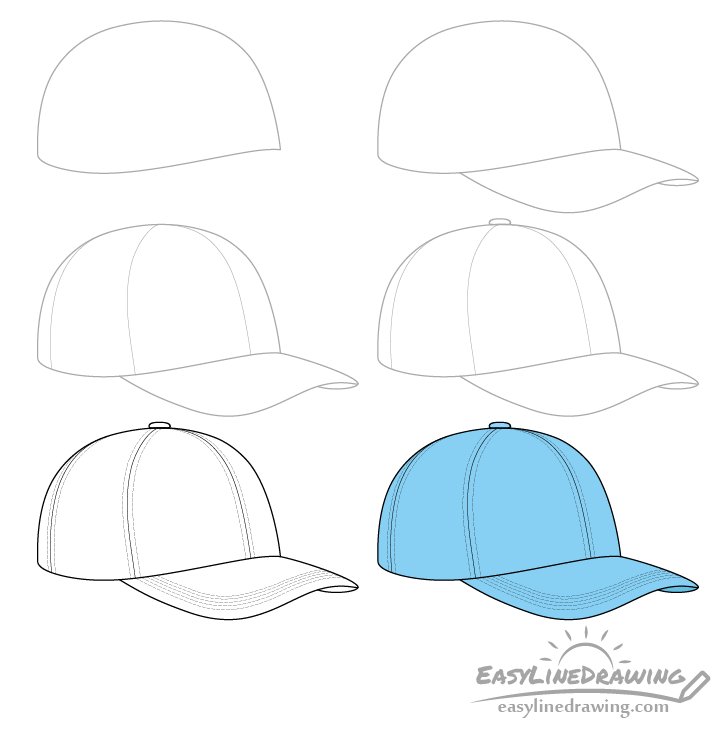
You can see the steps for drawing the hat in the preview image above. In this case it will be drawn in 3/4 view.
Please note that as the cap is fairly detailed this tutorial may be a little more challenging then some of the other ones here on EasyLineDrawing. However, you can optionally leave out some of the details if you want to make a simpler drawing of the baseball hat.
Be sure to start the tutorial in pencil and make light lines that are easy to erase in case you make a mistake. You can trace over them later on with a black pen or marker.
Step 1 – Draw the Crown of the Baseball Cap
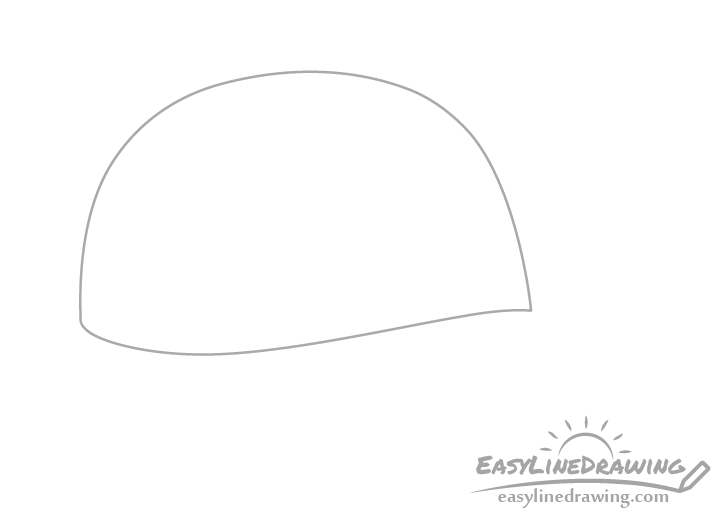
Begin by drawing the outline of the crown (the part of the hat that goes over the head). Make it’s upper part one big curve that is slightly of flattened at the top and draw the bottom with a bit of a wave.
Step 2 – Draw the Visor
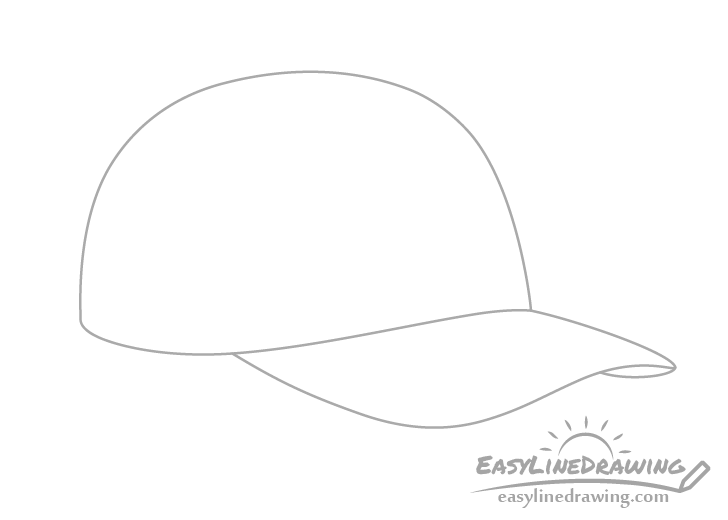
At the front of the crown add the visor. It’s bottom will again have a “wave” to it. As the visor is curved a little bit of it’s under side will become visible which you can draw as a small curve at the end of the wavy line.
Step 3 – Draw the Sections
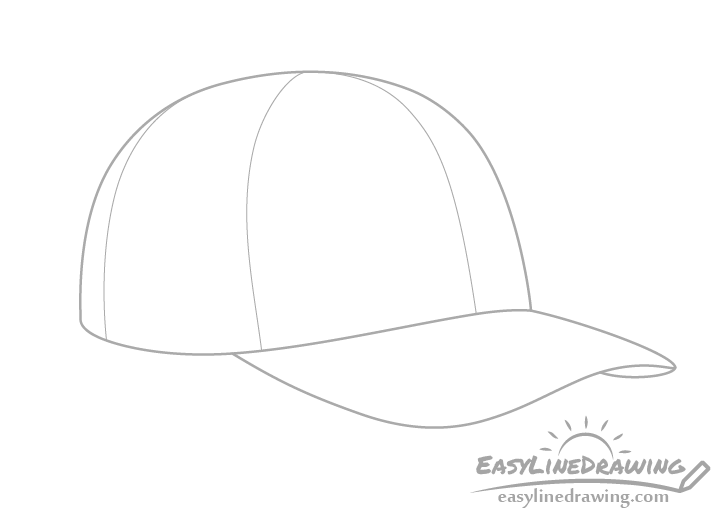
Split the crown into several sections that are so characteristic of a baseball cap. You can do this by drawing a series of curved lines as shown in the example.
Step 4 – Add the Button

At the top of the hat add a button. While the button is round viewed at this angle it will appear pretty much flat with rounded sides.
Step 5 – Add the Stitching & Finish the Line Drawing

Along the sections of the visor you can add some stitches that baseball caps usually have. Please note that adding the stitches is optional.
If you do choose to draw them do the following:
- Trace over the entire hat drawing with a black pen or marker (or darken your lines with the pencil).
- Draw very light lines (just so that you can barely see them) along which the stitches will run.
- Again using a black pen or marker (or dark pencil lines) draw a series of dashes along the “stitching lines”.
If you chose note to draw the stitches you can simply just do the first part of the above list and move on to coloring.
Step 6 – Finish the Baseball Cap Drawing
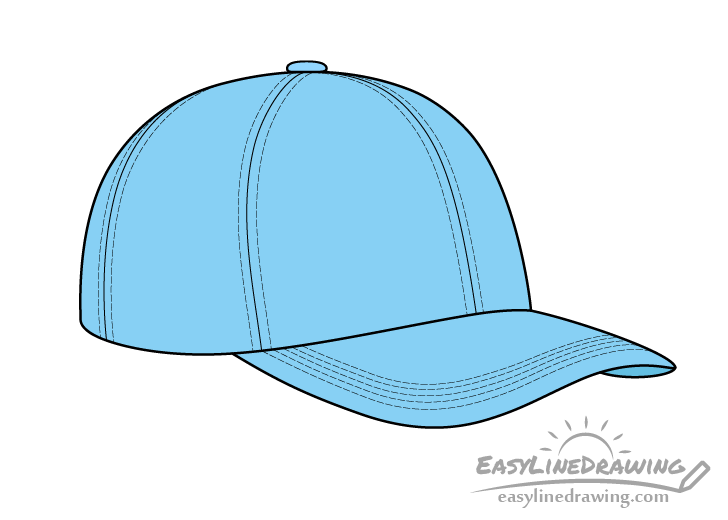
In this case the hat will just be one solid color, a light blue.
You can color the hat any way you like using whatever option you prefer (colored pencils, markers, paints, etc…).
Once done you should have a finished drawing of a baseball cap.
Conclusion
Drawing a basic outline of the baseball cap is fairly easy but adding the stitching can get a little time consuming. However, if you want to save some time you can still have a fairly nice looking drawing of a hat without them. Pick whatever option you feel is right for you.
For other similar tutorials also see:
- How to Draw a T-Shirt Step by Step
- How to Draw Jeans (Easy 8 Step Guide)
- How to Draw Socks Step by Step
- How to Draw a Baseball Bat Step by Step
- How to Draw a Santa Hat Step by Step
- How to Draw a Toothbrush Step by Step
- How to Draw a High Heel Shoe Step by Step


