How to Draw a High Heel Shoe Step by Step
This tutorial shows how to draw a high heel shoe in four steps. It provides simple examples and quick drawing instructions.
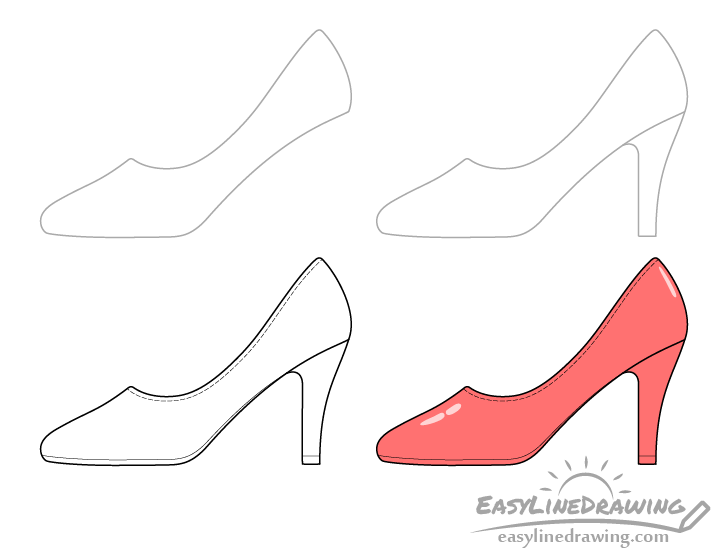
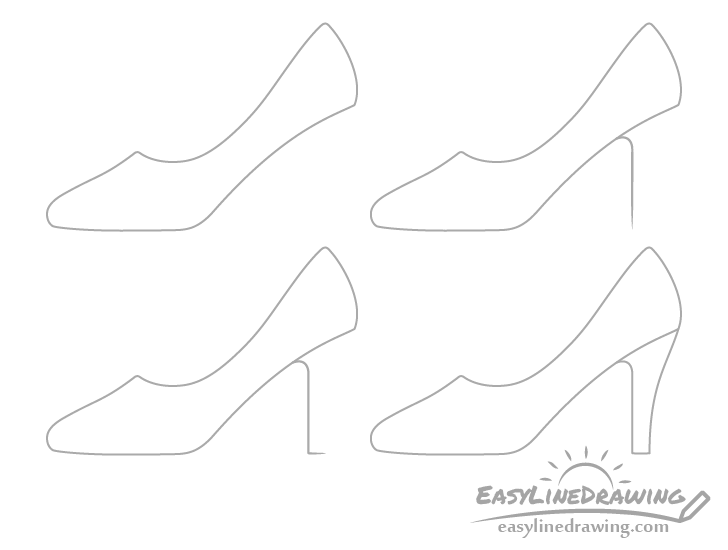
You can see a preview of the drawing steps for the shoe in the example above. While high heel shoes can have different looks the goal here is to draw one that has a fairly common and simple design.
Start the tutorial in pencil and make light lines in case you wish to make a correction later on. You can trace over your drawing with a black pen or marker at the end of step three.
Step 1 – Draw The Upper Part of the Shoe
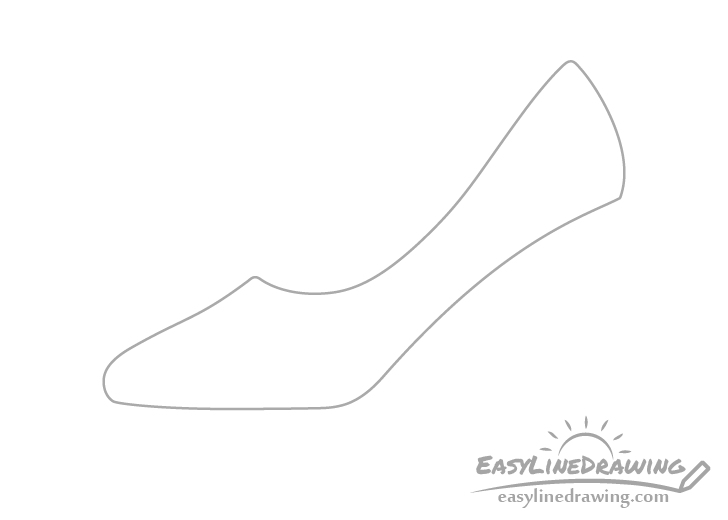
Begin by outlining the shape of the upper part of the shoe. You can see a breakdown of how you can do this in the example below.

First draw the front of the shoe. Next Draw it’s bottom curve followed by the upper curve (where to foot goes in).
Finally add the back (with another curve) to finish the outline of this part of the shoe.
Step 2 – Draw the Heel
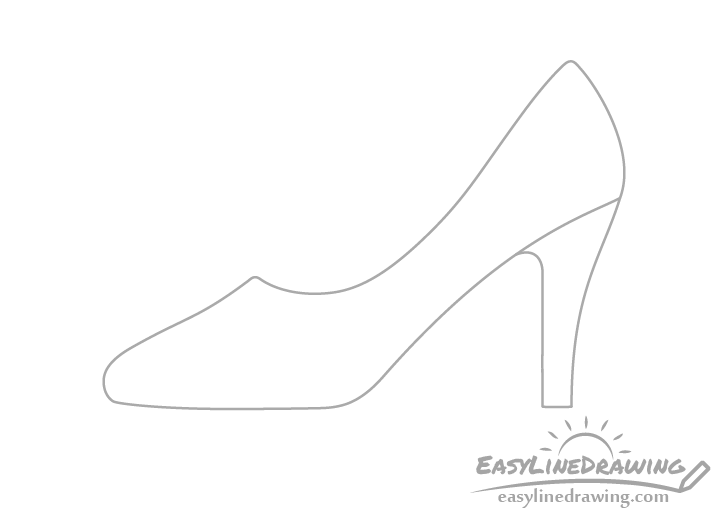
Going down from the back add the heel. Make it wider towards the top and narrower towards the bottom.
Heels can have different designs but in this case it will have a curved followed by a pretty much straight line as it goes down on it’s inner side. The bottom will be flat. On the outer side it will have a smooth outwards curve that will give it that extra thickness as it goes up.
Step 3 – Add the Details & Finish the Line Drawing
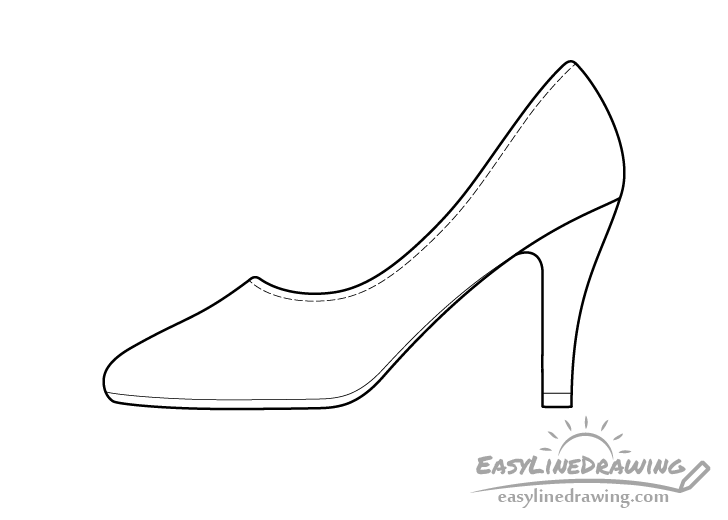
At this stage add some of the smaller details of the shoe. In this case those will have stitches around the opening at the top and an outline of the sole at the bottom.
To draw the stitches you can first draw a light solid pencil line. Next draw the little dashes of the stitches along this line with either darker pencil strokes or a thin black marker or pen. Whatever option you choose to draw the stitches you can also use to trace over the rest of your lines to darken them. Just be sure that you are happy with your drawing before doing so.
Step 4 – Color the Shoe
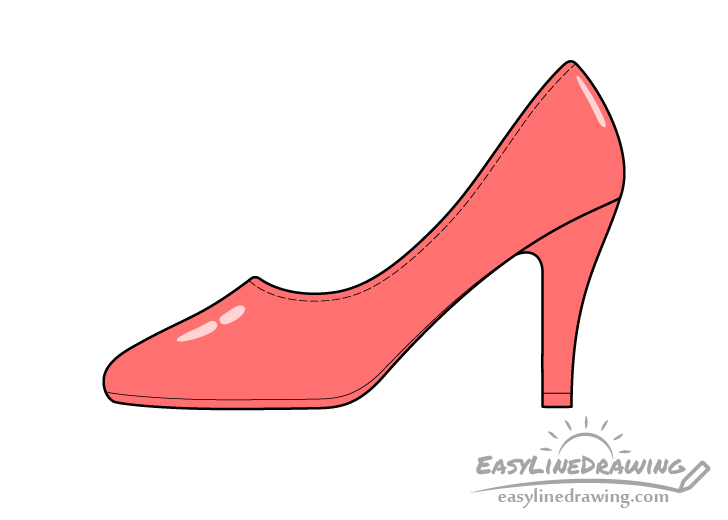
Finally to color the shoe you can make it a fairly bright red (you can use a different color if you prefer). Also before applying the color you can lightly outline (in pencil) a few highlights, the lighter areas shown in the example above. These will be the light reflecting from the smooth surface of the shoe. The outlines are to help you to not accidentally color over them. As shown in the example in this case there will be a larger highlight at the front of the shoe (broken up into two) and a smaller highlight at the back.
If you feel the highlights look a little too bright you can (optionally) lightly go over them with a colored pencil of the same color that you used for the shoe. For coloring the shoe itself a marker may be a good option if yo want to have a bright color.
Conclusion
There is a lot of variety in high heel shoes. This tutorial shows how to draw one way to draw a shoe with a fairly standard design for this type of footwear. You can of course also experiment for yourself by adding more elements or changing up the design. Simply look at some photos of real shoes to see things that you might like.
If you enjoyed this tutorial you may also want to try:
- How to Draw a Shoe Step by Step
- How to Draw a Santa Hat Step by Step
- How to Draw a Baseball Cap Step by Step
- How to Draw a Ribbon Step by Step
- How to Draw a Towel or Cloth Step by Step
- How to Draw Lipstick Step by Step

")


