How to Draw a Mobile Phone Step by Step
This tutorial shows how to draw a mobile phone in six steps from the front view. It includes simple illustrated examples and easy to follow drawing tips.
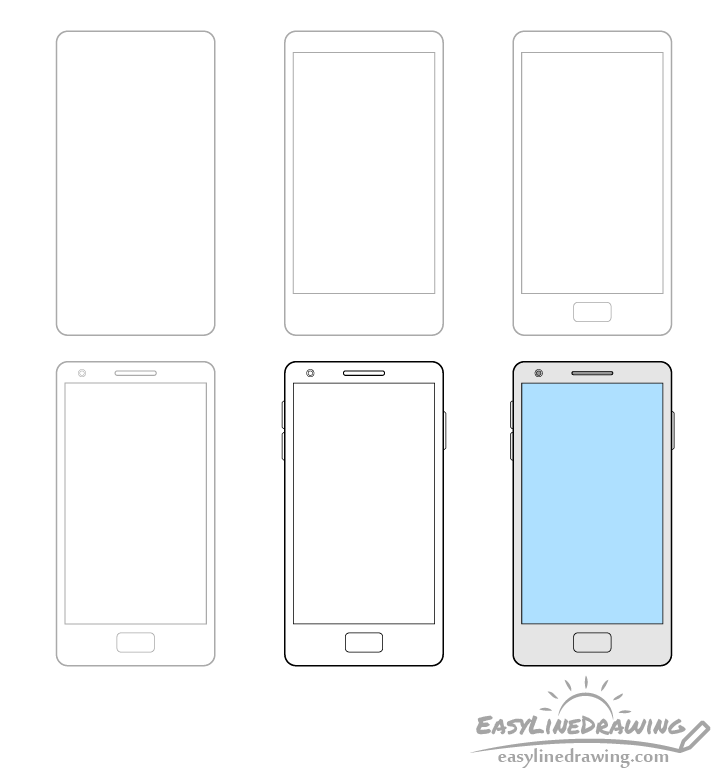
You can see a break down of the drawing steps for the mobile phone in the example above. In this case it will be a fairly generic looking one with the parts most phones tend to have.
Start the drawing in pencil and make light lines that you can easily erase in case you make a mistake. The phone will also have quite a few long straight lines in it’s shape so you may wish to use a ruler to help you draw those. You may also want to have a black pen/marker to trace over your drawing later on.
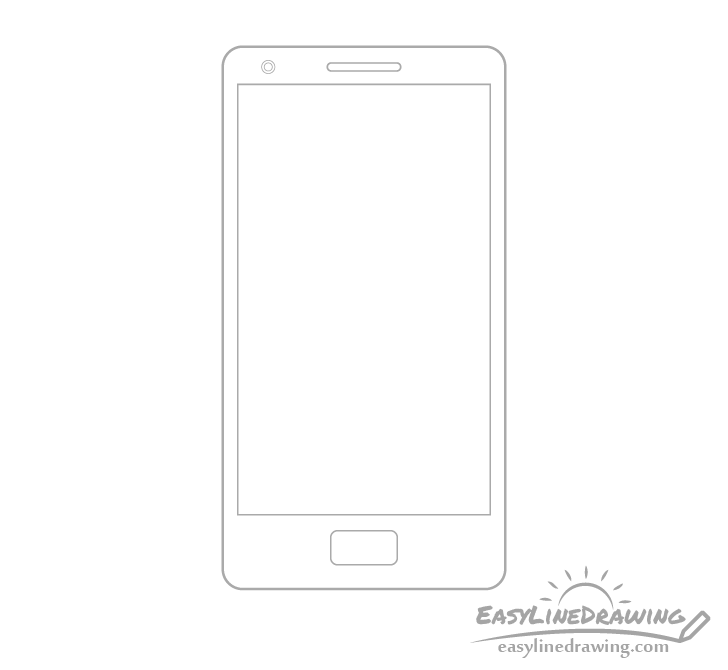
Step 1 – Draw an Outline of the Phone
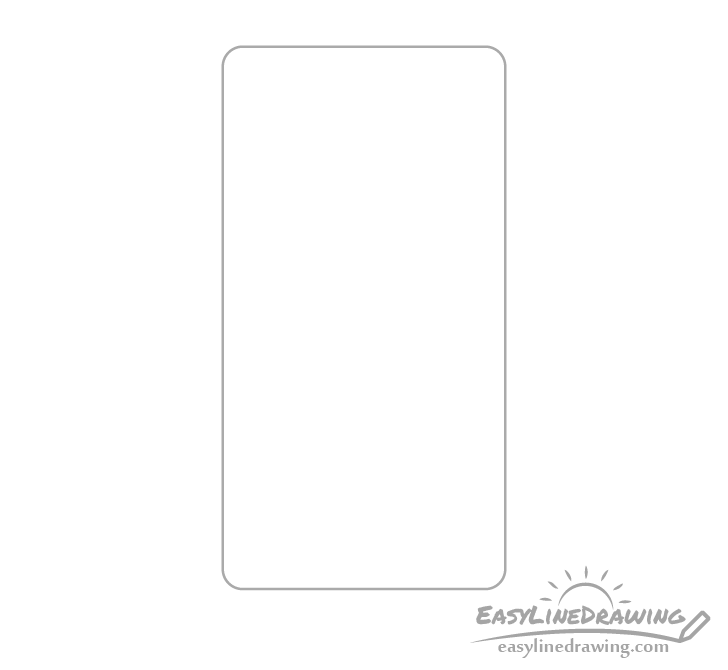
Begin with the outline of the phone. Draw it as a vertical rectangle with rounded corners.
Step 2 – Draw the Screen
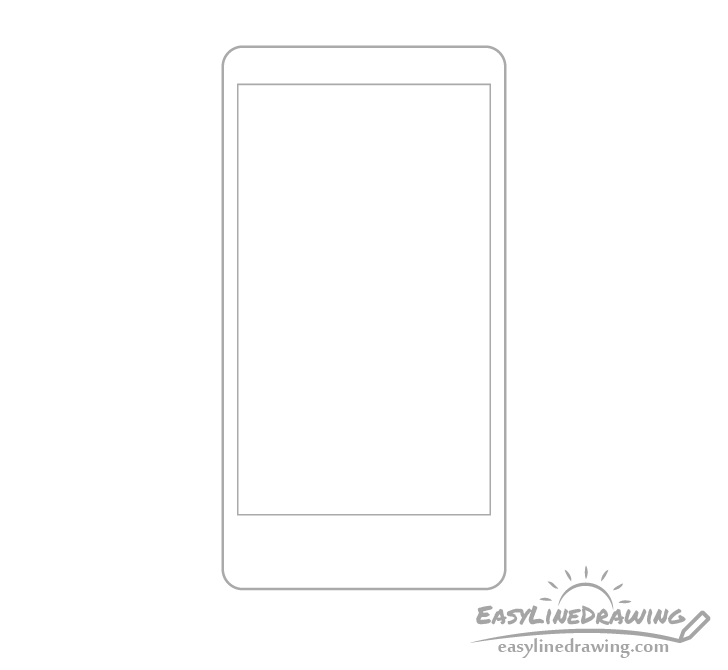
Inside the previous rectangle add another shorter one for the screen. This one does not need to have rounded corners.
Leave just a bit of space on the sides between the outlines of the two rectangles with more space on top and even more on the bottom.
Step 3 – Draw the Button
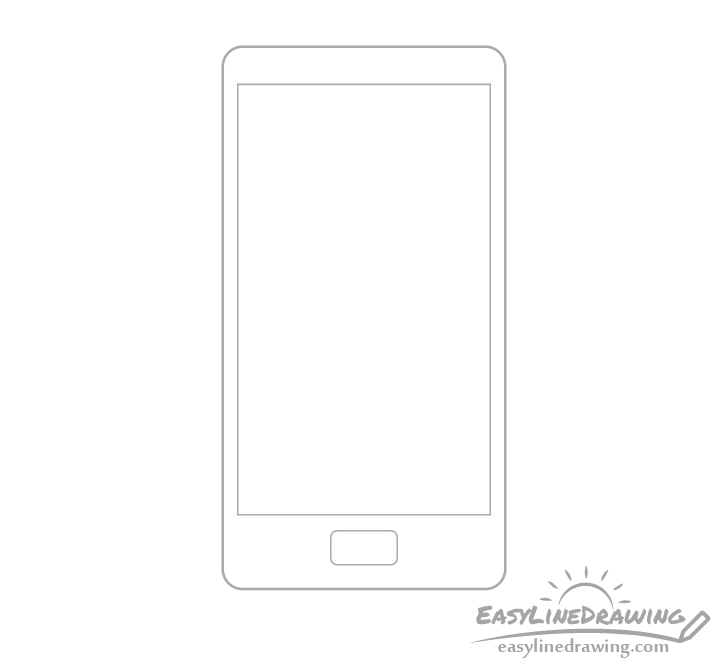
At the bottom of the phone add a button. In this case it will yet again be a rectangle (a horizontal one) with rounded corners.
Step 4 – Draw the Camera & Speaker
Draw the details of the upper part of the front side of the phone. In this case these will be the camera and speaker.
Draw the camera as two circles one inside the other and the speaker as basically a long and narrow rectangle with rounded sides.
Step 5 – Draw the Side Buttons & Finish the Line Drawing
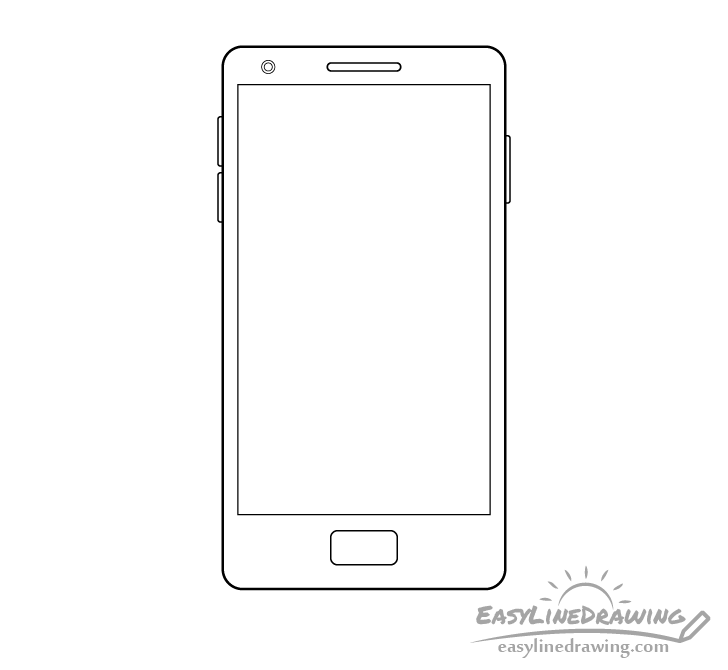
Finally add the buttons on sides. You can add two smaller ones on the left side and one larger one on the right. With that you should have an outline drawing of the phone.
Make sure you are happy with the way everything looks and darken your lines. Do this by either again tracing over them with a pencil or by using a black pen or marker.
Step 6 – Color the Phone
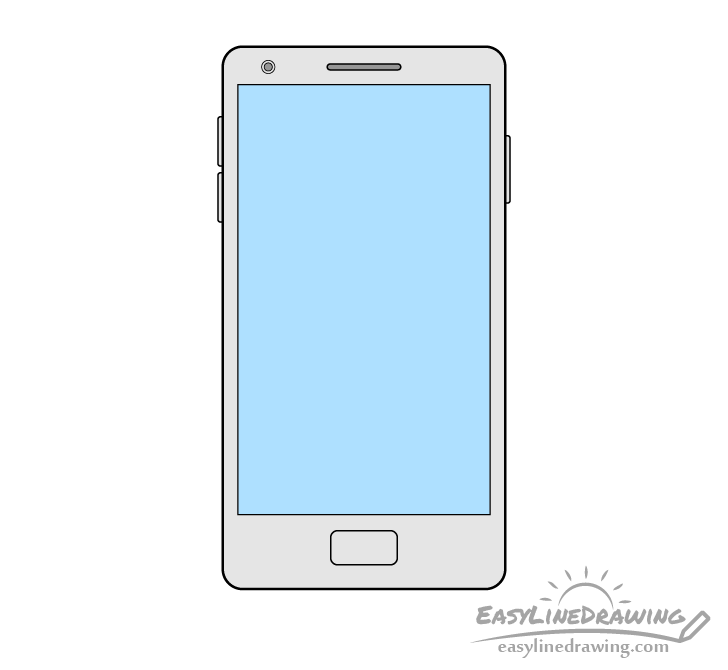
Coloring the phone is quite easy and you can use any medium you like for this (colored pencils, paints, markers, etc…).
In this case the phone will be a light grey, the screen blue and the speaker/inner part of camera a dark grey.
If you would like to use these colors then you can simply again use a regular pencil for the greys and a blue one for the screen.
You can of course also use different colors if you prefer.
Conclusion
This tutorial shows how to draw a fairly generic looking phone with some of the more common parts that mobile phones tend to have. If you like yo u can also try and change up the design as you like by adding/removing or changing the look of it’s various parts.
If you found this tutorial interesting you may also wish to try:
- How to Draw a Monitor Step by Step
- How to Draw a Light Bulb Step by Step
- How to Draw a Pen Step by Step
- How to Draw a Pencil Step by Step
- How to Draw Headphones Step by Step
- How to Draw a Bow Tie Step by Step


")


