How to Draw Headphones Step by Step
This six step tutorial shows how to draw headphones. It provides easy to follow illustrated examples with quick explanations for each of them.
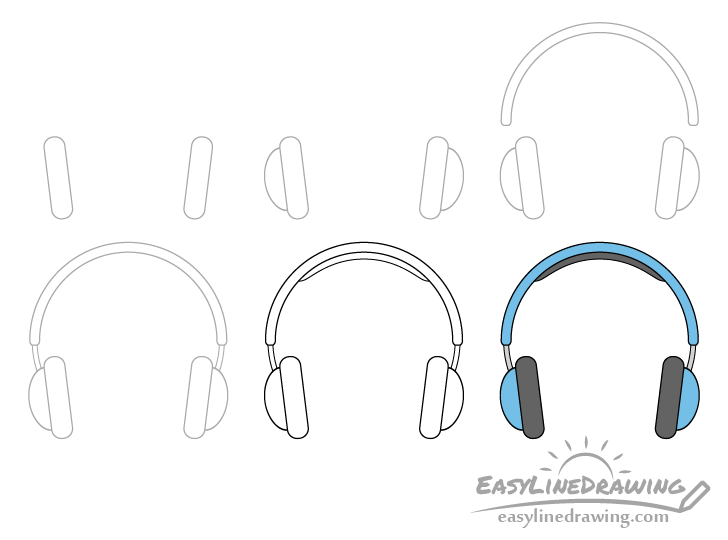
The headphones in the example will have a fairly standard design with the parts commonly found on such items. You can see a preview of the drawing steps for them above.
Start the drawing in pencil and make light lines that can easily be erased in case you make a mistake. You can darken them later on with a black pen or marker.
Step 1 – Draw the Outline of the Ear Pads of the Headphones
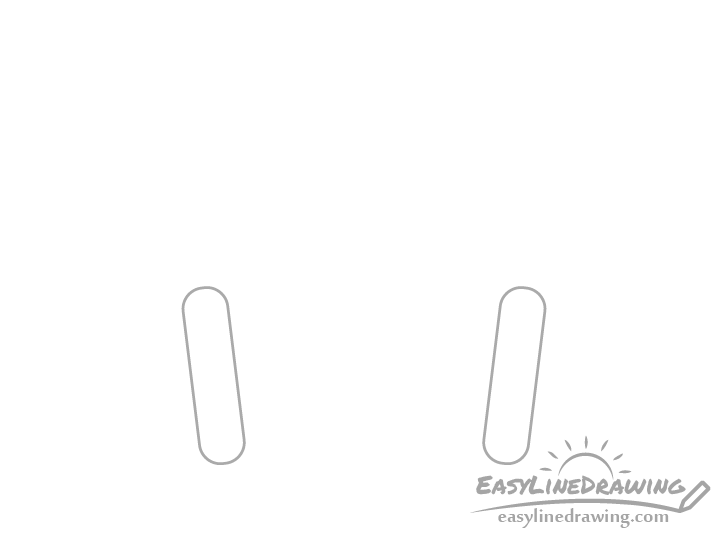
Begin the drawing with the ear pads. Make them fairly thick with rounded tops and bottoms. Draw each one on a slight angle as shown in the above example.
Be sure to leave plenty of room at the top of the page/drawing area for the headband.
Step 2 – Draw the Ear Cups
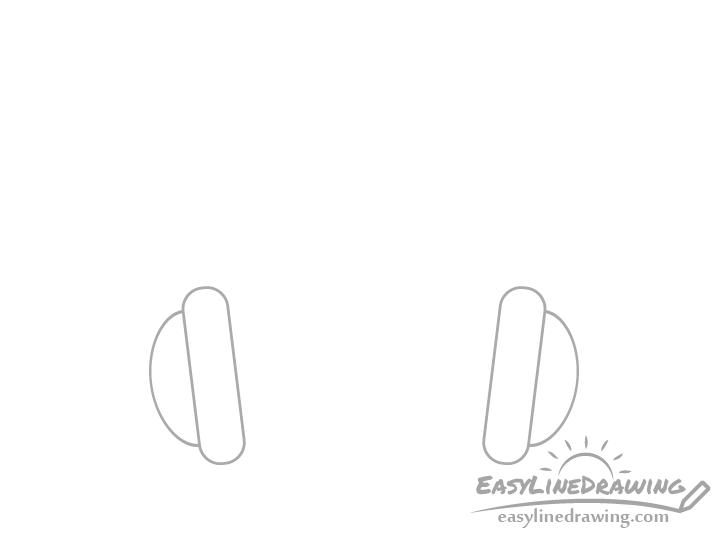
Onto the outer sides of the ear pads add the ear cups. Make them smaller in size so that they only reach to about the part of the pads where those start to curve. You can outline each of them with just one curved line.
Step 3 – Draw the Headband

Draw the headband shaped pretty much like a half-circle. Make it fairly thin and consistent in width throughout most of it’s length but slightly narrower towards the bottom ends.
Step 4 – Draw the Sliders

Connect the ear cups to the headband with a pair sliders (the parts that adjust it’s height). You can draw each one with just two lines. Make them slightly curved in shape.
Step 5 – Draw the Head Padding & Finish the Line Drawing

At the top of the headband add a bit of padding that many headsets tend to have in that area. Make it slightly thicker in the middle and thinner towards each side as shown in the example.
Once done confirm that your drawing looks the way you want and trace over it with a black pen, marker or darker pencil lines.
Step 6 – Color the Headphones
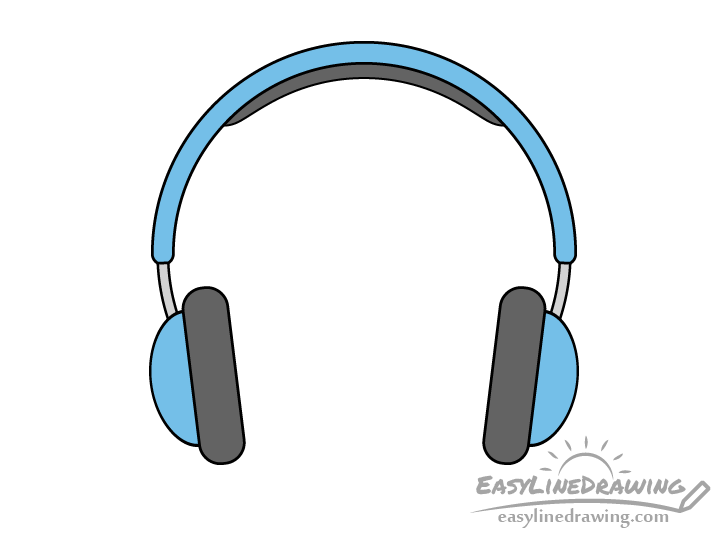
To color the headphones you can make the leather parts like the ear pads and head padding a dark grey/black (as is very common), the sliders a light grey (they will be metallic in this case) and the rest of the headphone any color you like. In this example it will be a fairly light blue.
You can use whatever medium you like to color the headphones such as markers, paints, colored pencils or a mix of several of them.
Once done coloring you should be finished with the drawing.
Conclusion
This tutorial shows how to draw headphones with a fairly common design and the features that most headphones tend to have. Due to the relatively simple shapes that these are comprised of they should not be too difficult to draw even if you are a beginner. Hopefully you’ve found the instructions helpful.
For other similar tutorials also see:
- How to Draw a Monitor Step by Step
- How to Draw a Mobile Phone Step by Step
- How to Draw a Light Bulb Step by Step
- How to Draw a Kettle Step by Step
- How to Draw a Battery Step by Step
- How to Draw a Pillow Step by Step

")


