How to Draw a Kettle Step by Step
This tutorial shows an easy way to draw an electric kettle in six steps with detailed illustrated examples and short and simple instructions.
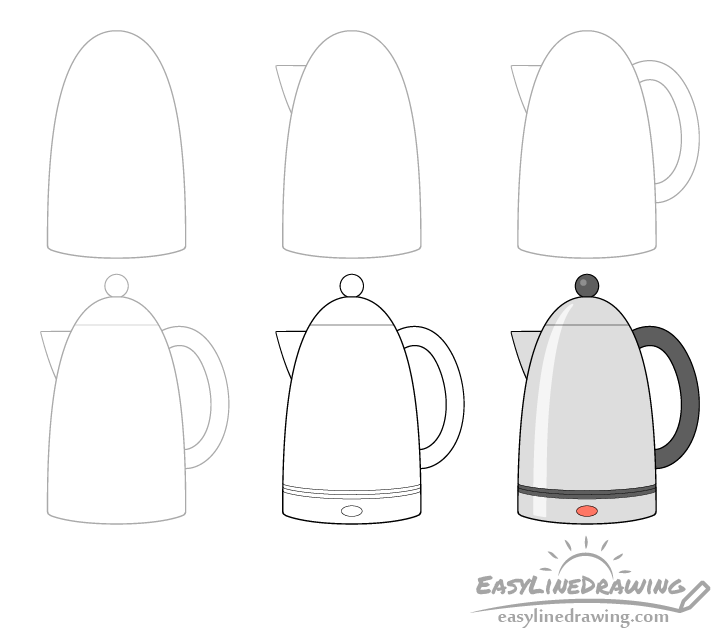
The kettle in this example has a fairly basic design with parts that most electric kettle generally have. You can see the drawing steps for it in the image above.
Start the tutorial in pencil and make light lines that you can easily erase in case you make a mistake. You can darken them later on with a black pen or marker.
For drawing a teapot see:
How to Draw a Teapot Step by Step
Step 1 – Draw an Outline of the Main Body of the Kettle
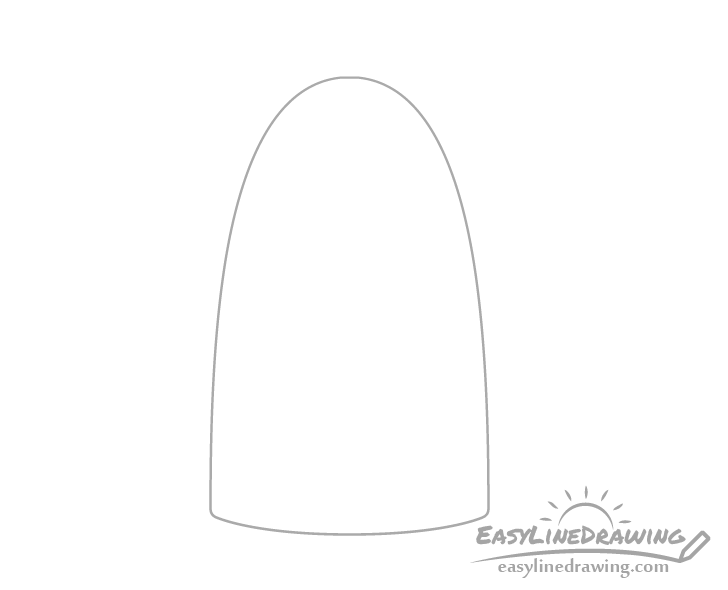
Begin with the outline the main part of the kettle (that holds the water). Draw it’s upper shape with pretty much one continuous curve and make it wider at the bottom and narrower towards the top.
Draw the bottom as a curve as well with small rounded corners corners on the sides.
Step 2 – Add the Snout
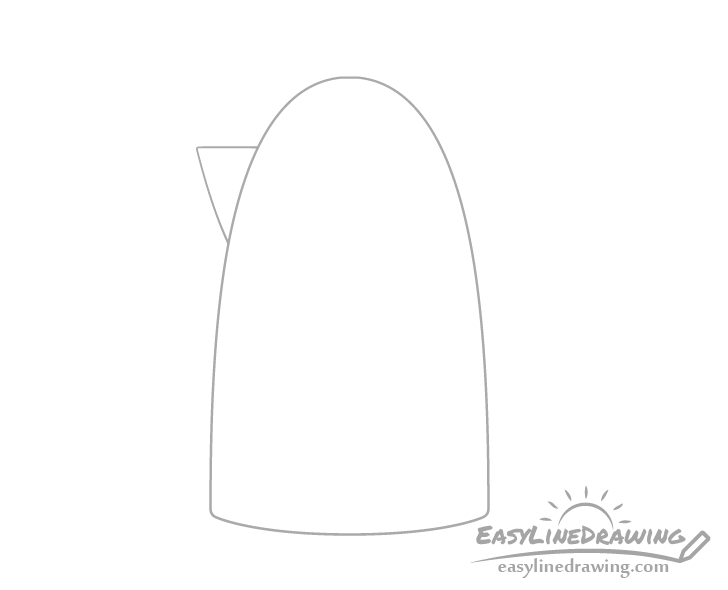
Coming out of one side of the kettle add the snout, again as shown in the example. Make its bottom lightly curved and the top pretty much flat. You can also make it’s tip just very slightly rounded so that it doesn’t look too sharp.
Step 3 – Add the Handle
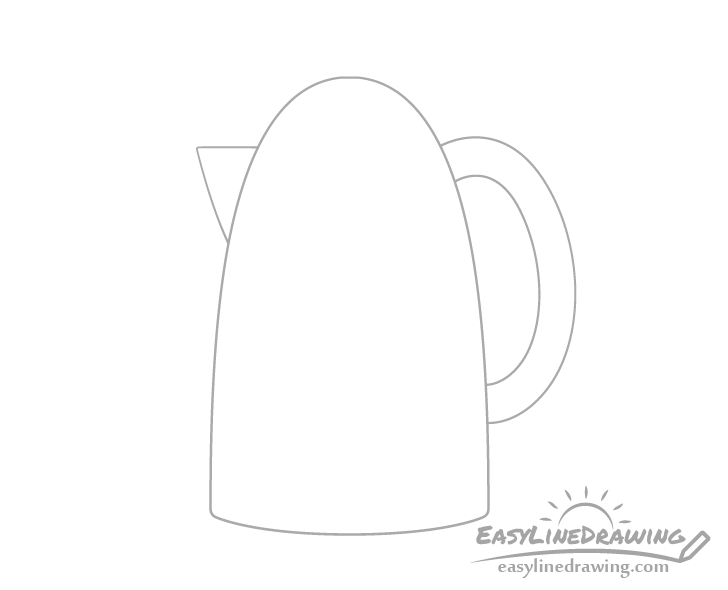
Opposite the snout draw the handle. Make it fairly tall and thick as in the example.
Step 4 – Add the Lid
At the top of the kettle add the lid. First draw a straight horizontal line that shows the separation from it’s main body. Next add the little handle that helps lift the lid. You can simply make it round like a sphere/circle.
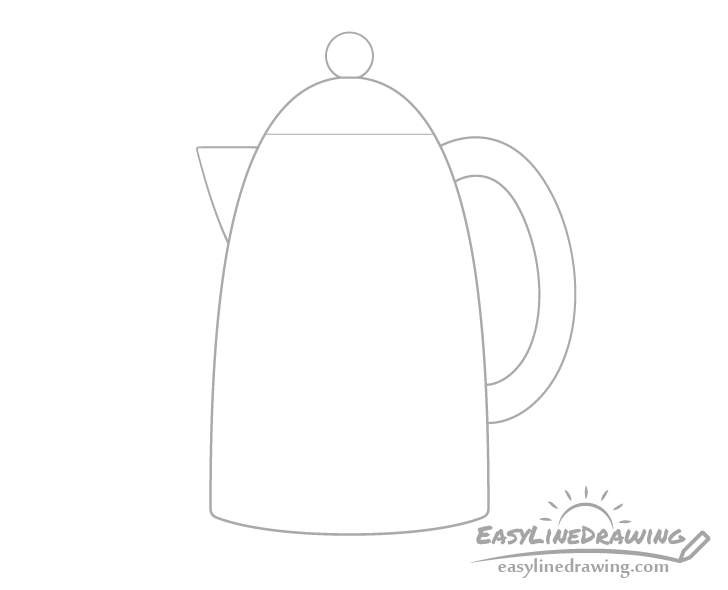
Step 5 – Separate the Base & Finish the Line Drawing
Electric kettles usually have a separate part at the bottom. You can show this by first drawing one curved line as in the example and then adding two more similar lines above and below it.
These are to define the thin plastic parts that are attached to the bottom of the kettle and the top of the base. Afterwards draw a little oval in the middle of the plate for the on/off indicator.
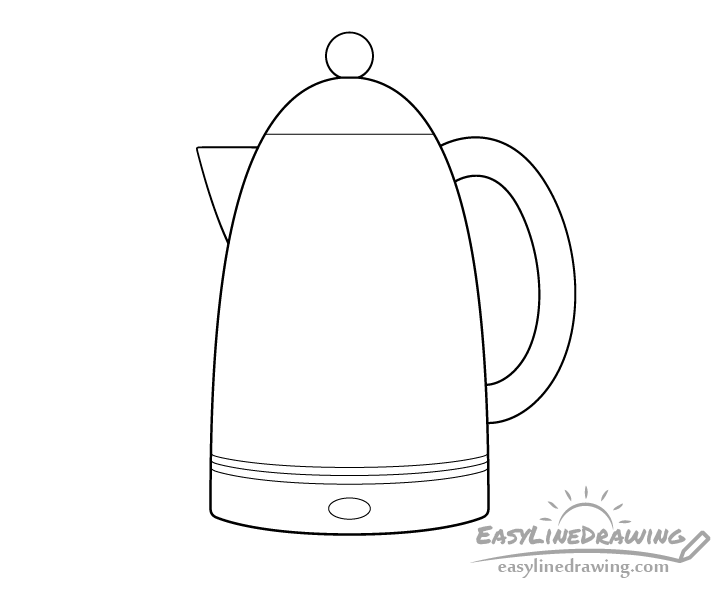
Once done adding these parts trace over your drawing with a black pen, marker or darker pencil lines.
Step 6 – Color the Kettle
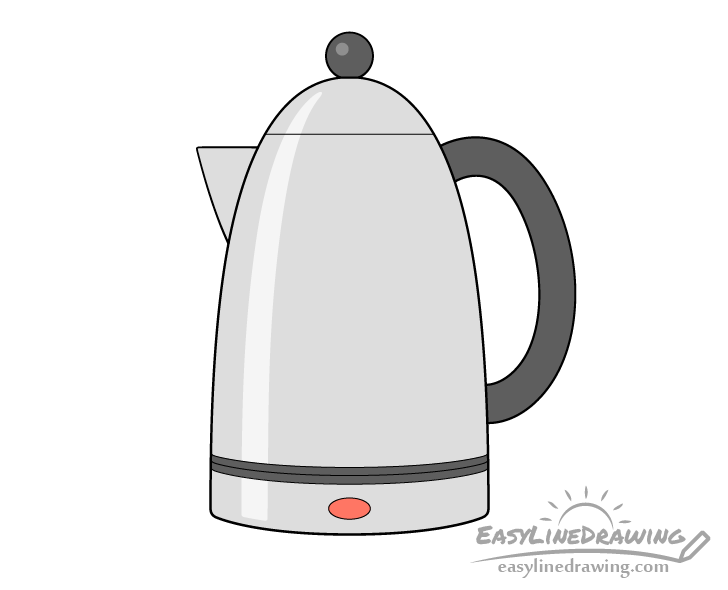
To color the kettle make the metallic bits a light grey and the plastic parts a dark grey or black. Make the little power indicator red. As there is so much grey you could even color/shade the entire thing (excluding the power button) with a regular pencil creating the darker parts by simply pressing harder on it as you shade.
You can also give the kettle a long highlight running along one of it’s side (with a curve that somewhat follows the shape of the kettle) and a small round highlight on the handle of the lid. Lightly outline these with a regular pencil before shading/coloring the kettle. You can then also lightly go over each of the highlights with grey as well so that they don’t look overly bright (especially the one on the lid handle).
Conclusion
The kettle drawing in this example is quite simple but at the same time definitely looks like what it’s supposed to be. By giving it a shape that is very characteristic of such appliances along with the appropriate you can easily tell that it’s a metallic electric kettle.
For more similar tutorials also see:
- How to Draw a Tea Bag Step by Step
- How to Draw a Coffee Cup Step by Step
- How to Draw Yogurt Step by Step
- How to Draw Headphones Step by Step
- How to Draw a Mug Step by Step
- How to Draw a Battery Step by Step