How to Draw a Tea Bag Step by Step
This tutorial shows how to draw a tea bag in eight steps. It provides easy to follow examples and short and simple instructions.
The tea bag in this example is a fairly common type with similar ones used for many brands of tea. You can see a preview of the drawing steps for it in the image above.
For drawing a tea pot see:
How to Draw a Teapot Step by Step
Start the drawing in pencil and make light lines in case you make a mistake. You can darken them once you have all parts of the tea bag outlined by using black pen or marker.
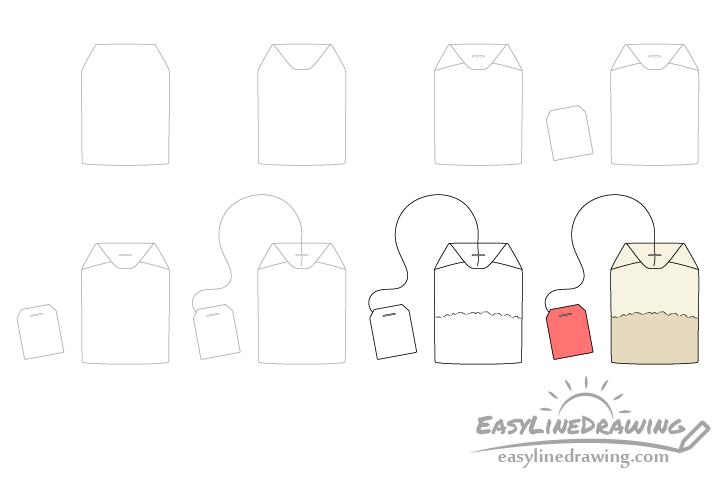
Step 1 – Draw an Outline of the Tea Bag
Begin the drawing by outlining the tea bag’s main shape. Draw it’s sides with a pair of straight lines and define it’s bottom with a light curve. Make the bag’s section narrower as it goes up and define the very top with a very light curve. The end result should look somewhat like a large rectangle a smaller section that looks a bit like the roof of a house sitting on top of it.
For drawing an actual house see:
How to Draw a House Step by Step
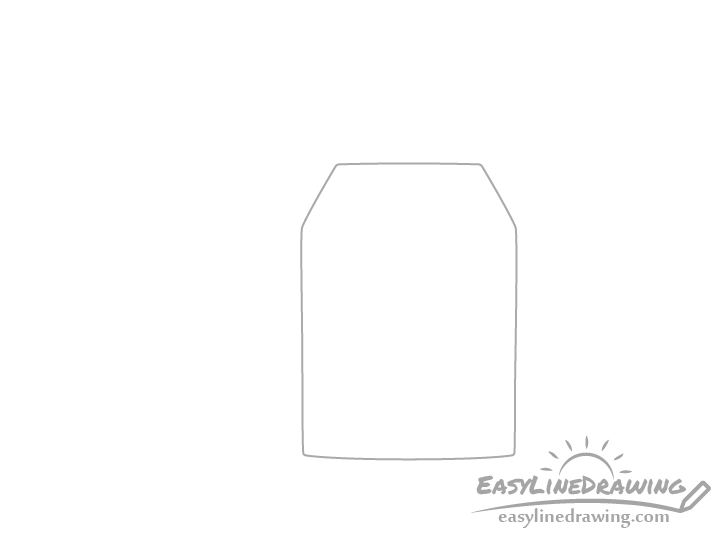
Step 2 – Draw to Top Fold
At the top of the bag add a fold as shown in the example. Draw it to look somewhat like the seal part of an envelope.
For drawing an envelope see:
How to Drawn an Envelope Step by Step
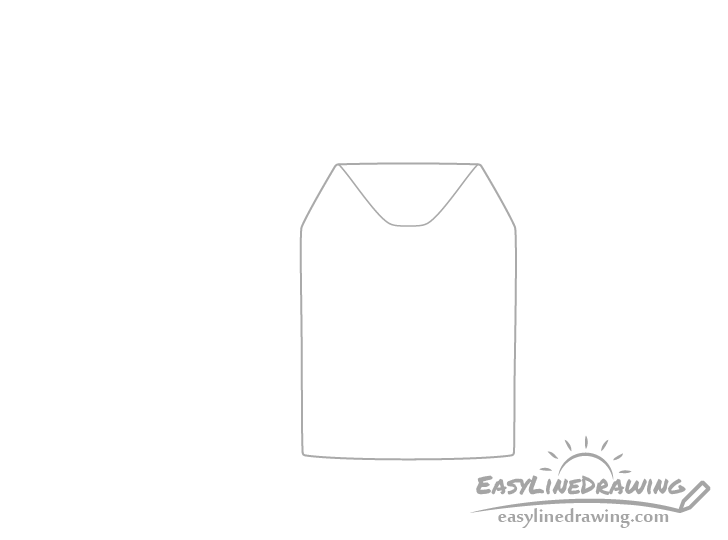
Step 3 – Draw the Side Folds

Add two more folds on the sides of the previous one. You can show them with just one line each. Draw these folds running from the upper ends of the rectangular part of the bag to behind the bottom end of the fold added in the previous step.
Step 4 – Draw the Tag
Besides the bag draw the tag. Make it’s shape similar to that of the tea bag but define it with straight lines (no curves).
Step 5 – Draw the Staples
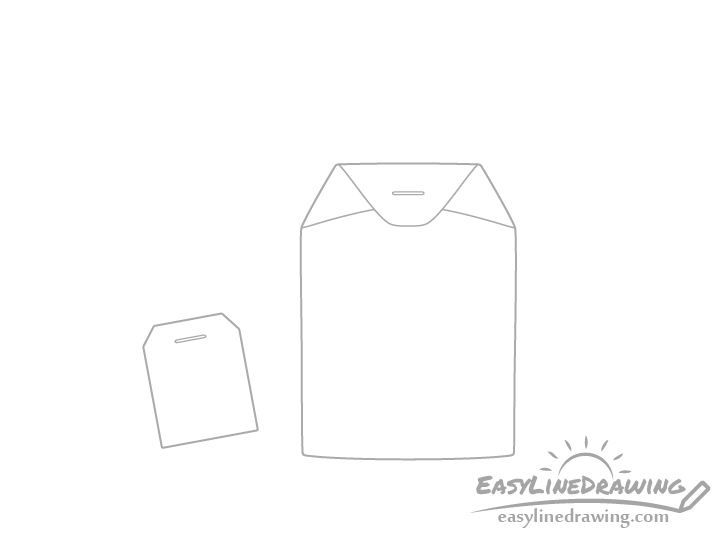
Add a pair of staples. One for the bag and one for the tag positioned as shown above.
Step 6 – Draw the String

Draw a string running between the bag and the tag. Make it go behind the staple on the bag end and into the side of the tag.
Step 7 – Draw the Tea & Finish the Line Drawing
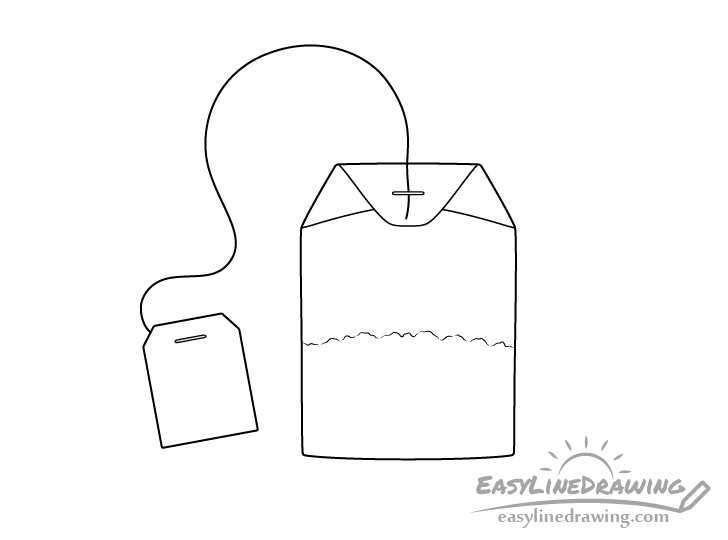
Inside the bag add some tea. Outline it as a bunch of broken up wobbly lines slightly closer to the bottom of the bag than the top.
Once done adding the tea check to see if your drawing looks the way you want. Make any corrections if needed and trace over your lines with a black pen, marker or darken them by pressing harder on the pencil.
Step 8 – Color the Tea Bag
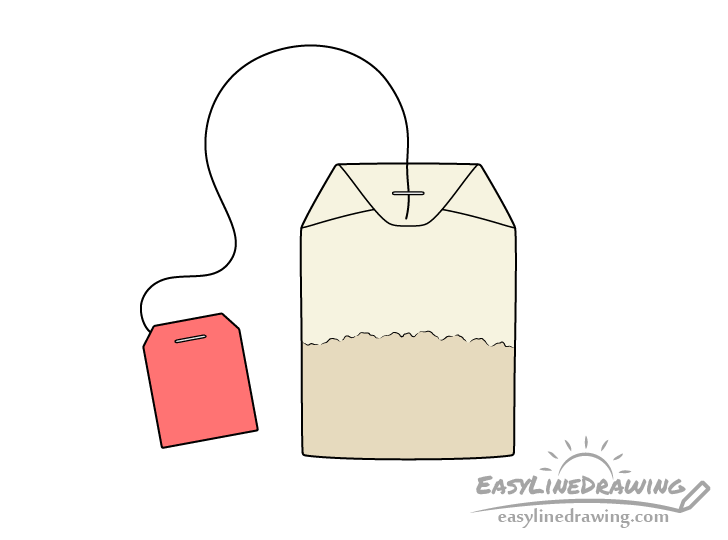
To color the tea bag colored pencils can be a good option. You can first make the entire bag a light yellow/grey and then go over the tea with a darker brown.
In this case the tag is red but you can make it any color you like. For example green can be a good option if you want it to hint at mint or green tea.
Conclusion – Drawing a Tea Bag Can be Quite Easy
There are a few different kinds of tea bags out there. This tutorial shows how to draw what is probably the most common type in a slightly stylized/simplified way. If you want to draw a bag with a different design you can use a similar approach. Start with it’s larger parts and work down to the smaller details. Once you have the main shape outlined it can be much easier to position the smaller parts of the drawing.
For more similar guides also see:
- How to Draw a Coffee Cup Step by Step
- How to Draw a Can of Pop Step by Step
- How to Draw a Bottle of Water Step by Step
- How to Draw a Champagne Glass in Four Step
- How to Draw a Bowl of Soup Step by Step


")


