How to Draw a Can of Pop Step by Step
This tutorial shows how to draw a can of pop in six steps. It includes simple illustrated examples with basic explanations.
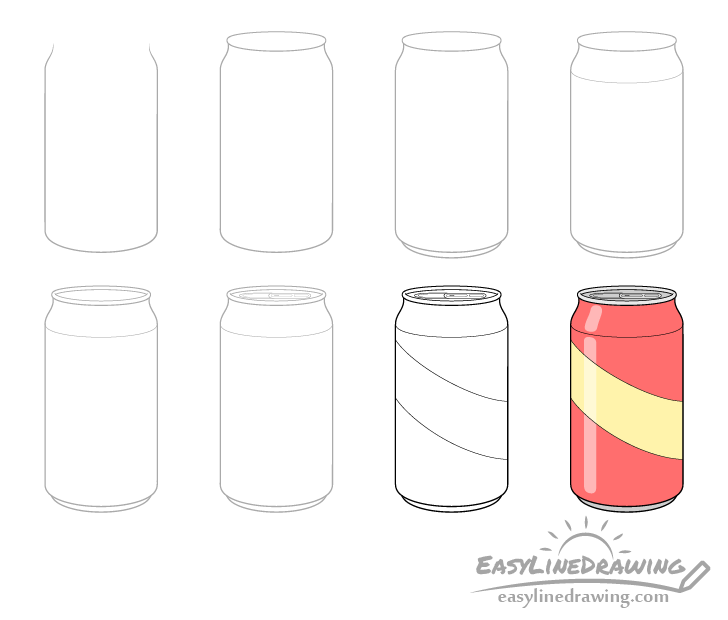
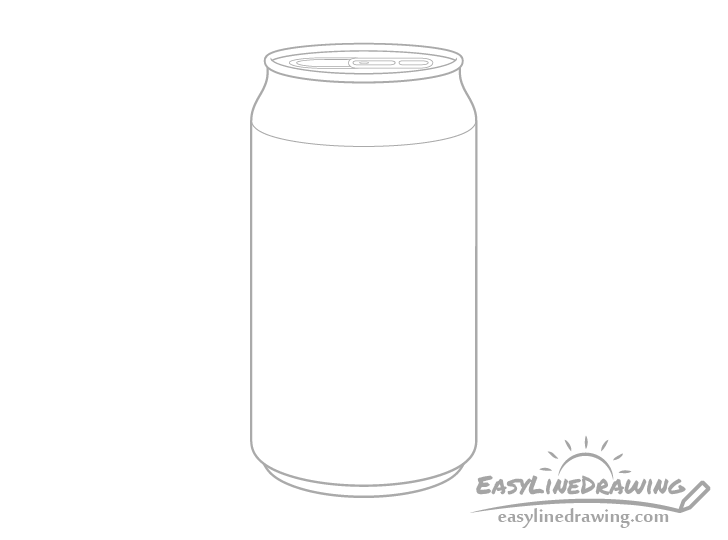
The can in this tutorial will be a fairly standard/common looking one that you tend to see for a large variety of beverages. A preview of the drawing steps for it is shown in the above examples.
Start the tutorial in pencil and make light lines that you can easily erase in case you make a mistake. You can trace over them later on with a black pen or marker.
Step 1 – Draw the Main Part of the Pop Can
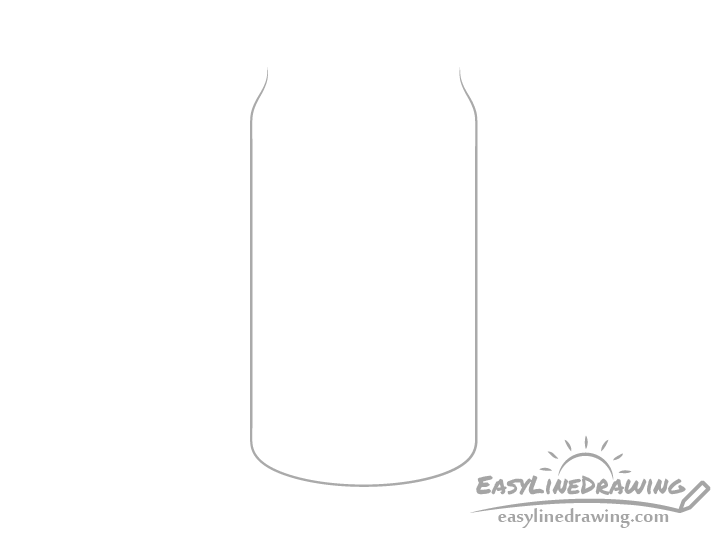
Begin by outlining the main part of the can. Give it a slightly thinner area at the top followed by a pair of straight lines for it’s sides and finally a rounded bottom. Leave the top open.
Step 2 – Draw the Top
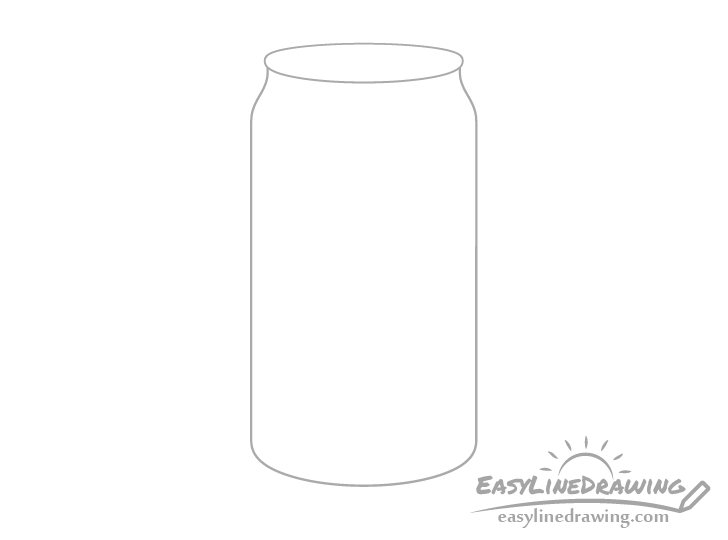
At the top of the previous shape draw an oval (really a circle viewed on an angle) with a slightly flattened top (less rounded than the bottom). Make it slightly wider than the upper part of the can.
Step 3 – Draw the Bottom
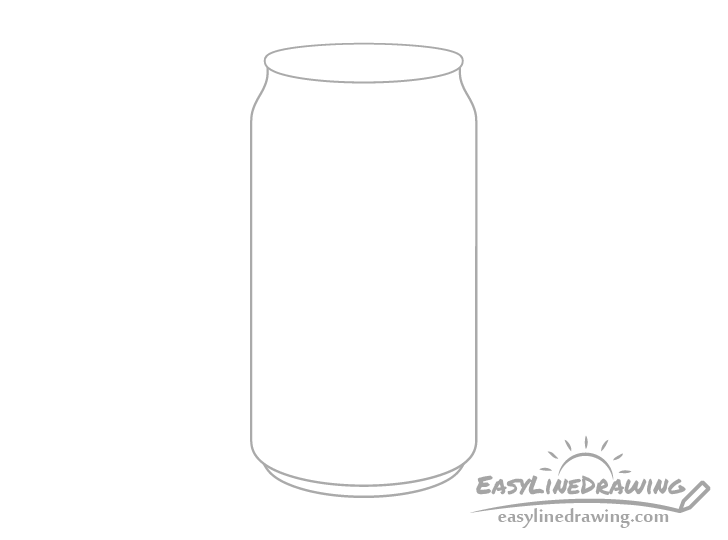
Pop cans often have a short narrower section at the very bottom. You can show this by adding a curve as in the example.
Step 4 – Draw the Shape Line

Add another curved line to where the narrower upper part transitions into the straight sides to help emphasize the shape of the can.
Step 5 – Draw the Ring at the Top

Pop cans usually have a ring around their top. You can outline this as shown in the example above.
Step 6 – Draw the Opening Mechanism
For the last main part of the can draw the opening mechanism. It’s a bit complex so you can see a more detailed breakdown of drawing it below.
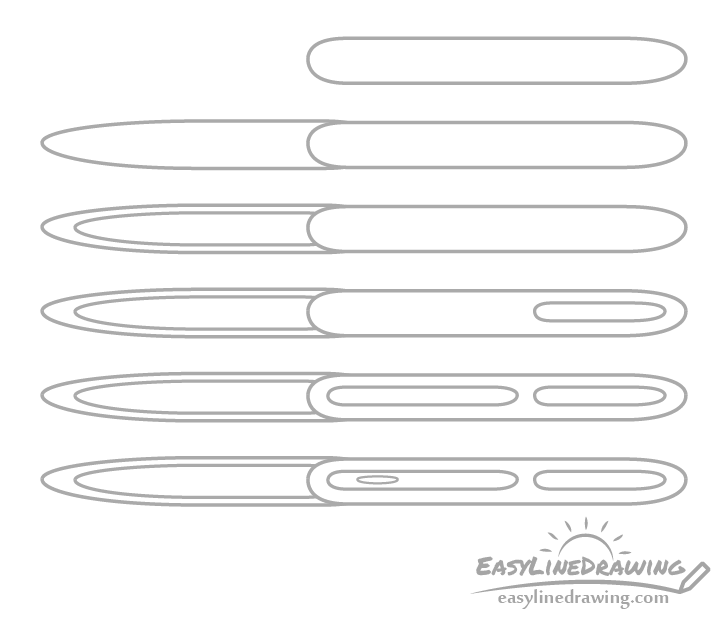
Begin with the larger shapes as shown and then work your way down to the smaller details.
Step 7 – Add a Design & Finish the Line Drawing
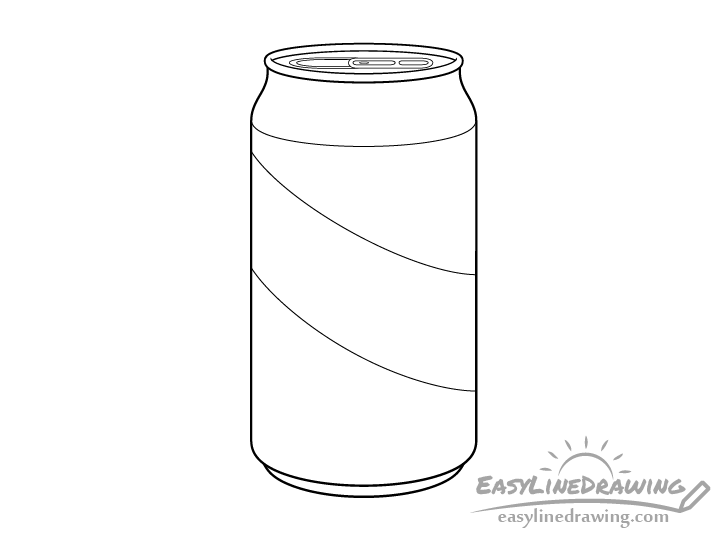
With all of the parts of the can in place you can give it a simple design element. In this case it will just be an angled stripe as shown in the example. If you want to be more creative though you can add other things as well.
Step 8 – Color the Pop Can
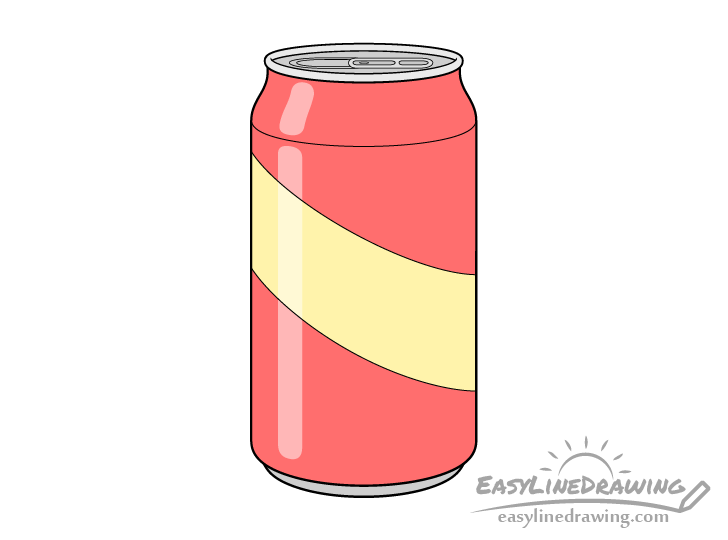
In this case the can will be red and yellow (with grey for the metallic parts) but you can of course use a different color combination if you prefer.
Before coloring the can outline a pair of highlight (light reflections) running along the left side of the can in the example. You can do this very lightly in pencil. At first leave these areas white and simply color around them. Next you can go over the highlights with a lighter version of the colors that they overlap. So if for example a highlight is going over top of the red part of the can you can make it a lighter red/pink.
An easy way to color the can is using colored pencils but you can also mix them with markers and use those for the brighter colors (such as the main red of the can in this case).
You can shade/color the grey/metallic parts with a regular pencil. When adding the greys make the top ring of the can and the little tab of the opening mechanism slightly lighter than the rest.
Conclusion
The shape of the pop can in this tutorial is a fairly common. You can find similar cans being used for a large variety of beverages. Hopefully the provided steps have helped you get a better understanding of how you can draw it.
For more similar tutorials also see:
- How to Draw a Bottle of Water Step by Step
- How to Draw a Glass of Water Step by Step
- How to Draw a Champagne Glass in Four Step
- How to Draw a Coffee Cup Step by Step
- How to Draw Yogurt Step by Step
- How to Draw a Mug Step by Step

")


