How to Draw a Shoe Step by Step
This tutorial shows how to draw a sneaker shoe in six steps. It provides detailed line drawing examples and instructions as well as coloring suggestions
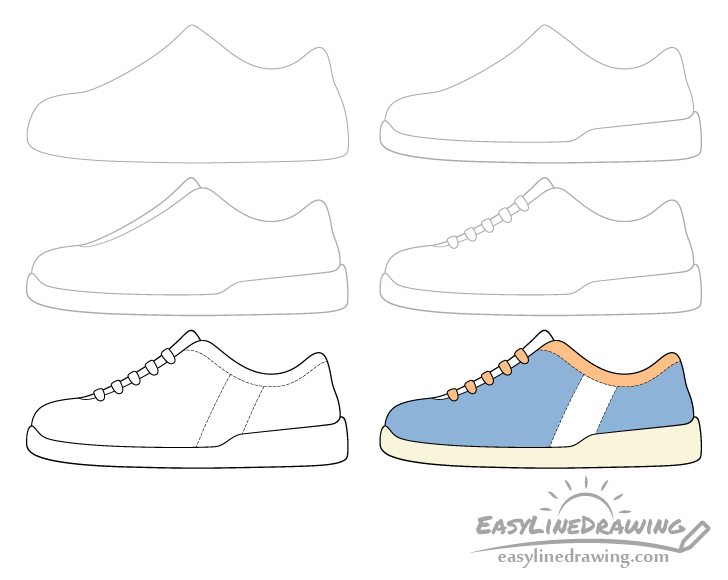
There is a large variety of sneakers out there. In this case the shoe will have a fairly simple design which should make it relatively easy to draw. You can see a preview of the different drawing stages for it above.
Start the tutorial in pencil and make light lines as you will need to erase some small parts of the shoe’s outline in steps two to four. You can darken the lines later on before coloring.
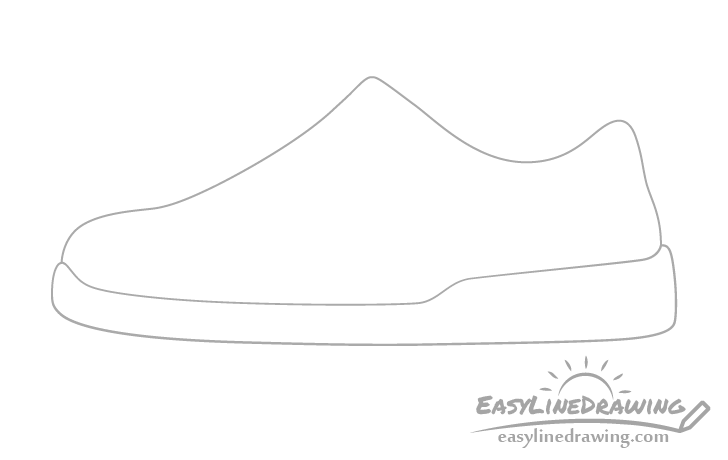
Step 1 – Draw an Outline of the Shoe

Begin the drawing of the sneaker with a simple outline as shown above. This will basically be a silhouette but without some of the smaller details.
The goal is to get it’s general overall shape.
Step 2 – Draw the Sole
Onto the shape from the previous step add the sole. You can erase little bits of the outline at the front/back where it transitions into the shoe.
Make the sole thinner at the front/mid part of the sneaker and thicker at the heel.
Step 3 – Draw the Tongue
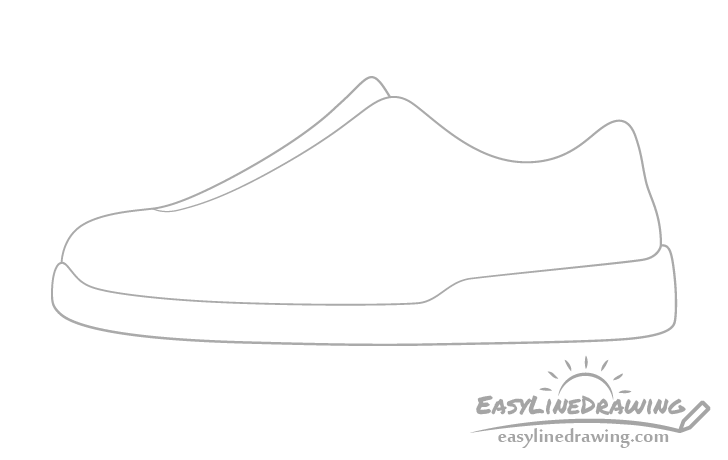
Similar to the sole add the tongue, again erasing a bit of the outline from step one as needed.
Step 4 – Draw the Laces
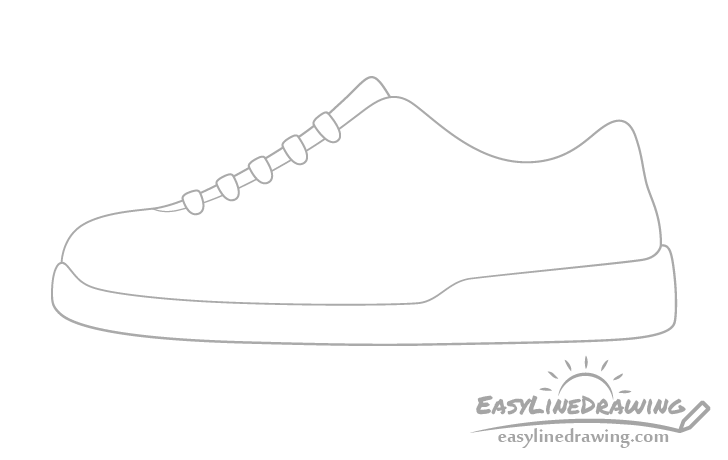
Going across the tongue draw the shoe laces (as shown in the example). You will need to again erase little bits of the drawing where you want to insert the different parts of the lace.
Once done you should have a basic outline of the main parts of the sneaker.
Step 5 – Add the Details & Finish the Line Drawing
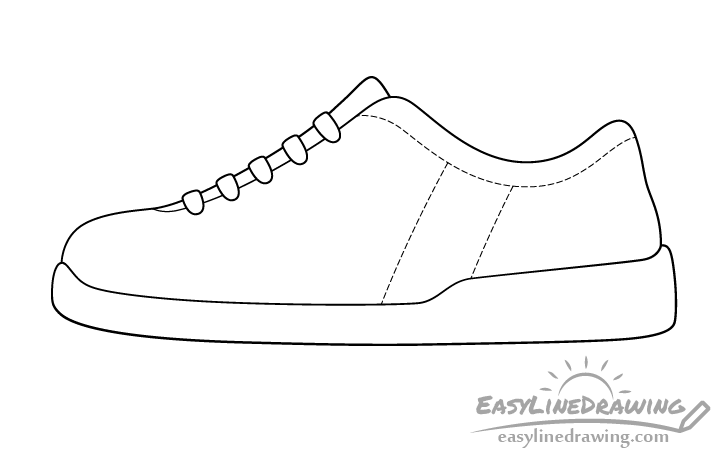
To make the shoe look a little more interesting add a few simple design elements. In this case these will be a sort of “outline” around the opening for the foot (the collar) as well as a short stripe down it’s side.
Outline these areas with a solid and very light pencil lines that you can then use as guides to draw little dashes along their paths. You can create the dashes with either a black pen, marker or darker pencil lines. Also darken the rest of your lines with whatever option you choose for the dashes. Just be sure you are happy with your drawing before tracing over it.
Step 6 – Color the Shoe
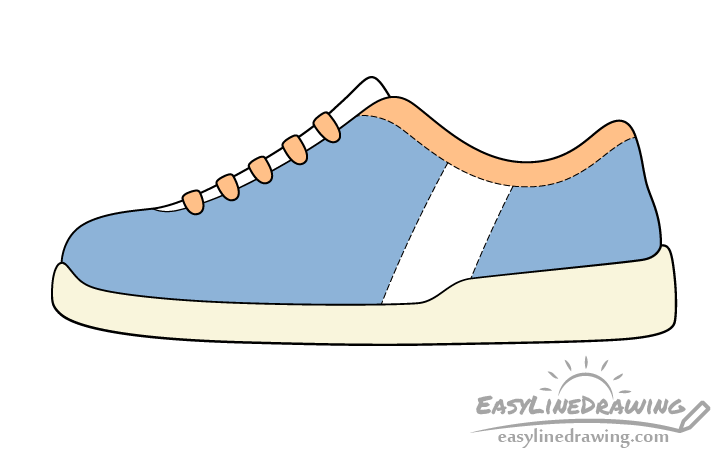
You can use whatever medium you like (or a mix of several) for coloring the sneaker (markers, paints, colored pencils, etc…). In this case the main part of the shoe will be blue, the sole a very light yellow and the laces/collar orange. You can leave the tongue and stripe white.
Conclusion
There are many variations of sneakers. The example in this tutorial shows one with a simple design and a nice combination of colors. You can of course also tweak/change these things as you like.
For more similar tutorials also try some of the following:
- How to Draw a High Heel Shoe Step by Step
- How to Draw a Pair of Socks Step by Step
- How to Draw a Baseball Cap Step by Step
- How to Draw Headphones Step by Step
- How to Draw a Briefcase in Six Steps
- How to Draw a Sponge Step by Step


")


