How to Draw a Briefcase in Six Steps
This tutorial shows how to draw a briefcase, the kind that is usually used for work and carrying things such as documents.
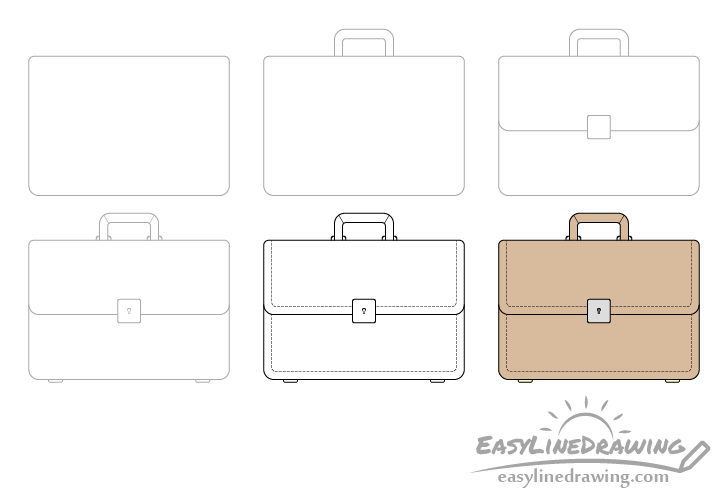
You can see the drawing stages that are included in the tutorial in the preview above. Though the briefcase in this example has a good amount of detail overall it should be fairly easy to draw if you just follow along with the instructions.
Start the tutorial in pencil and make light lines that are easy to erase in case you make a mistake. You can darken them later on with a black pen or marker.
Step 1 – Outline the Main Body of the Briefcase
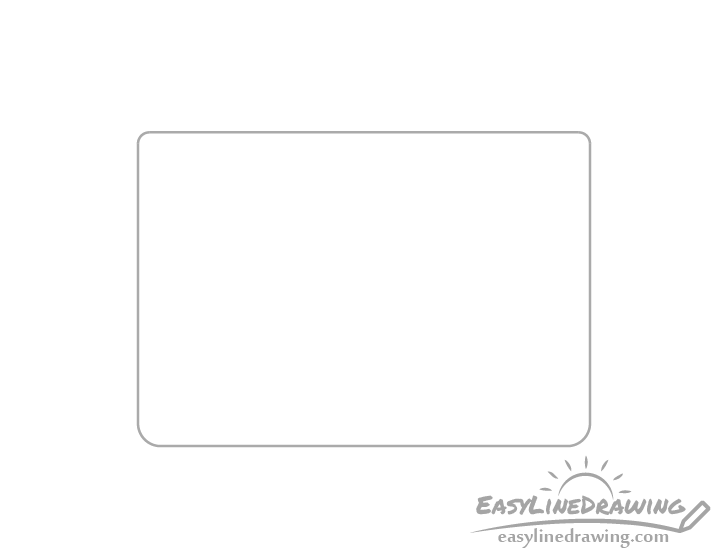
Begin by drawing the main part of the briefcase which should be rectangular in shape as shown in the example above. Give it rounded corners on all ends but make the ones on the bottom larger/more rounded (bigger corner radius).
Step 2 – Draw the Handle
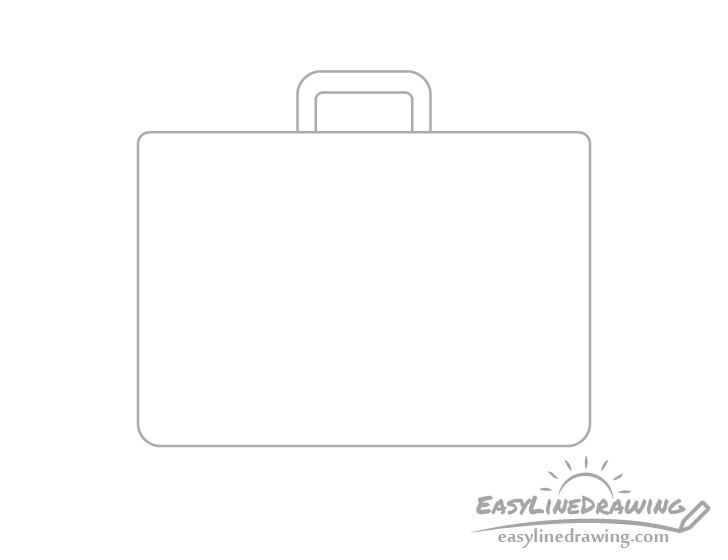
At the top of the briefcase add the handle. You can make it just a tiny bit thicker at the grip area than on the sides.
Step 3 – Draw the Flap
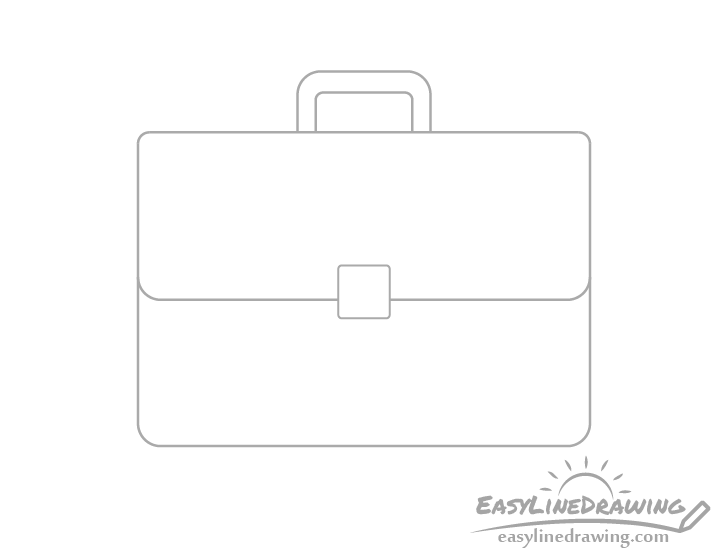
Going down to about the middle of the briefcase draw the flap (part hat opens/closes it). Give it rounded corners on the sides and a lock in the middle.
Draw the lock to be slightly vertically rectangular in shape and give it slightly rounded corners as well.
Step 4 – Draw the Smaller Details

With the major parts of the briefcase done you can add some smaller details. These should be as follows:
- Outline the grip area of the handle
- Draw the little parts around the handle that attach it to the briefcase
- Add the keyhole to the lock
- Attach a pair of little feet to the bottom
Step 5 – Draw the Stitching & Finish the Line Drawing
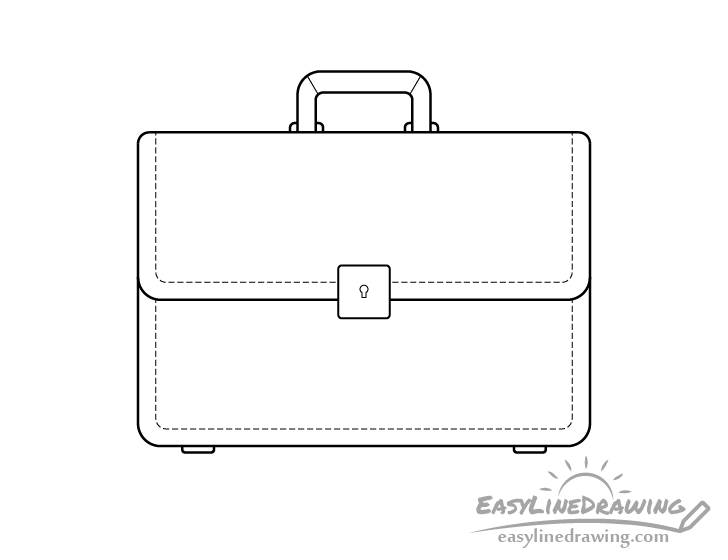
To finish the drawing you can first give the briefcase some stitching that runs along the sides of its main body and flap (as shown in the example). To do this first draw the lines that the stitches will be running along very light in pencil (just dark enough so you can barely see them).
Once done with the above trace over your drawing with a black pen, marker or darker pencil lines. Also use whatever one of these you choose to make the little dashes along the light pencil lines.
Step 6 – Color the Briefcase

To color the briefcase you can choose whatever color and method you like (paints, colored pencils, markers, etc…). In this case it will be a light brown to make it look more like leather.
The little parts that hold the handle and the lock will be grey to show that they are metallic and the little feet will be yellow. You can also make the keyhole a dark grey or black.
The coloring process itself should be fairly simple. Just fill in each area with it’s corresponding color and you should have a finished briefcase drawing once done.
Conclusion
This tutorial shows how to draw one of the more common varieties of briefcases, one with a flap. It’s design has some details to it but overall is still fairly simple and should be reasonably easy to draw.
If you found the tutorial helpful and would like to later try some more like it see the following:
- How to Draw Glasses Step by Step
- How to Draw a Pen Step by Step
- How to Draw Paper Step by Step
- How to Draw a Sack of Money Step by Step


")


