How to Draw a Toothbrush Step by Step
This tutorial shows how to draw a common toothbrush with toothpaste on it in six steps. It provides illustrated examples and quick instructions to help.

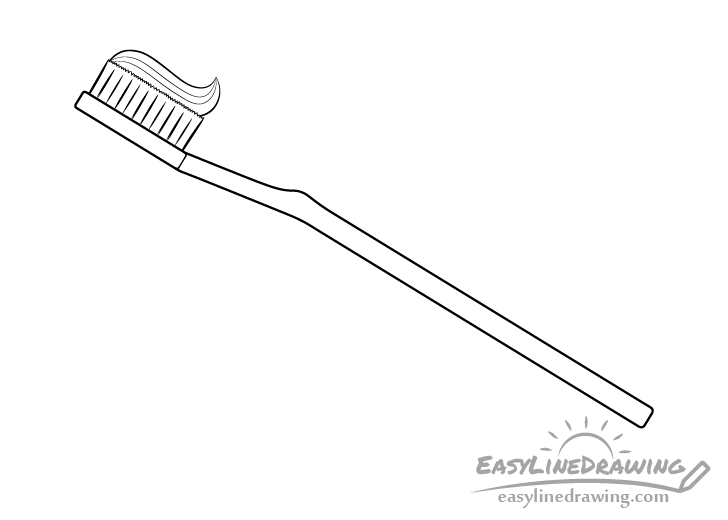
You can see a preview of the drawing steps for the toothbrush in the picture above.
The shape of the toothbrush is fairly simple but you may want to use a ruler to help you draw the long straight lines of the handle. You should also start the drawing in pencil and make light lines that are easy to erase in case you make a mistake. You can darken them later with a black pen or marker.
Step 1 – Draw the Head of the Toothbrush
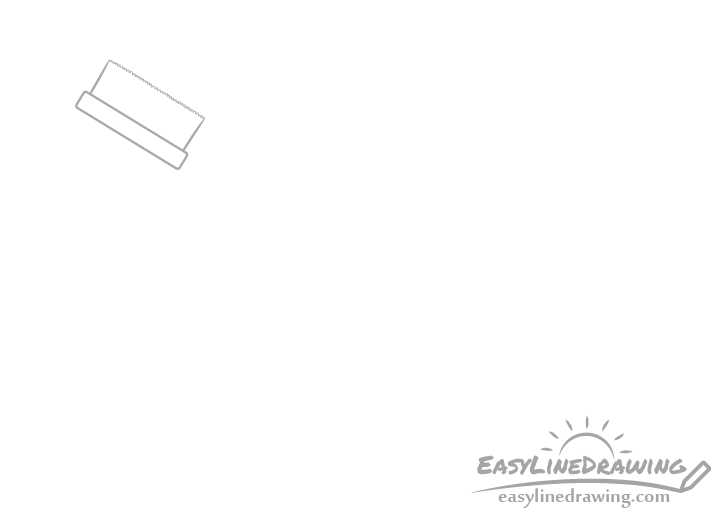
Begin with a simple outline of the head of the brush. First draw a long rectangle with slightly rounded corners as the base and coming out of that add the bristles.
Outline the bristles with a jagged/bump line for their tips and two lightly outwards curved lines on the sides.
Step 2 – Draw the Handle
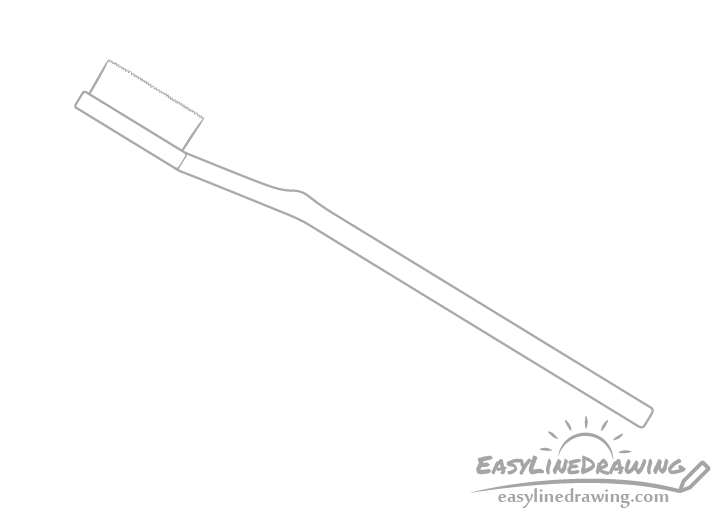
Onto the head add the handle starting with the slightly thinner neck that then transitions into a little bump followed by a long and straight handle.
If you are having trouble drawing the long straight lines of the handle you may wish to use a ruler to help you. Of course if you want to try and improve your drawing skills it’s better to try and make them without it.
Step 3 – Draw the Bristle Tufts
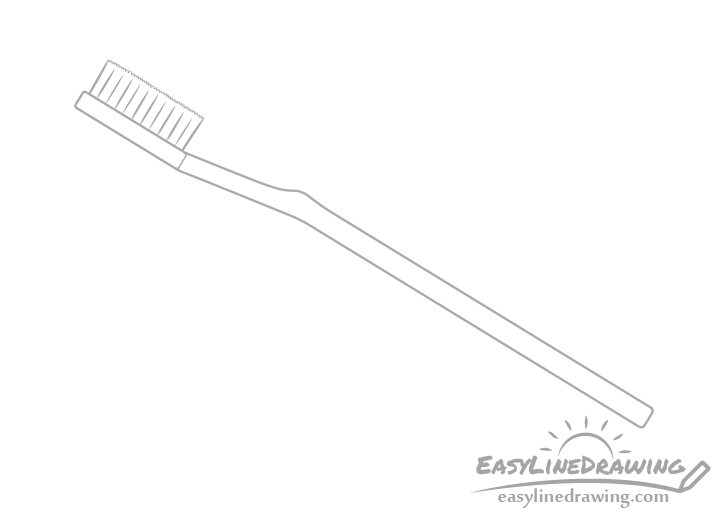
Add some hints of the bristle tufts (the little clumps the bristles are separated into) by drawing a few straight lines of slightly different length through the bristle area.
The spacing of these lines does not need to be perfect but try and keep it somewhat even so that you don’t get sections that are too far apart or too close together.
Step 4 – Draw the Toothpaste
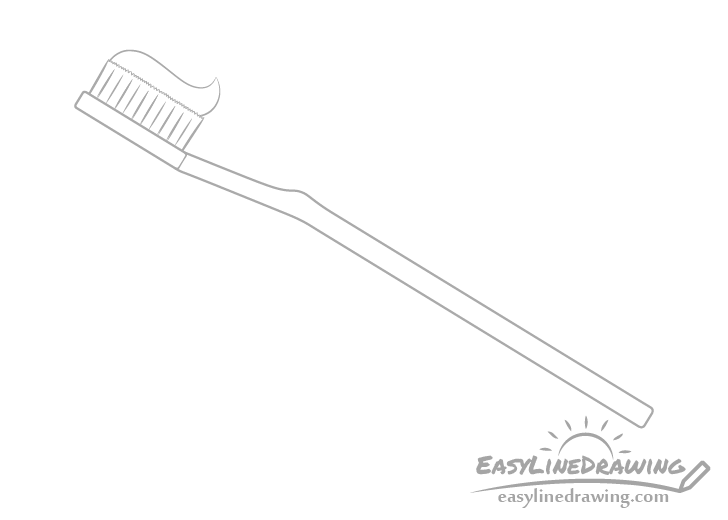
On top of the toothbrush add some toothpaste. Start its outline sa smooth curve that goes up from the bristles. This curve should eventually go in the opposite direction and end with a sharp looking tip (as shown in the example).
For drawing an entire tube of toothpaste see:
How to Draw Tooth Paste Step by Step
Step 5 – Draw the Toothpaste Stripe & Finish the Line Drawing
Toothpaste sometimes has different lines of color running through it. To make the drawing look more interesting you can add one of these as well.
Draw it running pretty much through the middle of the paste going from one end to another. It’s shape should pretty much follow the overall curve of the toothpaste.
Once done drawing the little stripe you can trace over your drawing with a black pen or maker. If you don’t have one handy simple darken your lines with the pencil.
You can also optionally make some of the outlines such as that for the brush handle thicker and others like the ones for the toothpaste thinner. You can also make some of the lines for the bristle tufts thicker than others to make the spacing seem just a tiny bit uneven.
Step 6 – Color the Toothbrush
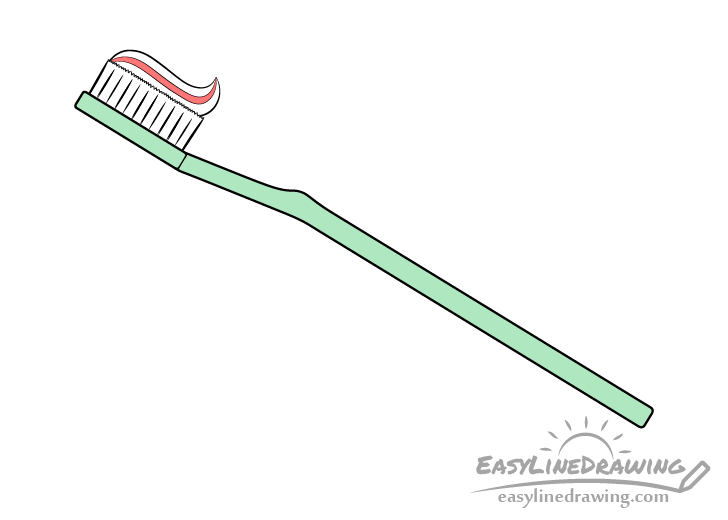
To color the toothbrush you can use whatever option you prefer (paints, markers, colored pencils, etc…).
There are many color combinations that you could use but in this case the two colors will be green and red. These go well together and are also fairly common for both brushes and toothpaste.
The green will be for the handle and the red for the stripe in the paste.
Once done coloring you should be finished with the drawing.
Conclusion
A common toothbrush without any of the more complex parts (such as those an electric one may have) is fairly easy to draw. If you can of course experiment for yourself and try and change up the design of the brush to make it more complex.
If you like this tutorial also try:
- How to Draw Hand Sanitizer Step by Step
- How to Draw a Baseball Cap Step by Step
- How to Draw a T-Shirt Step by Step
- How to Draw Socks Step by Step
- How to Draw Glasses Step by Step
- How to Draw a Shirt Step by Step


