How to Draw a Shirt Step by Step
This tutorial show how to draw a dress shirt in six steps. It provides easy to follow examples and simple explanations of the drawing process.
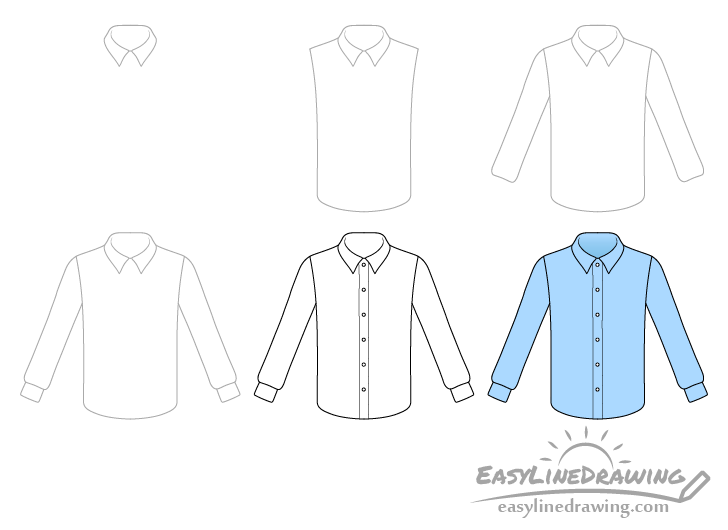
The examples in this tutorial has a simple design that is very common for shirts of this type. You can see a preview of the drawing steps for it above.
Start the tutorial in pencil and make light lines that are easy to erase in case you need to make a correction. You can darken them later on with a black pen/marker.
For drawing a T-shirt see:
How to Draw a T-Shirt Step by Step
Step 1 – Draw the Collar of the Shirt

Begin by drawing the dress shirt’s collar.
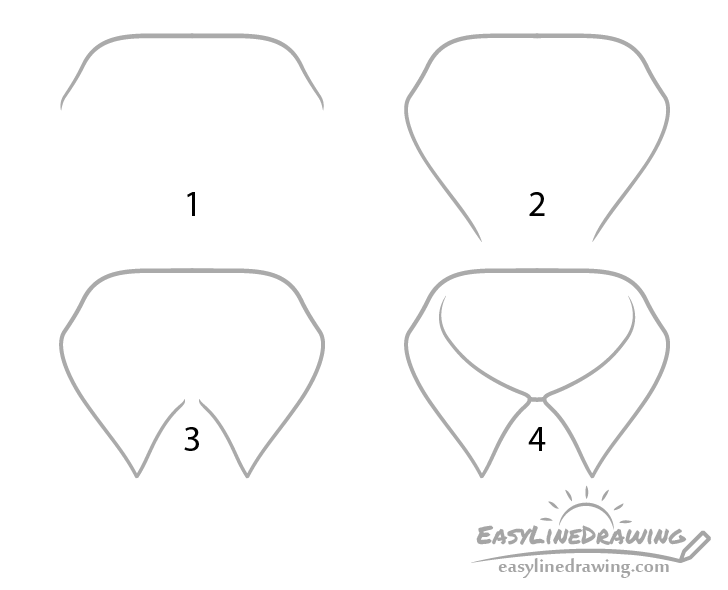
You can see the drawing steps for it in the example above.
Begin with an outlined of it’s top. Next draw the sides sides followed by the lower part of the inner outline and then the upper part. You can also connect the two sides of the collar with a short line.
Step 2 – Draw the “Vest”

Coming out of the collar add the shoulders followed by the sides and then the bottom of the main part of the shirt. At this stage it should basically look like a vest when done.
Step 3 – Draw the Sleeves
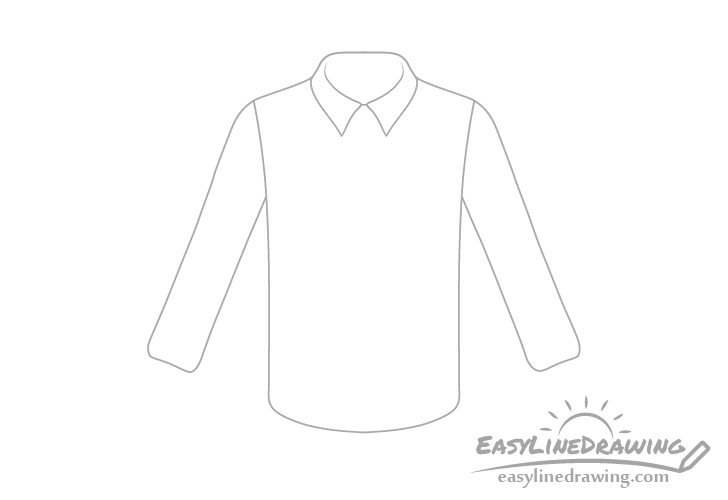
Add a pair of sleeves coming out of each side of the “vest” from the previous step. Be careful not to make them too long as you will also want to add the cuffs in the next step.
Step 4 – Draw the Cuffs
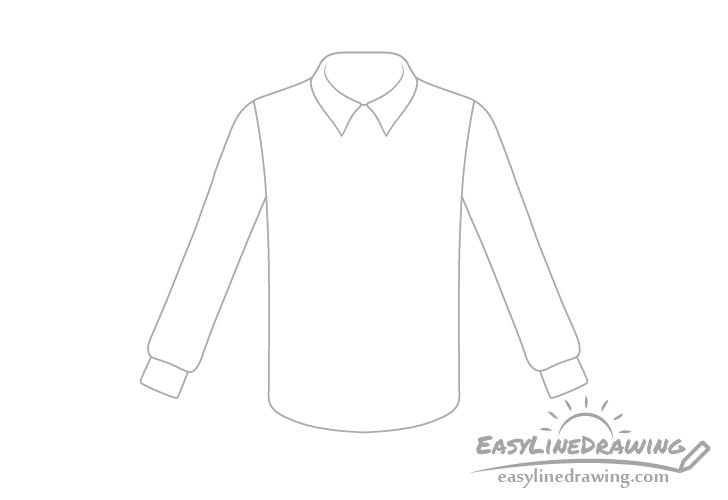
At the bottom of each sleeve add a cuff. Make the cuffs fairly short in length and slightly narrower than the sleeves.
Step 5 – Draw the Buttons & Finish the Line Drawing
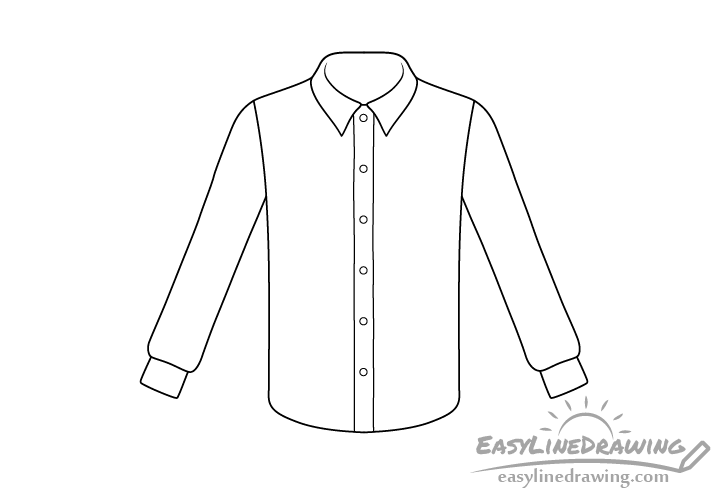
Finish the line drawing by first adding a strip running down the middle of the shirt. You can draw it with just two lines. Afterwards add a series of buttons going through the middle of this strip (try to keep these evenly spaced).
Finally once done outlining the buttons trace over the lines of your entire drawing with either a thin black marker or a black pen. If you don’t have one around you can darken your lines with the pencil.
Step 6 – Color the Shirt
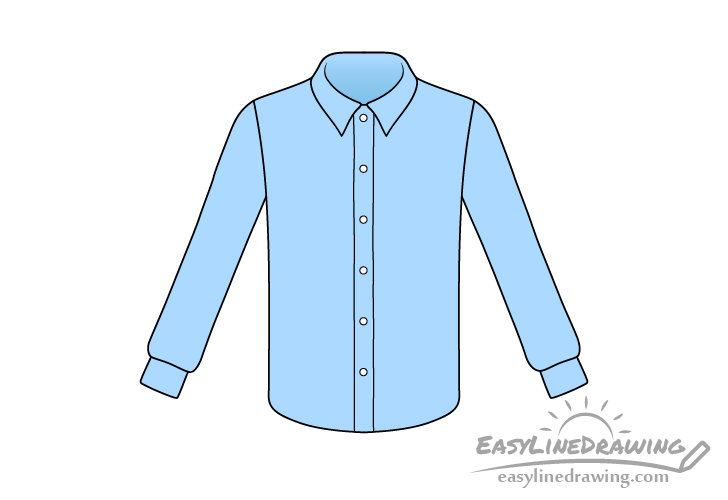
To color the shirt you can make it pretty much any color. In this case it will be blue (fairly common for dress shirts). You can also add a bit of a darker gradient coming up from the inner bottom of the collar as that area usually tends to have a shadow on it. You can leave the buttons white.
Colored pencils may be a good option for a lighter colored shirt. They also make it fairly easy to add the shadow gradient around the collar.
Conclusion
This tutorial shows how to draw a fairly common looking dress shirt. While the shirt has a bit of detail to it overall it’s not very complex and should not be too difficult to draw.
Hopefully you liked this tutorial. If you wish to try a few more like it also see:
- How to Draw a Tie Step by Step
- How to Draw Glasses Step by Step
- How to Draw a Baseball Cap Step by Step
- How to Draw Mittens Step by Step
- How to Draw a Jacket Step by Step
- How to Draw a Shoe Step by Step
- How to Draw Jeans (Easy 8 Step Guide)

")


