How to Draw Toothpaste Step by Step
This tutorial shows how to draw a tube of toothpaste in six steps with easy to follow drawing examples and simple instructions.
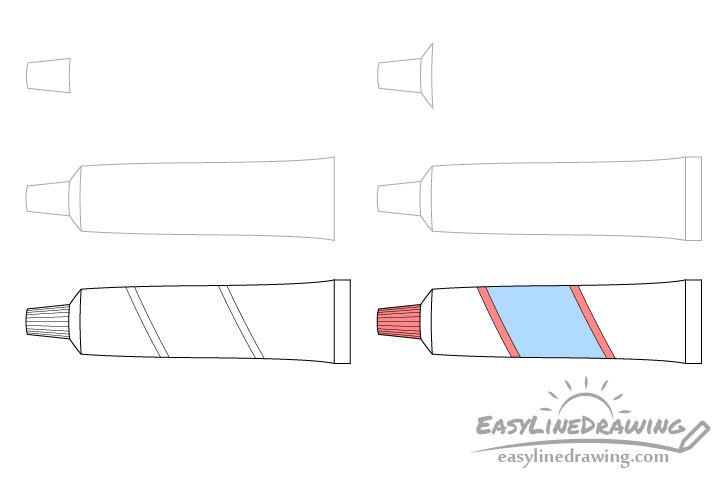
You can see the drawing steps in the preview image above. Most of these consist of fairly simple shapes that come together to create the toothpaste tube.
Overall this is an easy tutorial that can be great for beginners.
Start the drawing in pencil and make light lines that you can easily erase in case you need to make a correction. You can darken them later on with a black pen or marker.
Step 1 – Draw the Cap of the Toothpaste Tube

Begin by drawing the cap. Make it narrower towards the tip and wider towards the base. Make it’s sides straight and draw the top and bottom with light curves (as shown in the example).
Step 2 – Draw the Shoulder

Draw the shoulder narrower towards the cap and wider towards the tube (added in the next step). You can draw all of the lines that define this part with light curves.
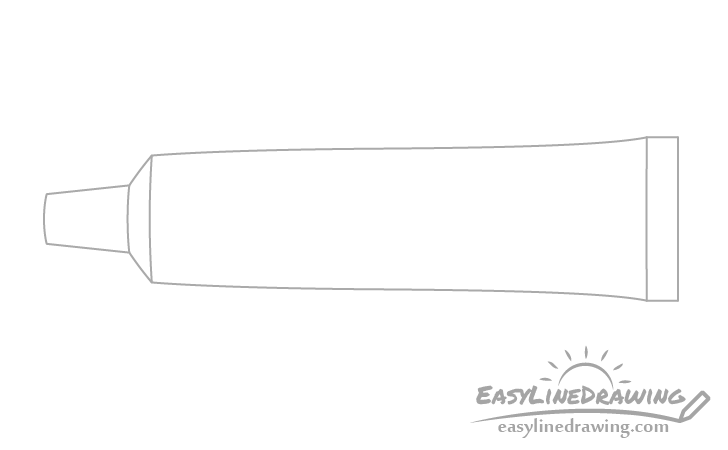
Step 3 – Draw the Main Section
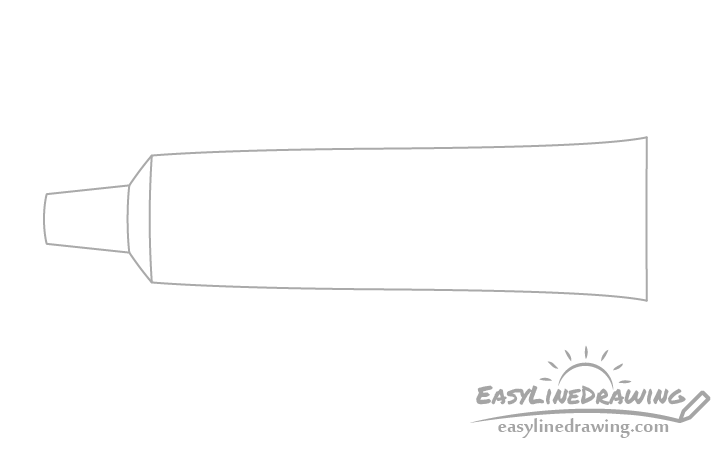
Going from the shoulder add the main part of the toothpaste tube. Draw it narrower at first and then wider as it goes towards the back as shown in the example.
Step 4 – Draw the Seal
At the very end of the tube add the seal. You can draw it very close in shape to a rectangle (a long and narrow one) but draw the line facing towards the tube with a very light curve.
Step 5 – Finish the Line Drawing
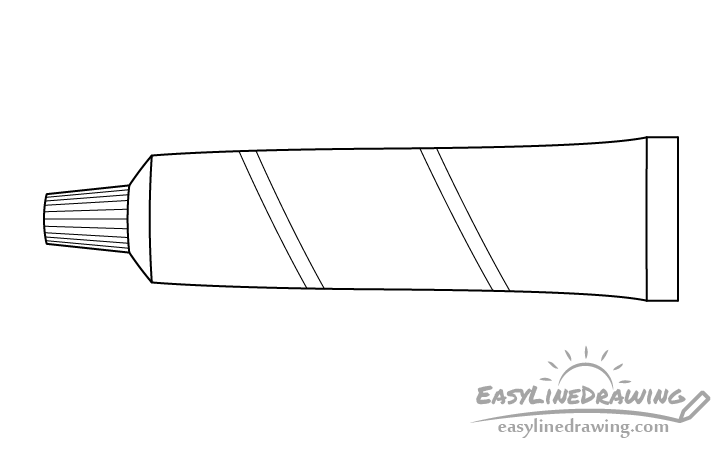
Add some lines along the cap (that help get a better grip on it) as well as a simple label design.
Draw the cap lines farther apart towards the middle and closer together as they go to the sides. This will help show that it’s round in shape.
Next draw the label with just a few angled and lightly curved lines as shown in the example.
Once done adding these details trace over your drawing with a black pen, marker or darken your lines with the pencil.
Step 6 – Color the Toothpaste Tube

Color the toothpaste with any medium you like (paints, markers, colored pencils, etc…).
In this case the cap will be red and the label blue with red stripes on the sides. You can of course use a different color combination if you prefer.
Once done coloring the toothpaste tube you should be finished with the drawing.
Conclusion
A tube of toothpaste like the one in this tutorial is particularly easy to draw as you can create it’s overall shape one simple part at a time (as was shown in this tutorial). If you’ve found this drawing approach helpful you might also want to try:
- How to Draw a Toothbrush Step by Step
- How to Draw Hand Sanitizer Step by Step
- How to Draw a Pen Step by Step
- How to Draw a Smiling Face Emoji Step by Step
- How to Draw Glasses Step by Step
- How to Draw a Bottle of Water Step by Step


")


