How to Draw a Baseball Bat Step by Step
This six step tutorial shows an easy way to draw a baseball bat with a detailed illustrated examples and simple explanations.
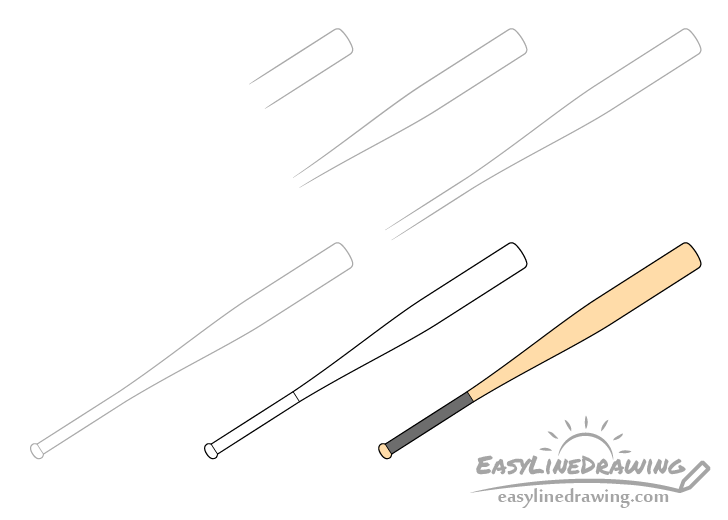
In this example it will be a simple wooden bat with a rubber grip. You can see the breakdown of the drawing stages for it in the preview image above.
Start the tutorial in pencil and make light lines that are easy to erase in case you make a mistake. You can darken them later on with a black pen or marker.
Step 1 – Draw the Barrel of the Baseball Bat

Begin by drawing the “barrel”, the wider part of the bat. Give it a rounded top and two straight parallel lines for the sides.

You may also wish to draw a straight line through your drawing area beforehand to help you make sure that all of the parts of the bat are properly aligned and that it’s not crooked.
If you do wish to use it you can keep it until you are done with step four.
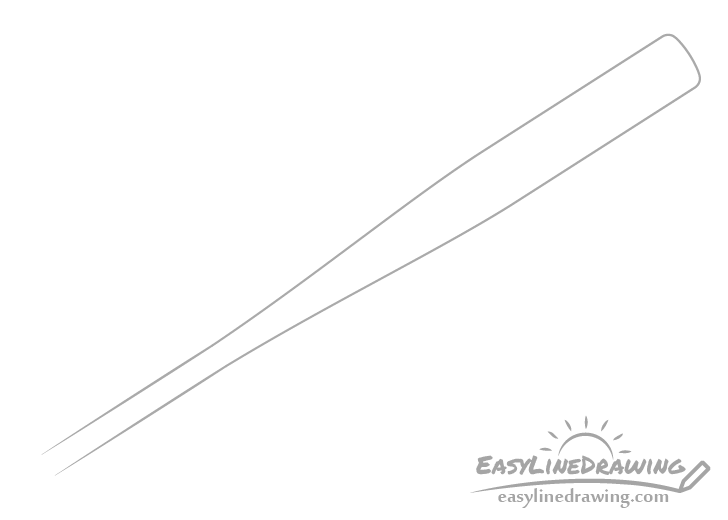
Step 2 – Draw the Taper

Going down form the barrel add the taper (the area where the bat gets narrower). Try and make sure that the end point of the taper is not too thick or too narrow as it will also set the width of the handle.
Step 3 – Draw the Handle
Coming after the taper draw the handle. You can outline it with just two parallel lines. Be careful that it’s not too short or too long.
Step 4 – Draw the Knob

At the end of the handle add the knob (helps prevent it slipping out of the hands).
One done with this step you can erase the center line if you chose to draw it in step one.
Step 5 – Draw the Grip & Finish the Line Drawing

Draw a straight line at the top of the handle to indicate the start of the rubber grip. Afterwards if you feel your drawing looks the way you want it to you can go over it with a black pen or marker. Alternatively you can simply darken your lines with the pencil.
Step 6 – Color the Baseball Bat
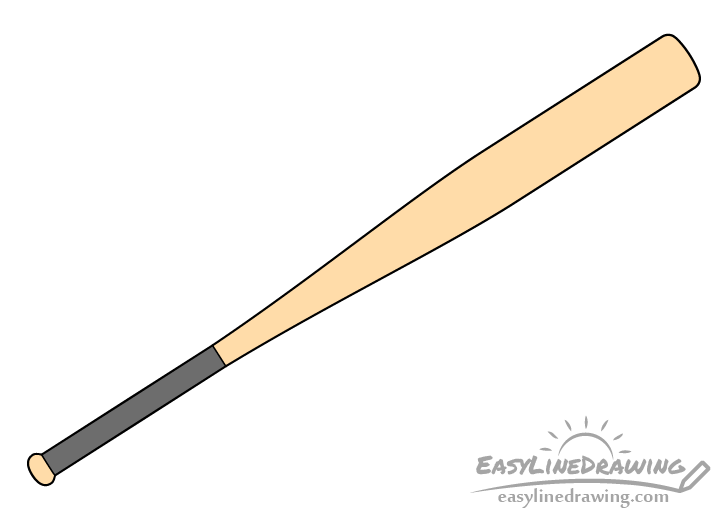
To color the bat you can make a yellow/orange/brown for the wooden part and a dark grey or black for the rubber grip on the handle. An easy way to get these colors can be with either colored pencils or paints.
Conclusion
A common baseball bat is not particularly difficult to draw. The main thing to worry about is that the various parts that make up it’s shape are in good proportion to one another (not too long/short) and that the bat is straight. If you’ve followed the provided instructions and examples hopefully you’ve gotten a nice looking drawing that you’re happy with.
For more similar tutorials also see:
- How to Draw a Baseball Cap Step by Step
- How to Draw a T-Shirt Step by Step
- How to Draw a Flag Step by Step
- How to Draw a Tennis Racket Step by Step
- How to Draw a Hockey Stick Step by Step

")


