How to Draw a Hockey Stick Step by Step
This tutorial shows how to draw a hockey stick in six illustrated steps and provides easy to follow instructions to go along with them.
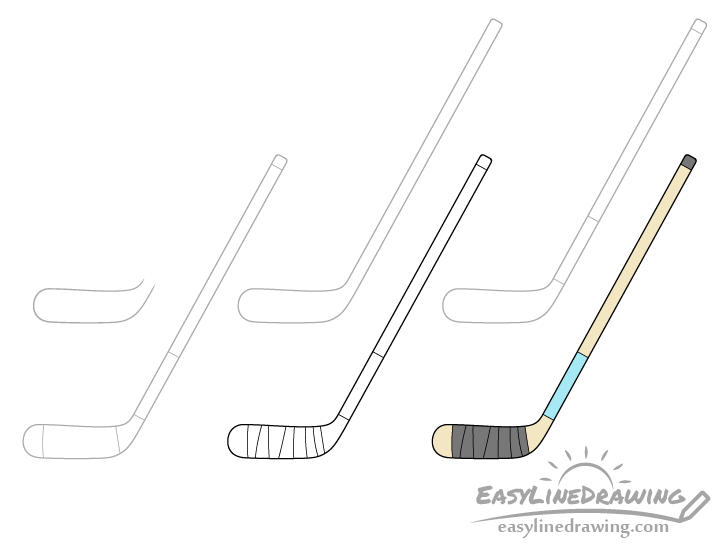
In this example the hockey stick will be drawn from the side (an easy view to draw from) and will have a simple and fairly standard design (without too many details). You can see a preview of the drawing steps for it in the examples above.
Start the tutorial in pencil and make light lines that are easy to erase in case you need to make a correction. You can darken them later on with a black pen or marker.
Step 1 – Draw the Blade of the Hockey Stick
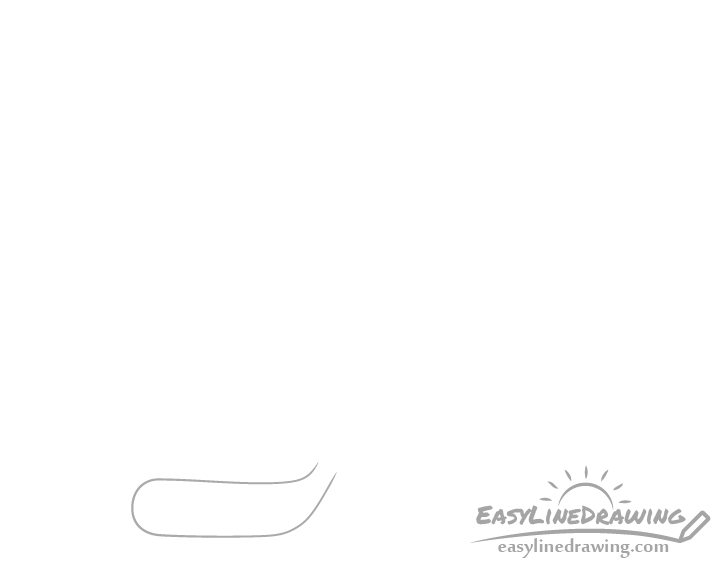
First draw the bottom part of the stick (the blade). You can make it’s shape a tiny bit wider towards the tip and narrower as it goes towards the shaft.
Step 2 – Draw the Shaft
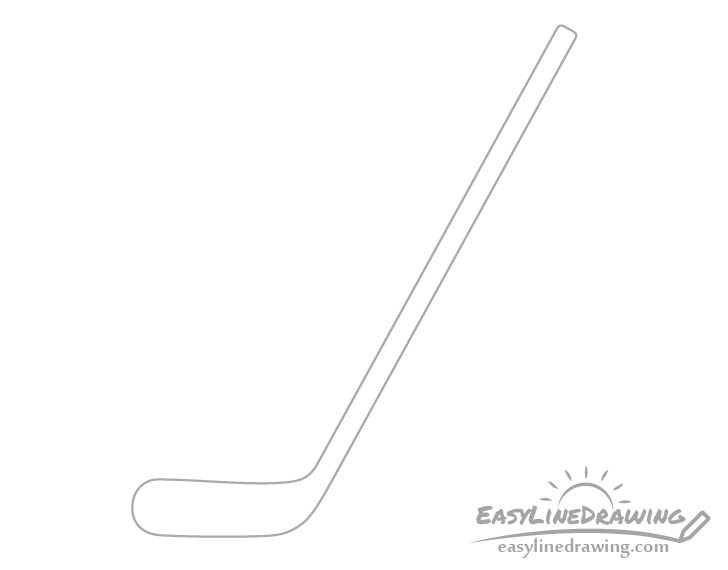
Coming from the blade (at an angle) add the shaft. You can draw it with pretty much two straight parallel lines and give it’s upper end slightly rounded corners.
If you are having trouble making the straight lines you can use a ruler to help you. However, if you want to try and improve your artistic skills it’s better to try an make them by hand.
Whatever option you choose once done you should have a basic outline of the hockey stick. Make sure that you are happy with it’s shape before moving on to the next step.
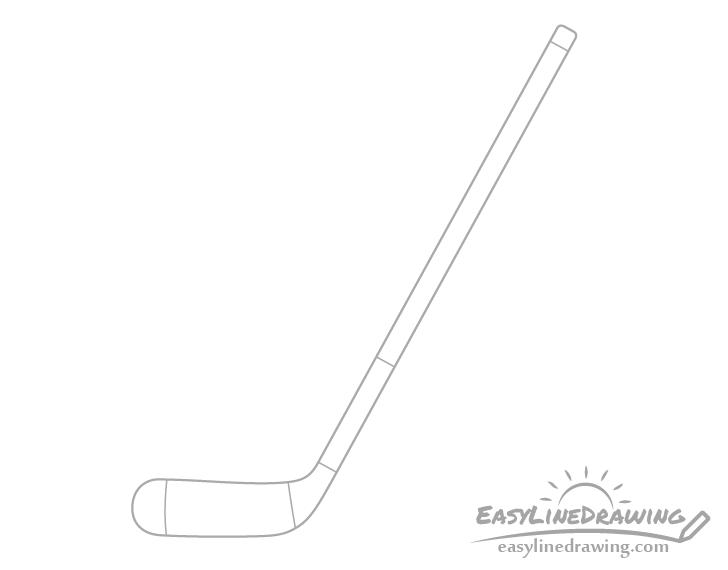
Step 3 – Draw the Handle Design

To make the stick look more interesting you can give it some very basic design elements. Add these by diving the shaft into a few different sections as shown in the example.
Step 4 – Draw the Wrapping Outline
On the blade outline another section that will have some wrapping on it.
Step 5 – Add the Wrapping Details & Finish the Line Drawing
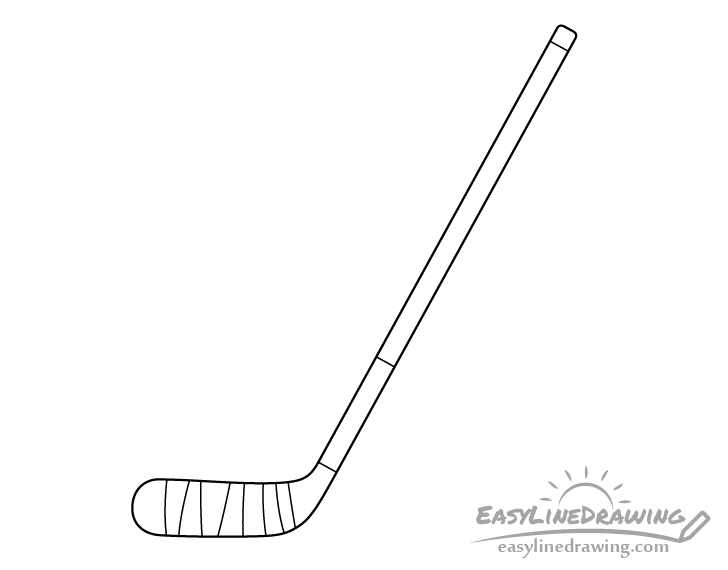
To finish the line drawing first add the details of the wrapping as a series of slightly curved lines randomly spread through the part outlined in the preview step. With that done you can trace over your lines with a black pen or marker. Just again, be sure that you are content with your drawing before doing so. Alternatively you can also darken your lines with the pencil.
Step 6 – Color the Hockey Stick
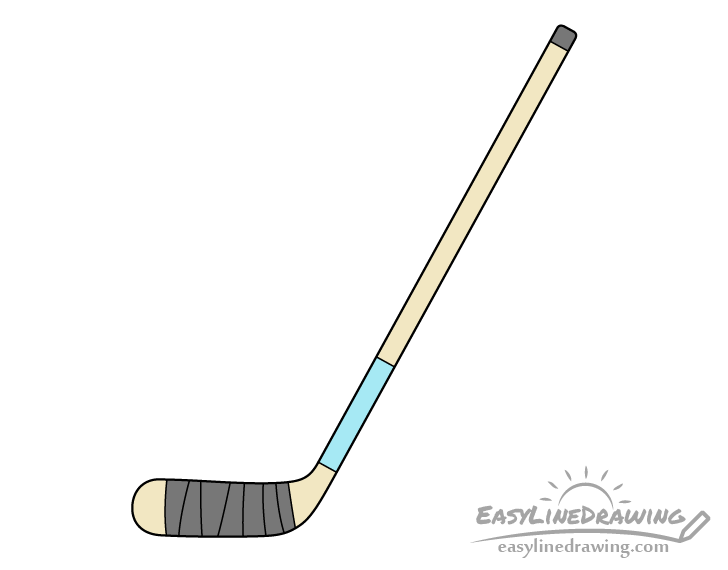
In this case colored pencils can be a good option. You can make most of the stick a yellow/brown (so that it looks like wood). In this example the wrapping and the little tip on the shaft will be a dark grey and the the section near the bottom of the shaft blue. You can of course use a different color combination if you prefer.
Conclusion
A simple hockey stick like the one in this tutorial can be fairly easy to draw. You generally don’t want it to be too plain as adding a little bit of detail is not that difficult and can make your end result look significantly nicer. However, you also don’t need to make things overly complicated.
For more similar tutorials also see the following:
- How to Draw a Baseball Bat Step by Step
- How to Draw a Jacket Step by Step
- How to Draw a Scarf Step by Step
- How to Draw a Tennis Racket Step by Step
- How to Draw a Lock Step by Step

")


