How to Draw a Water Drop Step by Step
This tutorial shows an easy way to draw a drop of water. It provides examples and instructions simple enough for complete beginners.
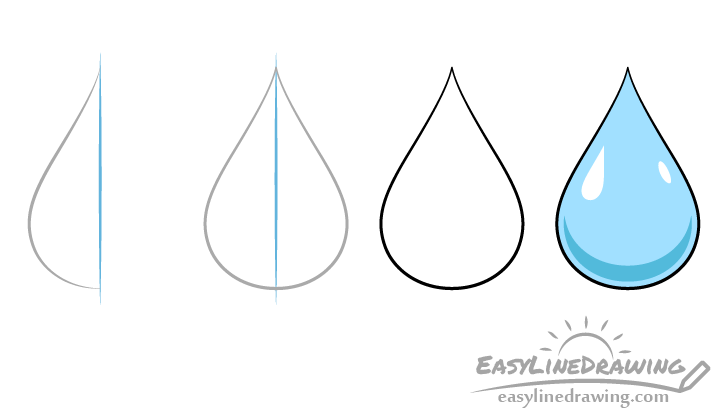
Drawing a water drop like the one in this tutorial is not very complicated. The guide shows how by giving it just the right amount of detail you can get simple but nice looking art.
Start the tutorial in pencil and make light lines that are easy to erase in case you make a mistake. You can darken them later on with a black pen or marker.
You may also wish to have a blue pencil handy for coloring.
Step 1 – Draw the First Half of the Water Drop
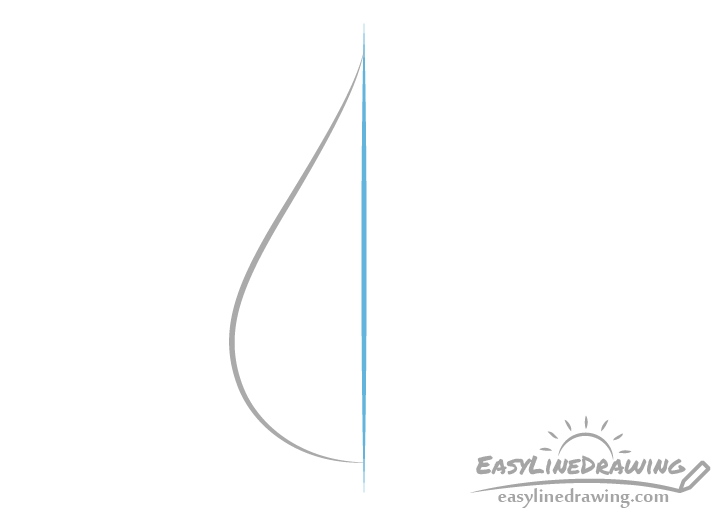
Before drawing the actual drop of water make a straight vertical line as shown in blue in the example above. Do this very lightly in pencil as you will want to erase it later on. It’s purpose it to help you see if both of the water drop’s halves are relatively symmetrical.
To one side of this line add the first half of the drop.
Step 2 – Draw the Second Half
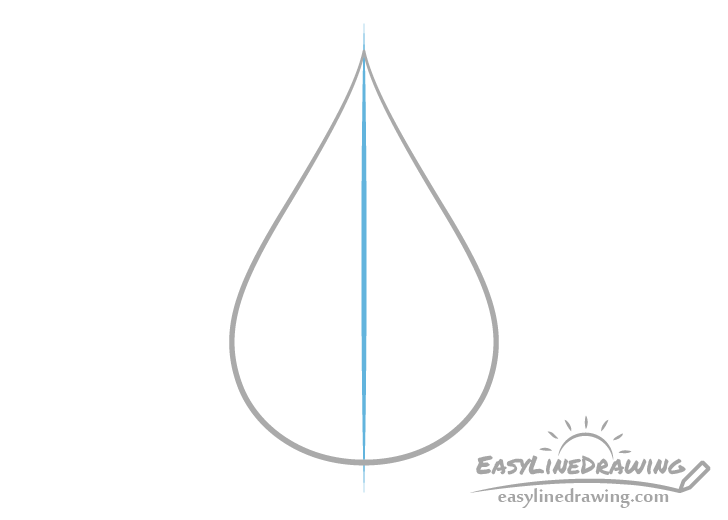
On the other side of the center line draw the second half of the drop. Try and make it mirror the first half as best you can.
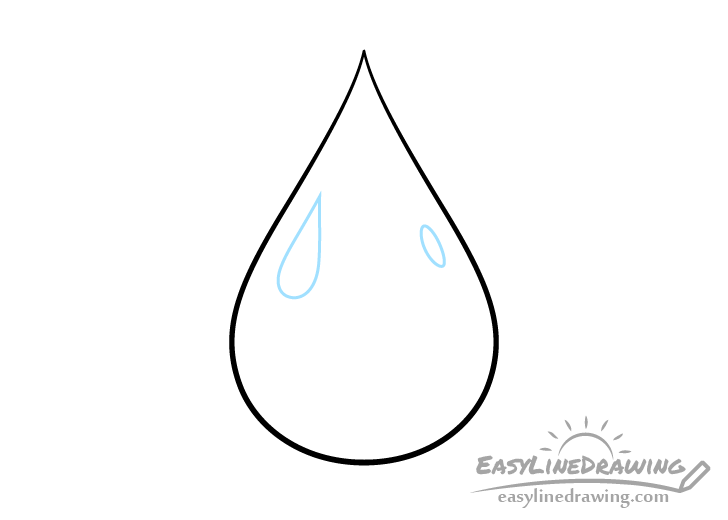
Step 3 – Finish the Line Drawing
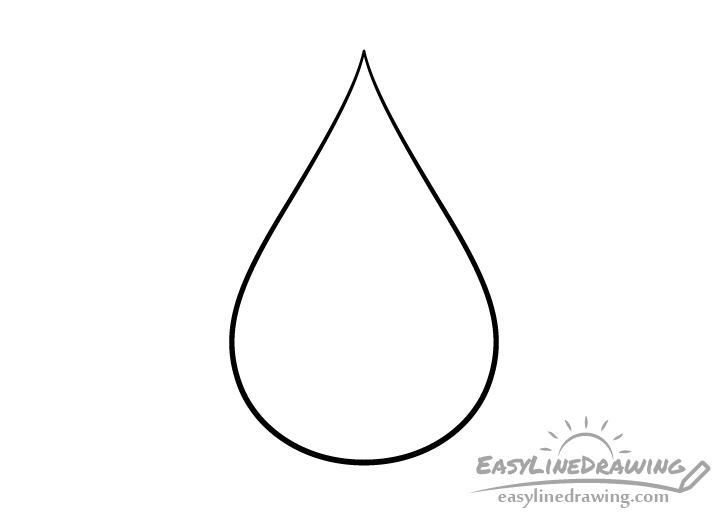
Once you feel your drawing looks good you can erase the center guide line and trace over the outline of the drop with a black pen or marker. Alternatively you can simply darken it with the pencil.
Step 4 – Color the Water Drop
To color the drop you will want to make most of it a light blue but also give it a few reflections. An easy way to do this is with a blue pencil.
Start by outlining a pair of highlights (reflections of light) either in blue or very lightly with a regular pencil (so that the lines will blend into the color). Make one larger and one smaller.
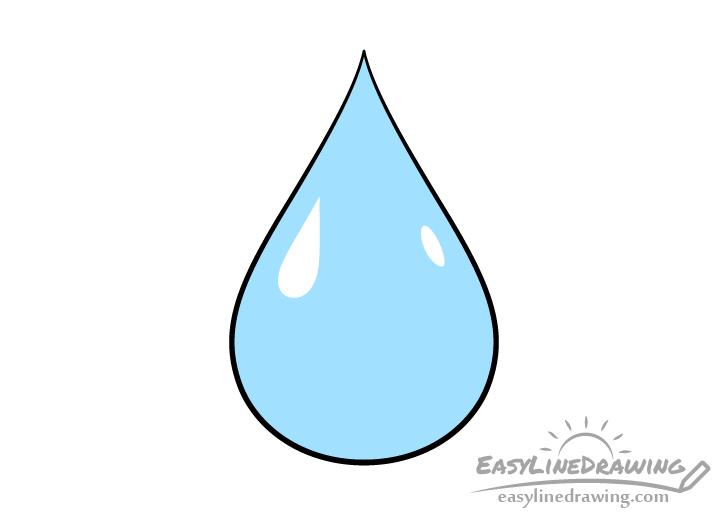
Once you have the highlights outlined fill in the surrounding area with blue and leave them white.

Outline another area at the bottom of the drop (as shown in the example). This will be a reflection of the surface below and will be darker.
You can can create the outline with a darker blue or with a regular pencil.
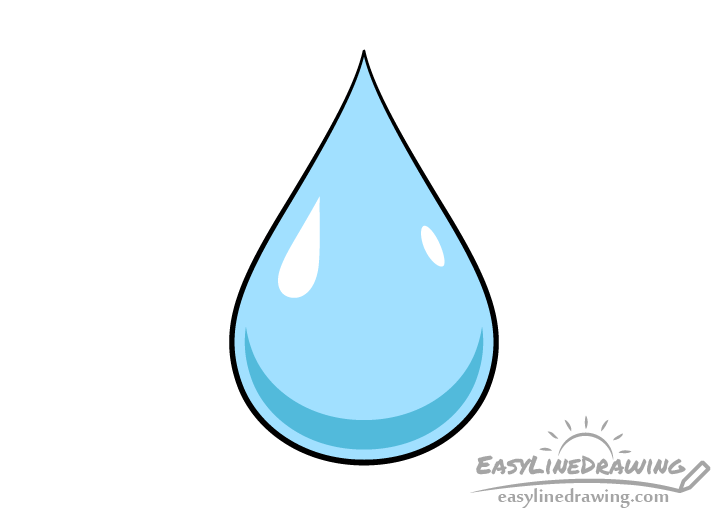
Fill in the reflection with a solid dark blue once you have it outlined.
When finished you should have a completed drawing of a water drop.
Conclusion
The water drop example shown in this tutorial is quite simple but at the same time not totally plain. Giving the water a few reflections makes the drop look more interesting than if you were to simply color it a solid blue. Whatever it is your drawing keep in mind that often adding little details like those just mentioned can make a big difference in improving your art.
Hopefully you’ve found the provided tips helpful and enjoyed the tutorial. For more similar drawing guides also see the following:
- How to Draw a Heart Step by Step
- How to Draw a Smiling Face Emoji Step by Step
- How to Draw Fire Step by Step
- How to Draw a Mirror Step by Step
- How to Draw an Ice Cube Step by Step

")


