How to Draw an Ice Cube Step by Step
This tutorial shows how to draw a ice cube, one that you might use to cool a drink. It consist of eight steps with illustrated examples and quick tips for each of them.
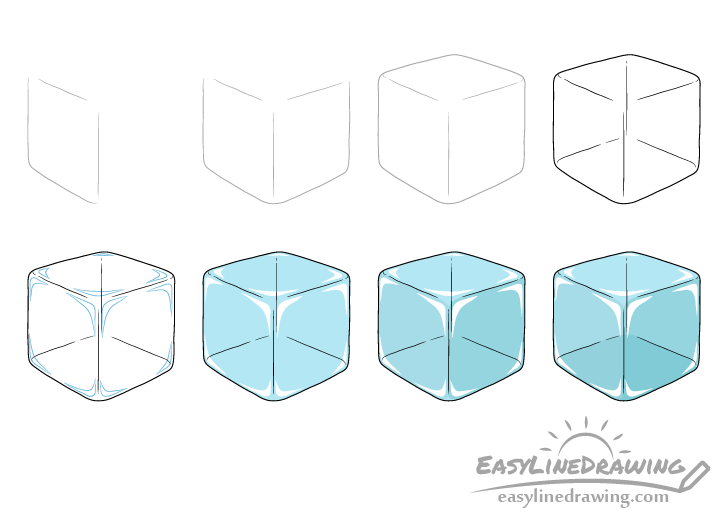
The ice cube in this example will be drawn from 3/4 view and will also be somewhat simplified to make the tutorial easier. You can see a preview of the included drawing stages in the image above.
Start the tutorial in pencil and make light lines that are easy to erase in case you make a mistake. You can darken them later on with a black pen or marker.
Step 1 – Draw the First Side of the Ice Cube

Begin by drawing the first side of the ice cube as shown in the example. You will want to deliberately make the lines that define it a little wobbly/wavy. Also make it’s forward facing corner slightly taller than the one on the side.
Step 2 – Draw the Second Site

Draw the second side similar to the first one but make it just a tiny bit wider.
Step 3 – Draw the Top
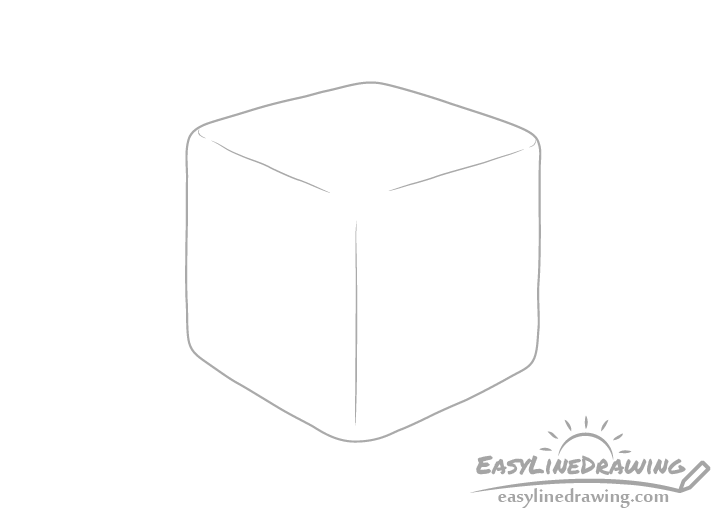
Finally draw the top to finish the ice cube’s main shape. When adding the outline of it’s upper part you can think of it as almost a mirror of the bottom but slightly flatter.
Step 4 – Draw the Bottom
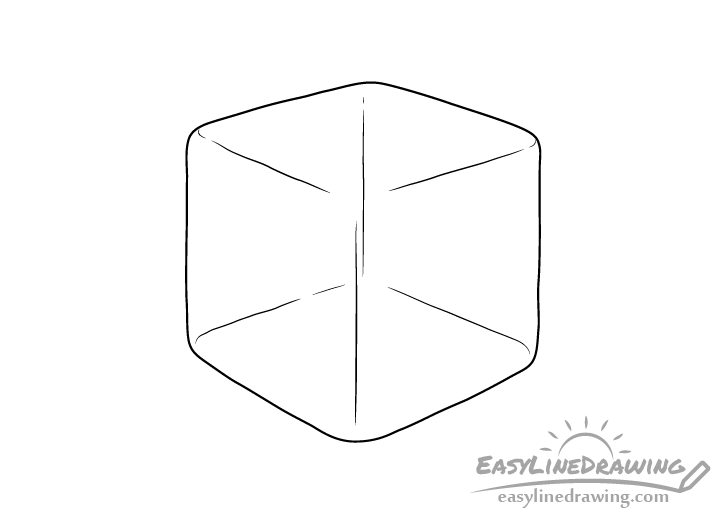
To show that the ice cube is transparent draw it’s bottom as well as the edge of it’s back corner. The shape or the bottom surface should be somewhat similar to the top but taller (vertically wider).
Once done adding the above parts of the drawing trace over your lines with a black pen/marker or darker pencil lines. Just be sure that you are happy with how things look before doing so.
Step 5 – Outline the Light Reflections
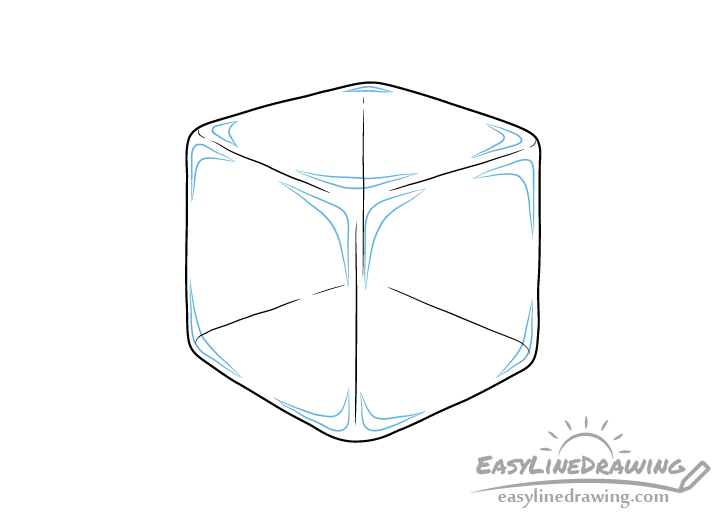
Before coloring the ice cube outline some reflections/highlights on it’s surface. These are very important as they are what will make the ice cube look shiny and smooth. You can refer to the example above for their shapes and placement.
Outline the reflections very lightly (so that you can just barely see them) with either a regular or a blue pencil. The reason for keeping the lines so light is so that they blend into the color later on.
Step 6 – Color the Ice Cube
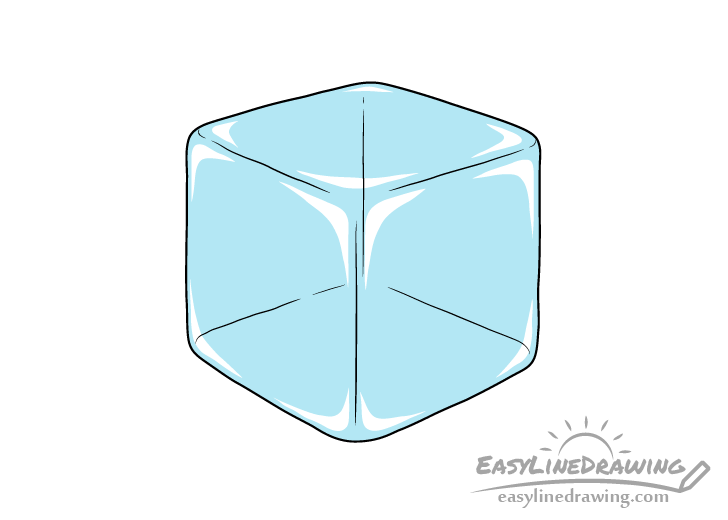
Color the ice cube a light blue and leave the highlights/reflections white. An easy way to do this is with colored pencils but you can also use paints or even a marker.
Step 7 – Shade the Sides
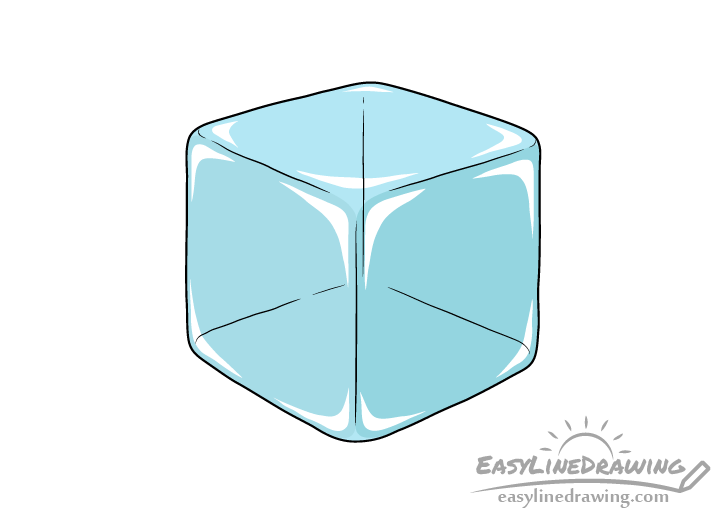
To make the ice cube look a bit more three dimensional you can shade one of the sides to be just a tiny bit darker than the blue in the previews step and the other side even more so. You can add the shading by simply going over the color with e regular pencil.
Step 8 – Shade the Bottom
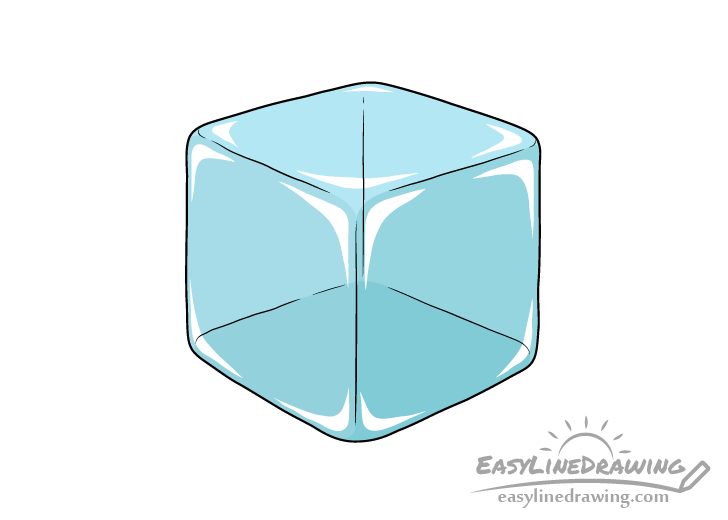
Shade the bottom to be even darken than each of the respective sides that it overlaps (as shown in the example).
Once done you should be finished with the drawing.
Conclusion
Drawing an ice cube in 3/4 view can be seem a bit complicted. However, if you follow the steps provided in this tutorial you can get a nice looking drawing that is fairly simple but not overly stylized.
Hopefully you’ve found the provided tips and example helpful.
For more similar tutorials also check the following:
- How to Draw a Soda Cup in 6 Steps
- How to Draw a Glass of Water Step by Step
- How to Draw a Can of Pop Step by Step
- How to Draw a Bottle of Water Step by Step


")


