How to Draw Cranberries Step by Step
This tutorial shows how to draw a small bunch of cranberries with leaves in six steps. It includes simple examples and quick tips.
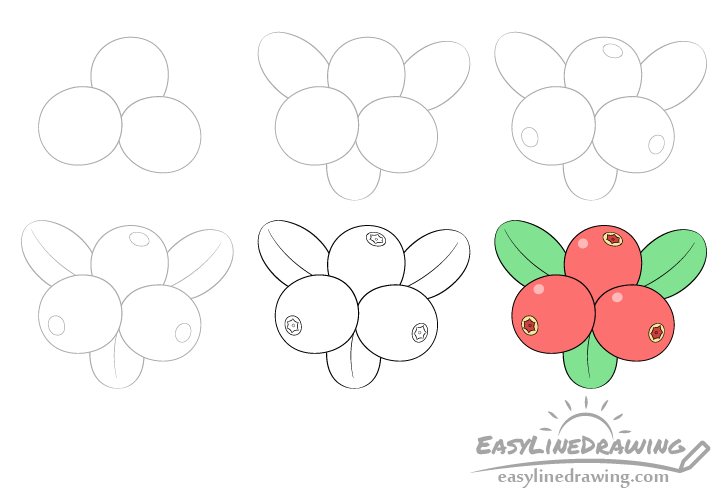
You can see a preview of the drawing stages for the cranberries in the examples above.
Start the tutorial in pencil and make light lines that are easy to erase in case you make a mistake. You can darken them later on with a black pen or marker.
Step 1 – Draw the Outlines of the Cranberries
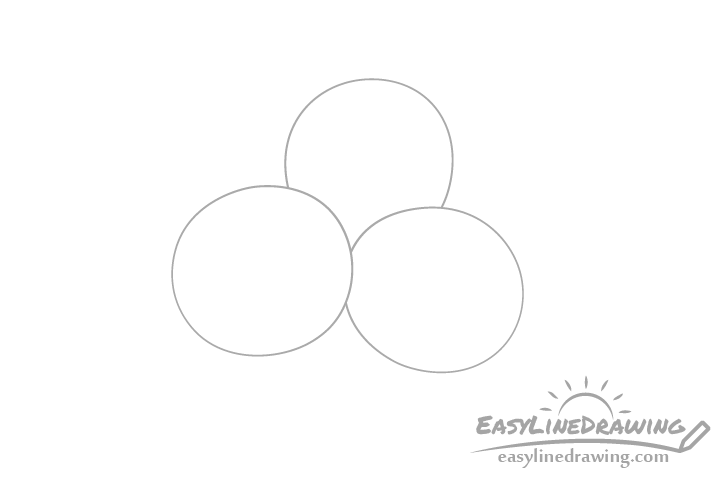
First draw the outlines of the cranberries. Start with the one in front (on the left in this case) followed by the one slightly behind it (on the right) and finally the one in the back (on top).
Be sure to draw them oval in shape as cranberries generally are.
Step 2 – Draw the Outlines of the Leaves

Sticking out from behind the cranberries draw some leaves. You can position these as shown in the example to have a nice looking composition.
Make these oval in shape as well but slightly longer than the cranberries.
Step 3 – Draw the Tips of the Berries
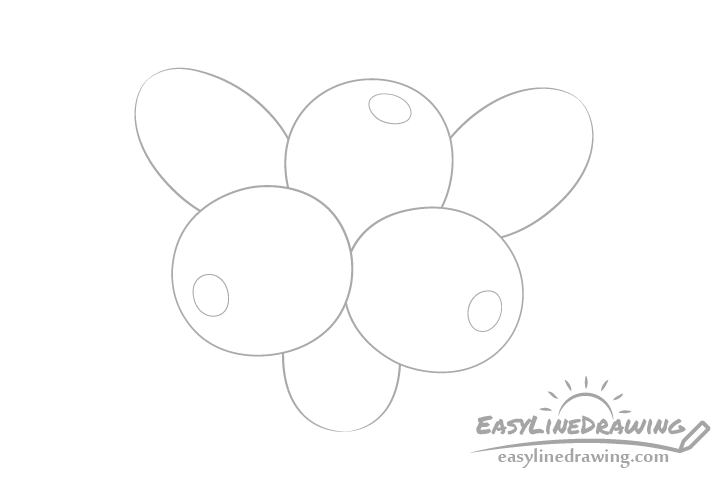
Outline the tips of each of the berries as shown in the example.
Step 4 – Draw the Midribs of the Leaves
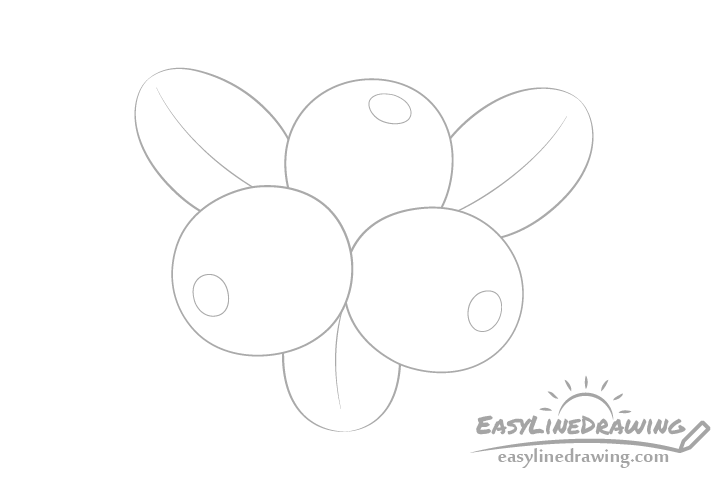
Draw a curved line running down the middle of each of the leaves to show the midribs.
Step 5 – Draw the Smaller Details & Finish the Line Drawing
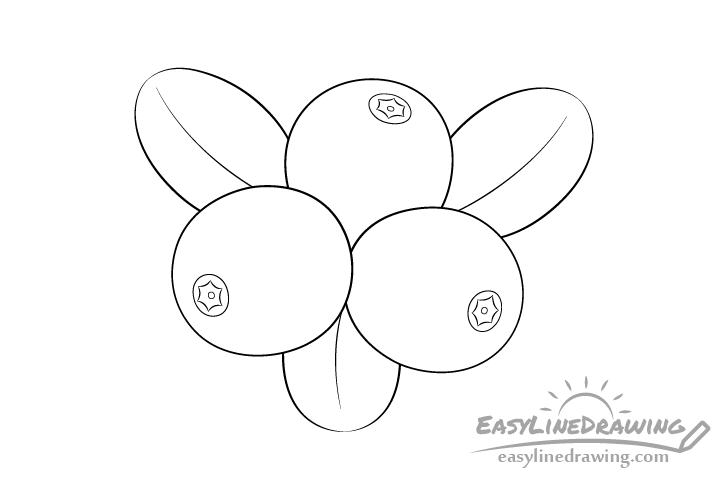
Inside each of the tips outlined in step three draw shapes that look somewhat like stars (see example). You can define these with a series of curves. Afterwards draw a little round/oval bit in their center.
Once you have all of the details outlined you can trace over your drawing with a black pen, marker or darker pencil lines. Just be sure that you are happy with the way your drawing looks before doing so.
Step 6 – Color the Cranberries
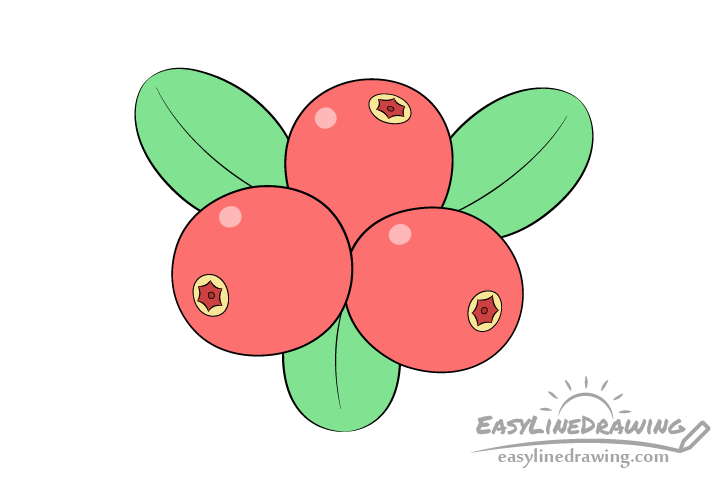
To color the cranberries you can use whatever medium you like (paints, markers, colored pencils, etc…) or a mix of several of them.
Make the berries red but leave a little lighter area inside each of them (the highlight). This will help show that they have a smooth and reflective surface. Outline the highlights lightly in regular pencil or in red and color around them. You can also lightly go over them with red afterwards so that they don’t look too bright.
Color the tips of the berries yellow and make the “star” shaped parts inside of those a darker red. Make the leaves a yellow/green.
Once done with this step you should have a finished drawing of the cranberry bunch.
Conclusion
This tutorial shows a fairly simple approach to drawing a small bunch of cranberries. At the same time it still adds enough detail so that the end picture does not look too plain or boring. Hopefully you’ve like this drawing style and found the tutorial helpful.
For more similar guides also see:
- How to Draw Blueberries Step by Step
- How to Draw Cherries Step by Step
- How to Draw Grapes Step by Step
- How to Draw a Plant Pot Step by Step
- How to Draw a Butterfly Step by Step

")


