How to Draw Grapes Step by Step
This tutorial shows how to draw grapes in a grape bunch in six steps. It includes detailed step by step drawing examples with instructions.
The tutorial goes from a fairly simple line drawing to applying some color with very basic light an shading. While this is fairly simple to do it can make the grapes look significantly nicer.
Though this tutorial is not very difficult it’s still recommended that you start it in pencil in case you make mistake.
For drawing a grape leaf see:
How to Draw a Grape Leaf Step by Step
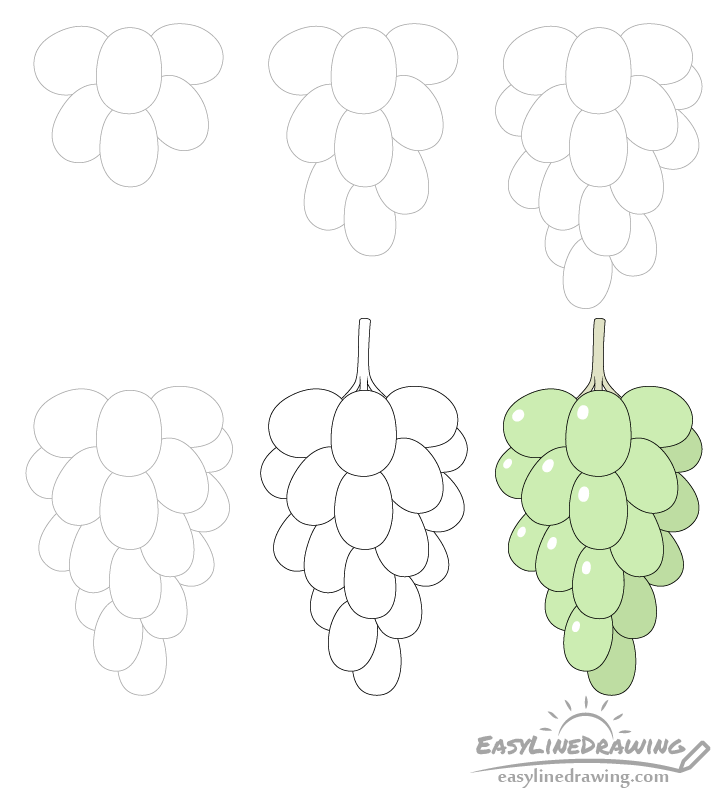
Step 1 – Draw the Top Grapes
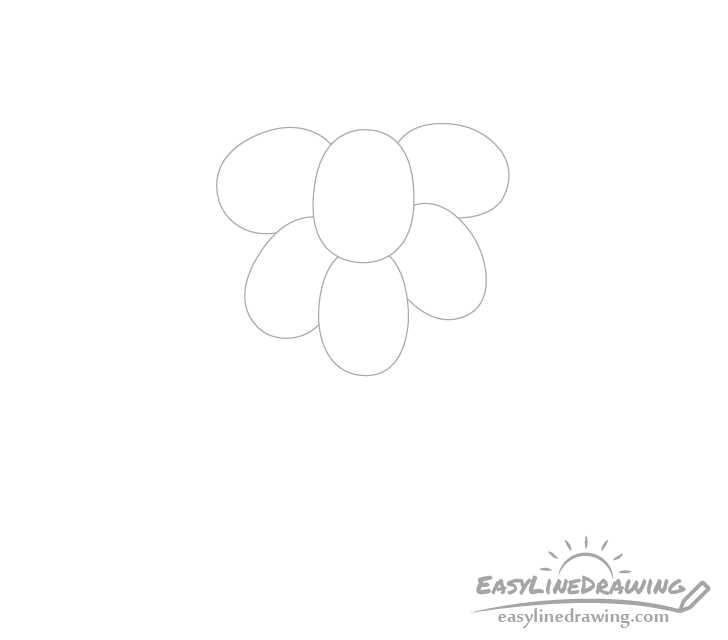
Begin by drawing the top part of the grape bunch. First draw the forward most grape and draw the rest sticking out from behind it. In general try to draw the grapes that are out in front first and then draw the ones that are partially hidden behind them.
Be sure to leave enough space at the bottom of your drawing area for the entire bunch. Also leave some at the top for the part that attaches the grapes to the vine.
Usually the grapes at the top of the bunch tend to stick out more to the sides. The further the grapes go down the bunch the more they tend to point downwards. Try and take this into account when drawing.
Step 2 – Draw the Middle Grapes
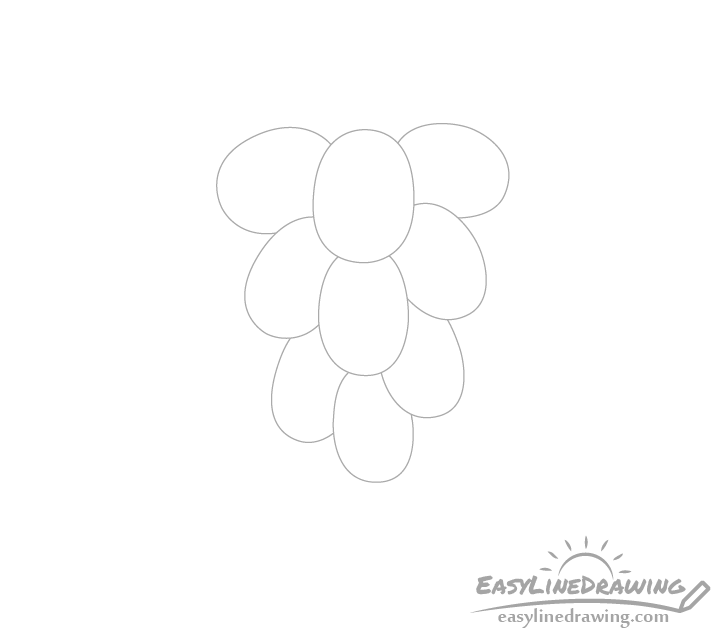
Below the previous set of grapes draw the next one going further down with the grapes also pointing more downwards.
Step 3 – Draw the “Outer” Grapes
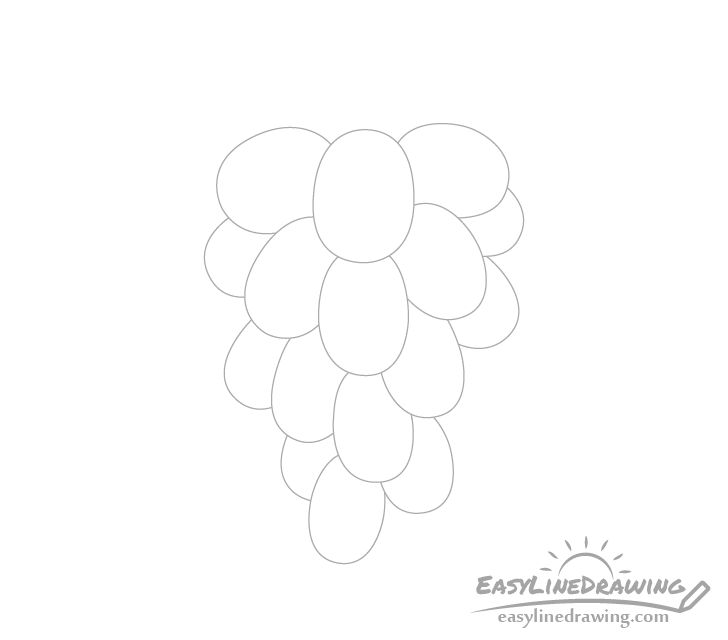
Now add yet another set of grapes around the sides as well as near the bottom. The grapes on the sides should be mostly hidden behind the other grapes due to the curvature of the grape bunch.
Step 4 – Draw the Very Bottom Grapes

Finally add the last bit of grapes at the very bottom to finish the bunch.
Step 5 – Finish the Line Drawing
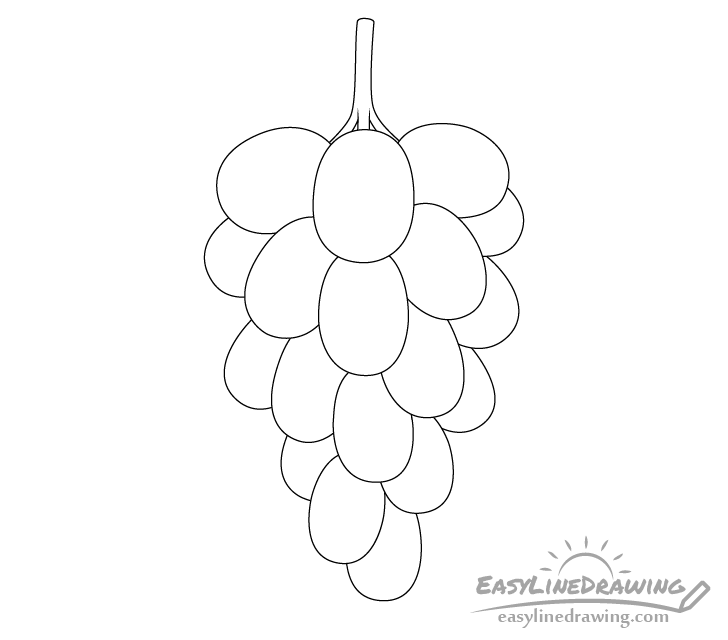
At the top of the grape bunch draw the little part that attaches it to the vine. Make it split into smaller “branches” (three in this case) as it connects to the grapes.
Once done go over your drawing with a black pen or marker or if you prefer simply darken the lines with a pencil.
Step 6 – Color the Grape Bunch

To color the grapes it’s probably easiest to do it in colored pencils or paints. In this case we will make them a yellow/green and the little “branch” part at the top a light brown.
To make the grapes a little more interesting add some very basic shading and highlights. In this case the light will be coming from the left side of the bunch. To show this leave some white spots on each of the left side/middle grapes for the highlights. To show that the right side is facing away from the the light you can shade the grapes on the very right/bottom slightly darker.
To add the shading with pencils you can first fill the grapes with green and then lightly go over them with a regular pencil to add the shading.
Conclusion
By adding some very basic light and shading to a drawing you can really make it stand out a lot more than one that simply filled in with one solid color. Combined with good, clean line drawing it can really make for a very nice overall picture.
For more similar tutorials see:
- How to Draw a Mango Step by Step
- How to Draw a Pear Step by Step
- How to Draw a Peach Step by Step
- How to Draw a Hazelnut Step by Step

")


