How to Draw a Plum Step by Step
This tutorial shows how to draw a plum in six steps from 3/4 view. It includes illustrated examples along with quick and simple drawing tips.
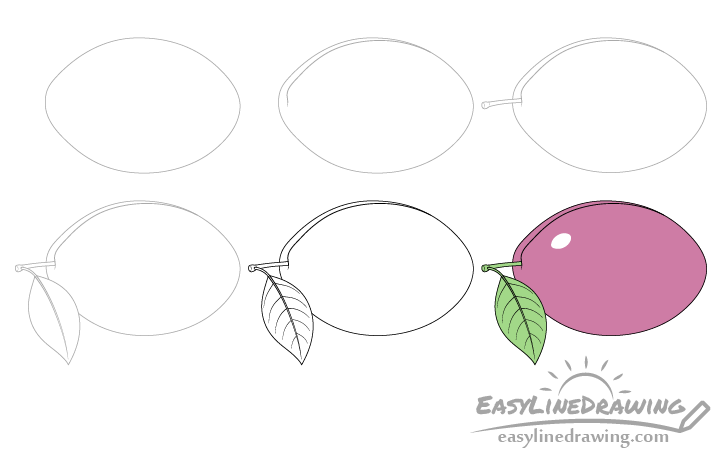
Drawing a plum in 3/4 view (slightly turned to one side) is a good way to show off it’s shape. It’s also a fairly easy.
Start the tutorial in pencil as you will need to erase part of the drawing in a few of the steps. You can trace over it with a black/pen marker after you outline all of the parts and details of the plum.
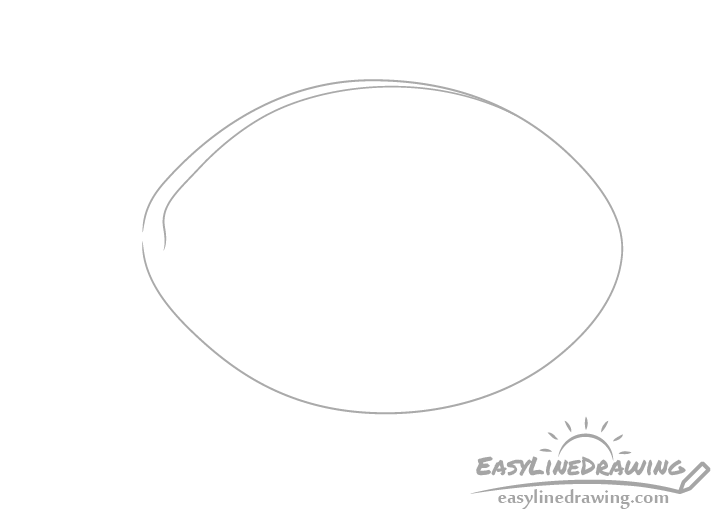
Step 1 – Draw the Outline of the Plum

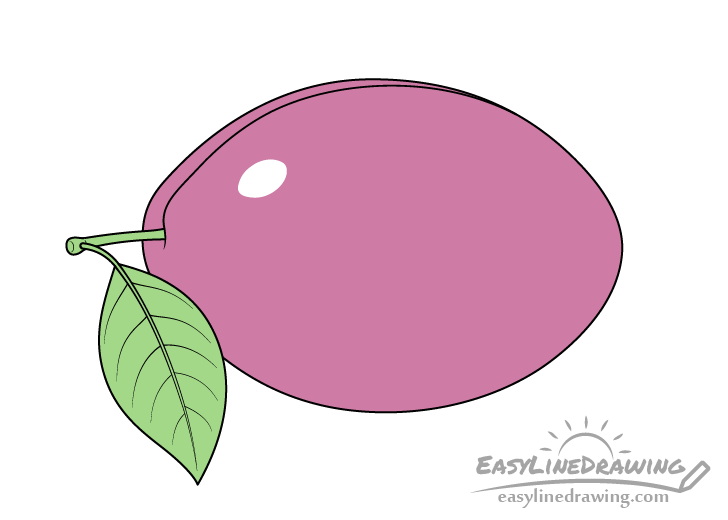
First draw the outline of the overall shape of the plum (basically it’s silhouette). It should be similar to an oval but with slightly pointier ends (refer to the example).
Step 2 – Draw the Split

To one side of the outline draw the split that plums tend to have. Start with a little curve near one of the “pointy” ends that then turns into a bigger curve going along the side. It should eventually merge into the outline.
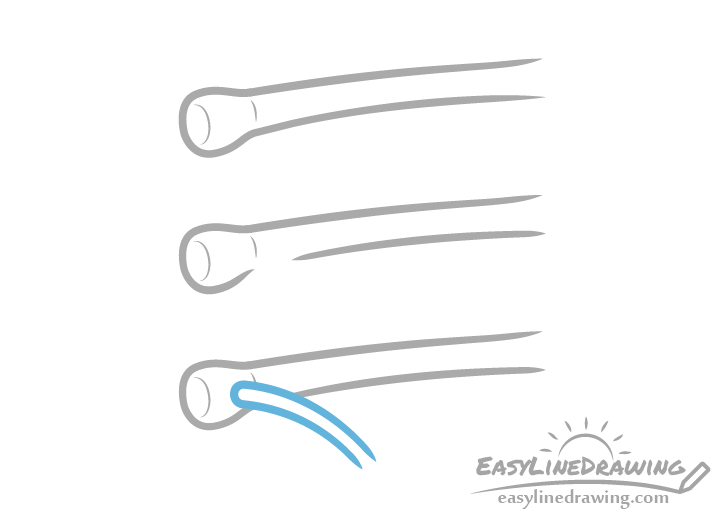
Step 3 – Draw the Stem
Before adding the stem erase a little bit of the plum’s outlined on the side with the split (as shown in the example above).
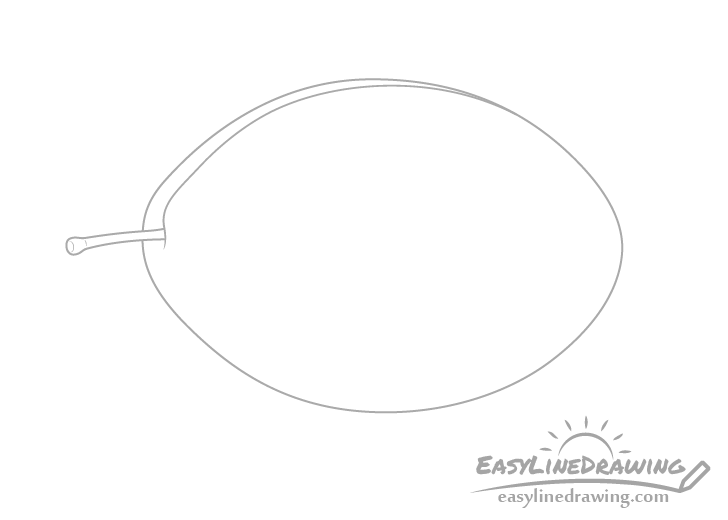
Sticking out from the little curve/indent in the split and going through the opening in the outline draw the stem. Make it fairly small and thin in comparison to the plum. Also, give it a little bit of a thicker area on the very end.
Step 4 – Draw the Outline of the Leaf & the Midrib
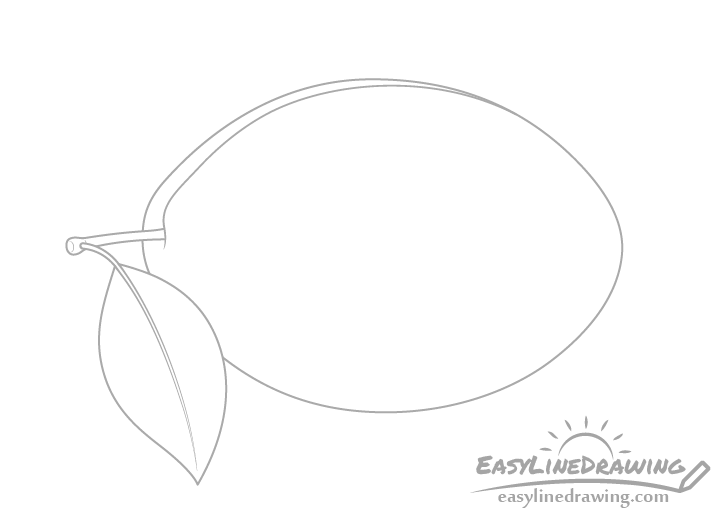
When done with this step you will want to have a drawing similar to the above.
You will first want to add the stalk of the leaf going out from the end of the plum’s stem. Erase a little bit of the stem’s outline and draw it in as shown in the example.
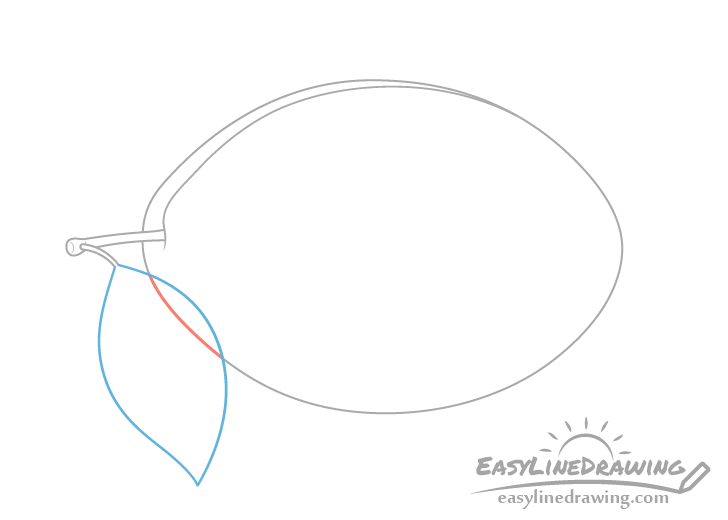
Next, draw the outline of the leaf with a pair of curved lines (shown in blue). When you add the leaf it will overlap a little bit of the plum’s outline so you can erase that part afterwards (shown in red).
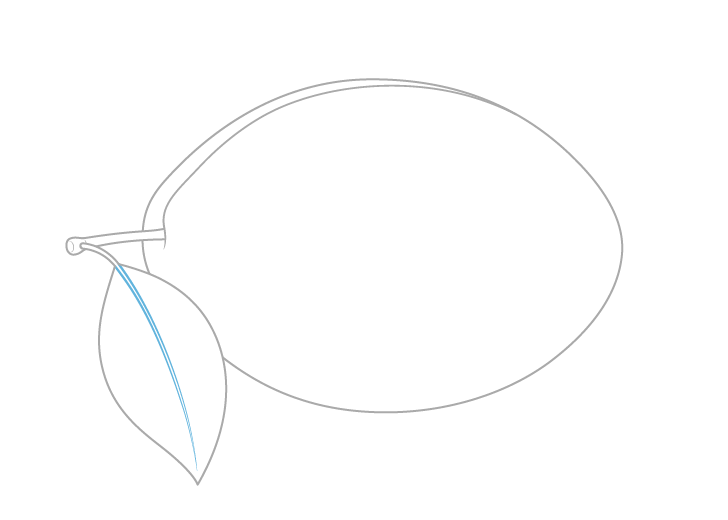
Finally running through the middle of the leaf add the midrib (again shown in blue). Make it narrower as it goes towards the tip.
Step 5 – Add Veins to the Leaf & Finish the Line Drawing
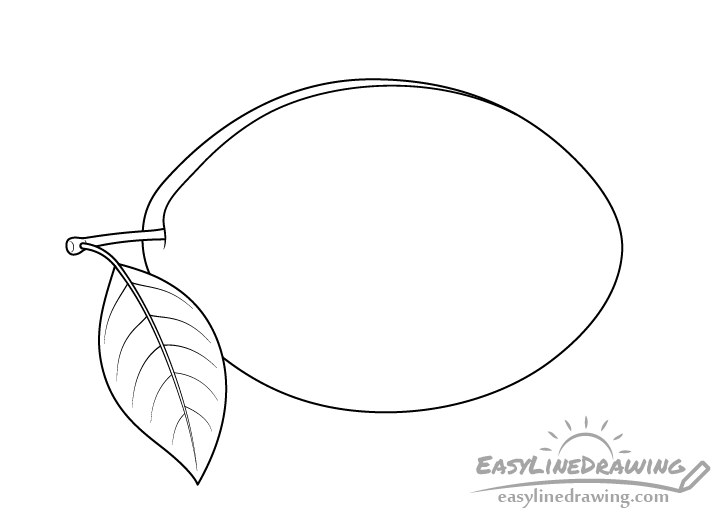
For the last set of details add the veins along the leaf. Draw these going out from the midrib towards the sides in smooth curves. Place most of the veins directly opposite one another but also add a few that are misaligned (see example). This will make the leaf look more natural.
After you add the veins go over your lines with a black pen or marker. Alternatively you can also just darken them with the pencil.
Step 6 – Color the Plum
If you went over your lines with a marker/black pen wait a bit for them to dry so that the line’s don’t smudge. Afterwards you can color the drawing using whatever you have handy (paints, markers, colored pencils, etc…).
Make the plum itself a purple and the leaf green. Don’t worry about matching the example too closely as the color of plums tends to vary.
To show that the plum has a smooth reflective surface leave a little white spot to one of the sides (light reflecting from it). Make this an oval similar to the shape of the plum but place it on an angle. You may want to lightly outline the reflection before coloring so that you don’t accidentally go over it. Do this either in regular pencil or in purple.
Alternatively you can also add the reflection with a white correction pen over top of the color.
Conclusion
Drawing a plum in 3/4 view is a good way to show it’s shape. It’s generally also fairly easy, especially with a step by step breakdown like the one in this tutorial. Hopefully you haven’t had much trouble following along.
For more drawing guides like this one also check:
- How to Draw an Apple Step by Step
- How to Draw a Peach Step by Step
- How to Draw Cherries Step by Step
- How to Draw a Hazelnut Step by Step
- How to Draw a Kiwi Step by Step

")


