How to Draw a Mango Step by Step
This six step tutorial shows how to draw and color a mango for beginners. It provides simple illustrated examples and quick and easy to follow instructions
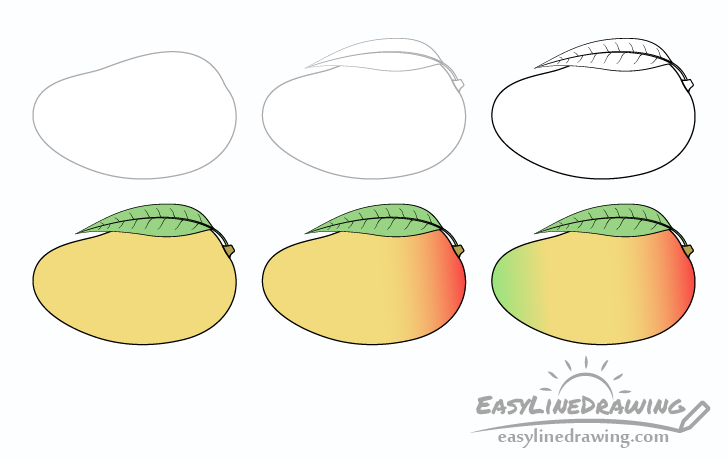
You can see a preview of the different stages of the tutorial in the image above. The first half focuses on line drawing and the second on coloring.
Start in pencil and make light lines as you will need to do some erasing in step two. You can darken them later on with a black pen or marker.
Step 1 – Draw the Outer Shape of the Mango
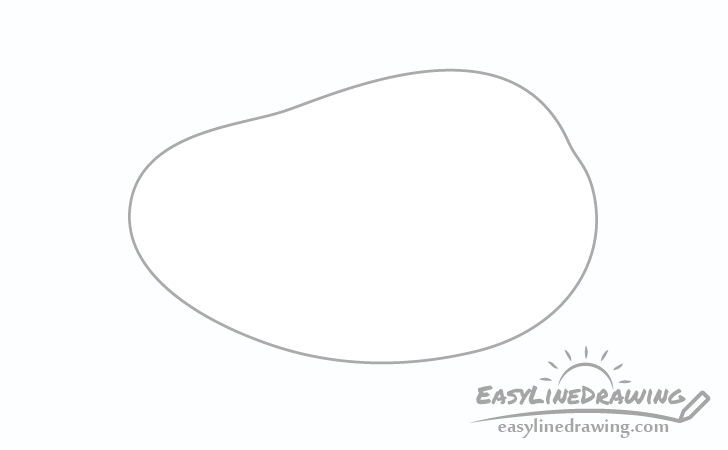
Draw the outer shape of the mango with a slight upwards curve in it’s overall form. Make one side narrower and the other wider. Also add a small indent on the upper end of the wider side.
Step 2 – Add a Leaf
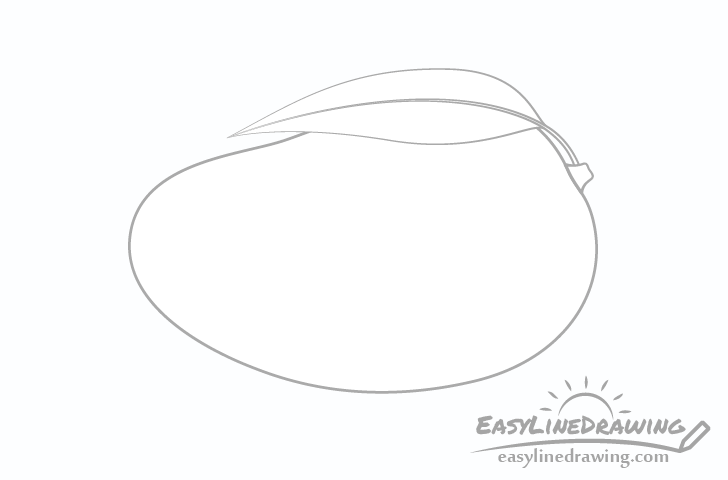
To make the mango look more interesting you can add a leaf. First draw it’s outer shape over top of the mango outline and then erase the the part that it overlaps.
In this case the leaf will be viewed on a bit of an angle so you can draw it fairly narrow. Define it’s shape with a pair of smooth lines and give it a pointy tip.
Inside the little indent on the back draw a little bump like bit for the stem. Make it wider at it’s base and narrower as it goes out. Afterwards connect the leaf to the bump with it’s petiole.
Finally running through the middle of the leaf add the midrib to to finish this step of the drawing.
Step 3 – Finish the Line Drawing
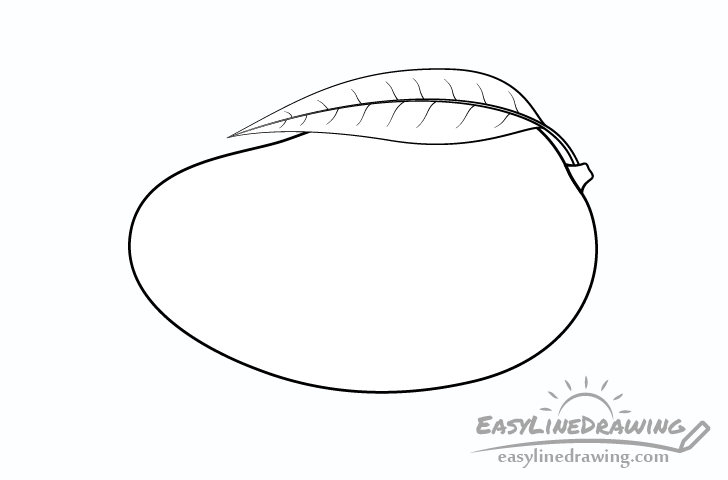
Inside the leaf going from the midrib to the edges draw a series of wavy and curved lines to show the veins. Make them longer at the base and smaller near the tip.
Generally the veins tends to be on the opposite sides of one another but to make them look more natural place a few at random as well.
Once you finish adding this last set of details, trace over your lines with a black pen, marker or darken them with the pencil. Just be sure that you are happy with how things look before doing so.
Step 4 – Color the Drawing
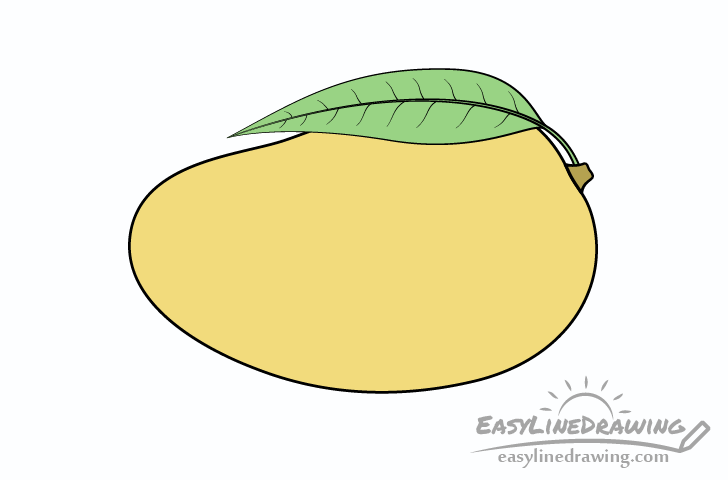
With the line drawing portion of the tutorial finished you can begin adding some color. For the initial part simply fill the entire mango with yellow, the leaf with green and the little bump of the stem with brown.
You can do this using markers, colored pencils, paints or just about any other medium you might prefer.
Step 5 – Add a Red Gradients
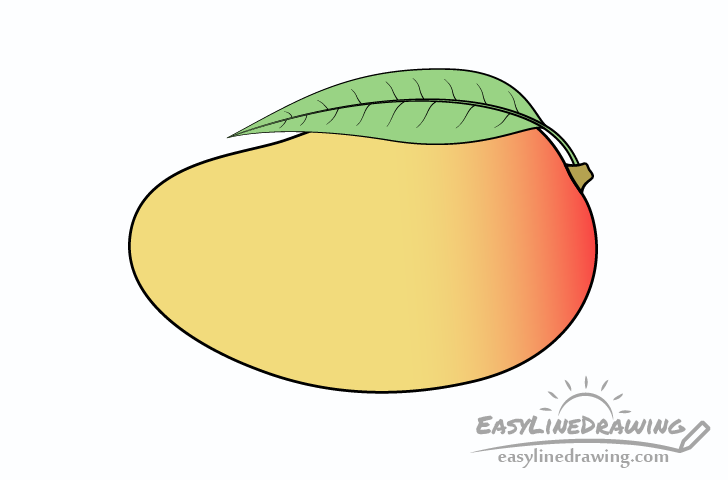
To make the mango look more interesting you can give it some red on one of it’s sides . Add this as a gradient where it starts with as a solid color and eventually blends into the yellow.
An easy way to do this is with a colored pencil. You can even do it over top of dry paint or marker (if you’ve used those for the previous step).
Step 6 – Add a Green Gradient
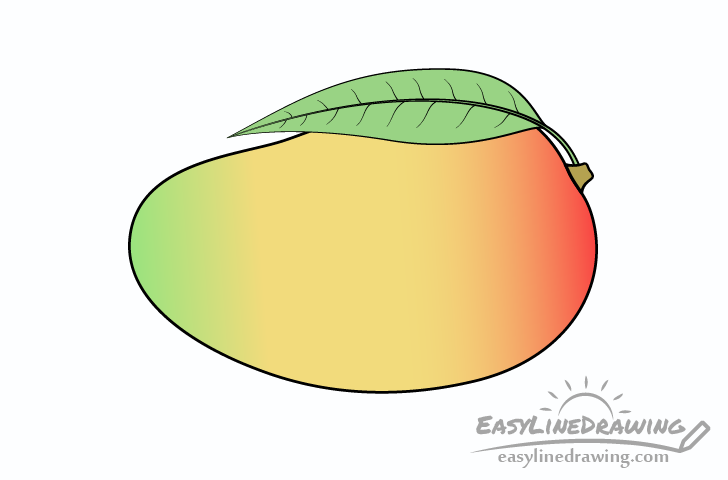
On the opposite end of the mango do the same thing as the previous step but with a green gradient that fades in the direction of the red.
Once finished with this step you should be done with tutorial. Hopefully you’re happy with how your drawing turned out.
Conclusion
This tutorial shows how adding a little bit more color to your art can make a really big difference. Without the red and green bits the mango would look a lot more plain and boring.
Of course having a good line drawing as the basis is also very important.
If you’ve found the detailed step by step breakdown of the drawing process shown in this tutorial helpful you should also see the following:
- How to Draw a Spear Step by Step
- How to Draw a Banana Step by Step
- How to Draw a Lemon Step by Step
- How to Draw a Papaya Step by Step

")


