How to Draw a Tortoise Step by Step
This tutorial shows how to draw a cartoon tortoise in nine steps. It includes detailed illustrated examples and simple instructions.
You can see a preview of the drawing steps for the tortoise above. The tutorial also includes a step by step breakdown of drawing the face as well as the shell.
Start the drawing in pencil and make light lines. This will make it easier to correct mistakes. You can trace over your lines with a black marker or pen later on.
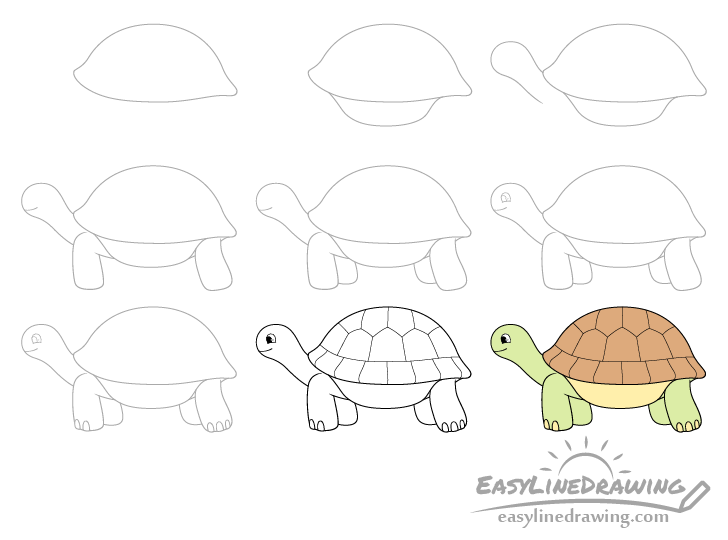
Step 1 – Draw the Top of the Tortoise’s Shell
First draw an outline of the upper part of the tortoise’s shell. Make it’s top rounder and it’s bottom a bit flatter. Also give it an upwards facing bump at the front and a slightly longer downwards facing bump at the back.
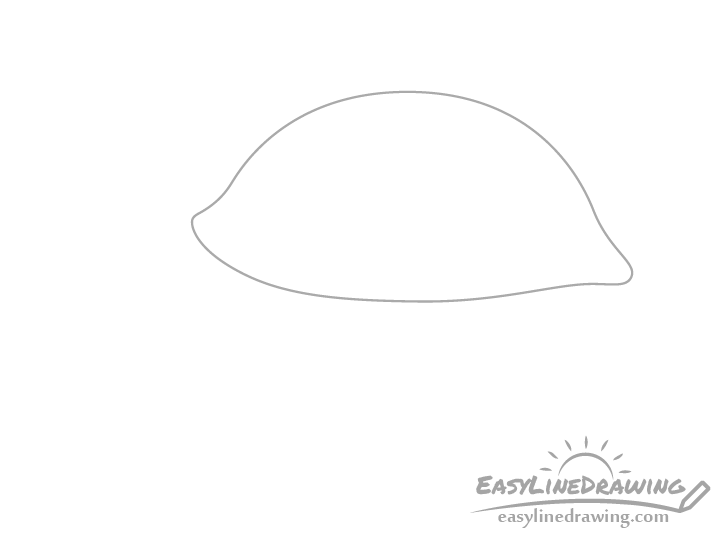
Step 2 – Draw the Bottom of the Shell
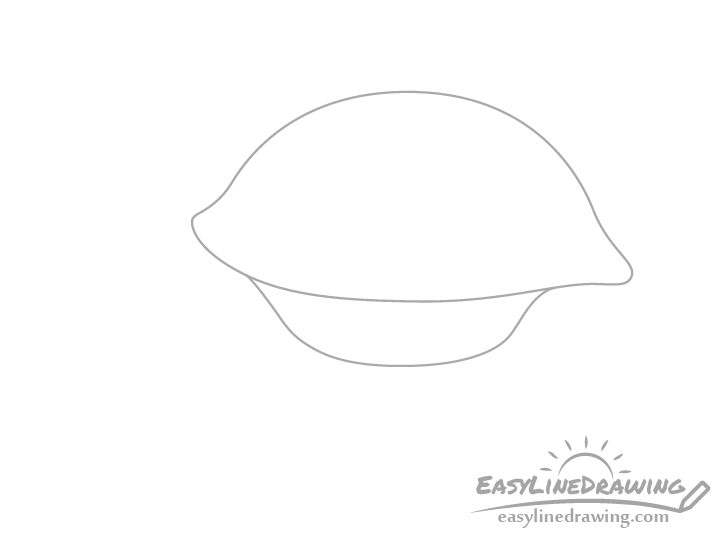
Draw the bottom portion of the shell significantly smaller than the top. Make it’s shape as shown in the above example.
Step 3 – Draw the Head
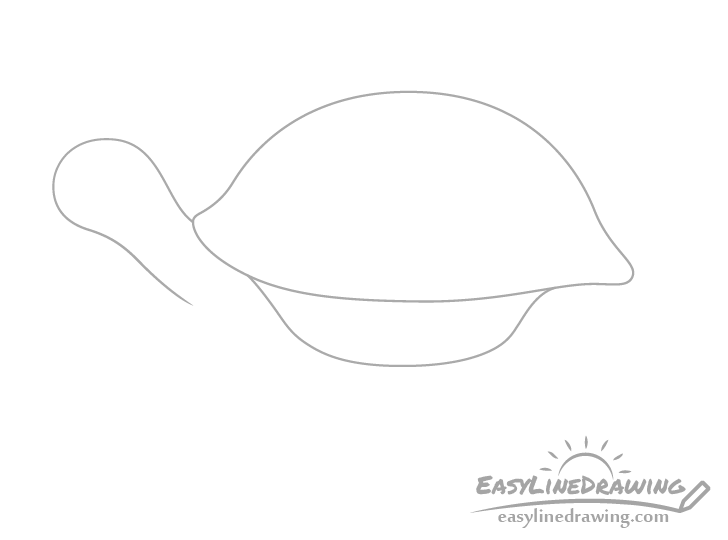
Coming out of the front of the shell draw an outline of the head/neck. Make the neck curve slightly upwards.
Step 4 – Draw the First Pair of Legs
To each side of the lower part of the shell add the first set of legs. Draw both leaning slightly forward with a bend in the front one. Also make both legs slightly thicker as they go down.
Step 5 – Draw the Background Legs
Draw the second set of legs (in the background) coming out from behind the first set as shown in the example. Make the visible parts of their shape similar to the legs in the front but position them a little higher up.
Step 6 – Draw the Face
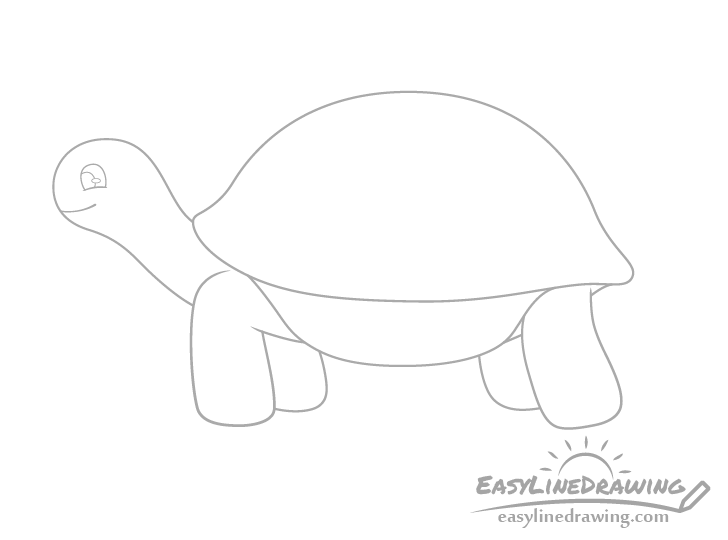
The tortoise’s face has a bit of details to it so you can see a step by step breakdown of drawing it in the example below.
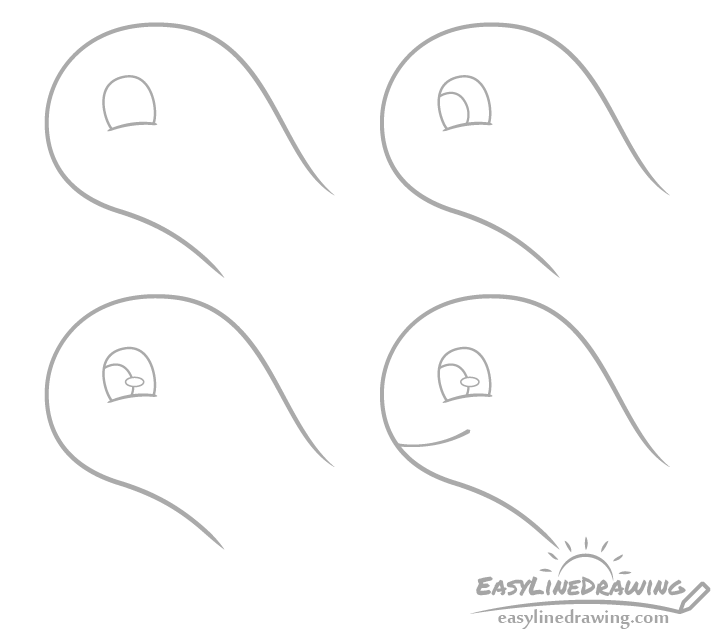
As this is a cartoon tortoise it’s face will be somewhat different from that of a real one.
First add the the outline of the eye. Inside it add the iris and then erase a little bit of it’s outline to add a small oval shaped highlight (light reflecting form the eye). Finally add the mouth to finish the tortoise’s face.
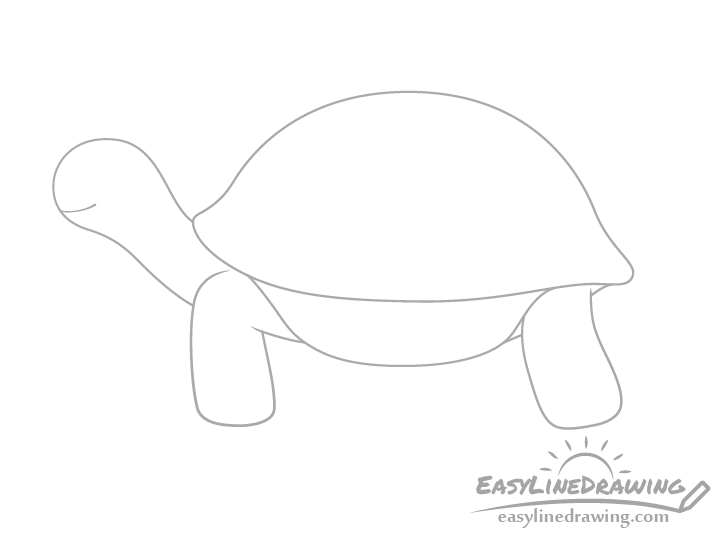
Step 7 – Draw the Toes
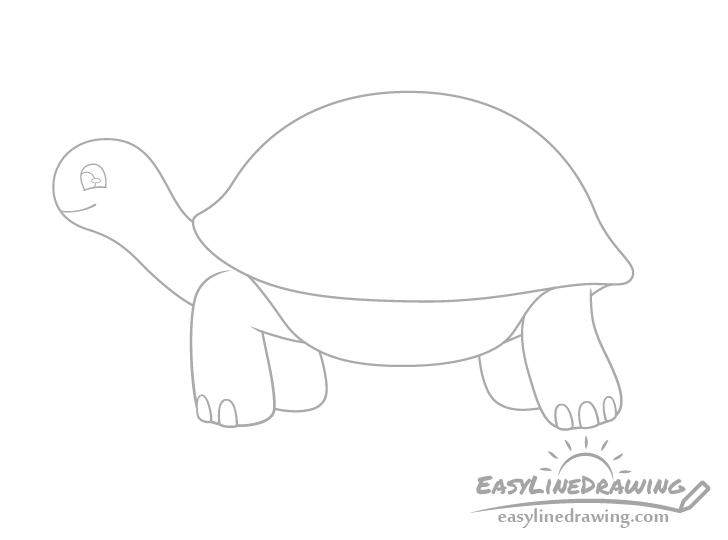
You can erase a little bit of the outlines of the feet and add in the toes/nails as shown in the example. You can shape each one similar to an upside down letter “U”.
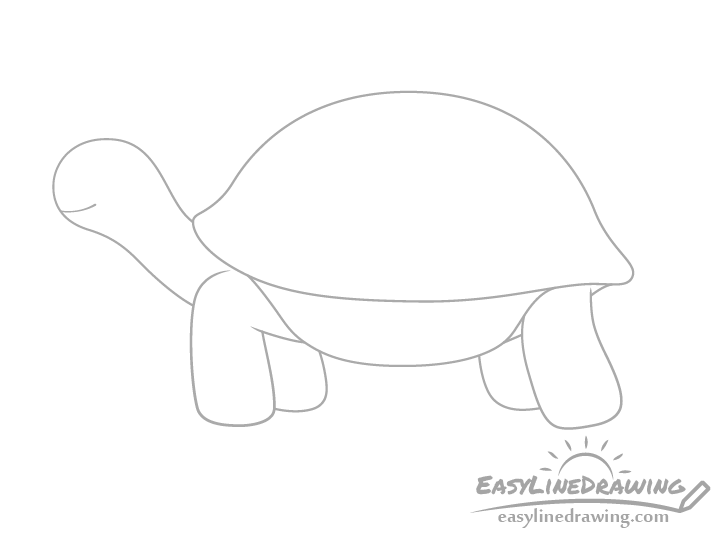
Step 8 – Draw the Shell Details & Finish the Line Drawing
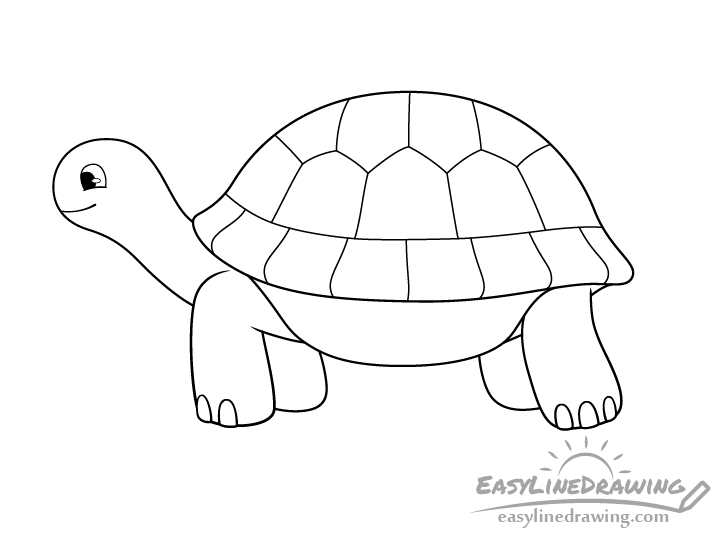
Similar to the face you can see a step by step breakdown of drawing the shell below.

First draw a line to divide it into the top and bottom. Next divide the bottom portion into little segments that get narrower as they go to the sides. This will help show the curvature of the shell.
Draw another set of segments at the upper part of the shell. Again, make them narrower as they got to the sides. Give them pointy tips at their upper ends and coming from those tips draw the lines that will create the last set of the segments of the shell.
Once done with these details confirm that your drawing looks good and trace over it with a black pen or marker. You can fill in the iris of the eye with black as well but leave the part overlapped by the highlight white.
Step 9 – Color the Tortoise
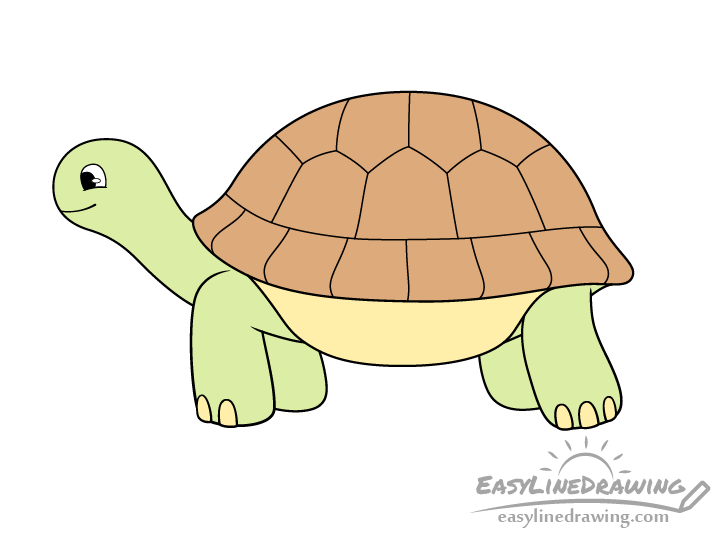
To color the tortoise you can make it’s main body a light yellow/green. Make the upper part of the shell brown and the lower part yellow. You can make the toes/nails yellow as well.
To get colors similar to the example water based paints or colored pencils can be good options. If you want a brighter looking drawing you can use markers instead.
Conclusion
The cartoon turtle used as the example in this tutorial is not particularly complex but at the same time also has some detail to it so that the drawing does not look too plain. Hopefully step by step breakdown of the drawing process has made it easy for you to follow along.
For more tutorials on drawing animals also see the following:
- How to Draw a Fox Step by Step
- How to Draw a Toucan Step by Step
- How to Draw a Penguin Step by Step
- How to Draw a Seahorse Step by Step


")


