How to Draw a Face Mask Step by Step
This tutorial shows how to draw a surgical face mask in six easy steps. It provides simple illustrations and quick instructions to go along with them.
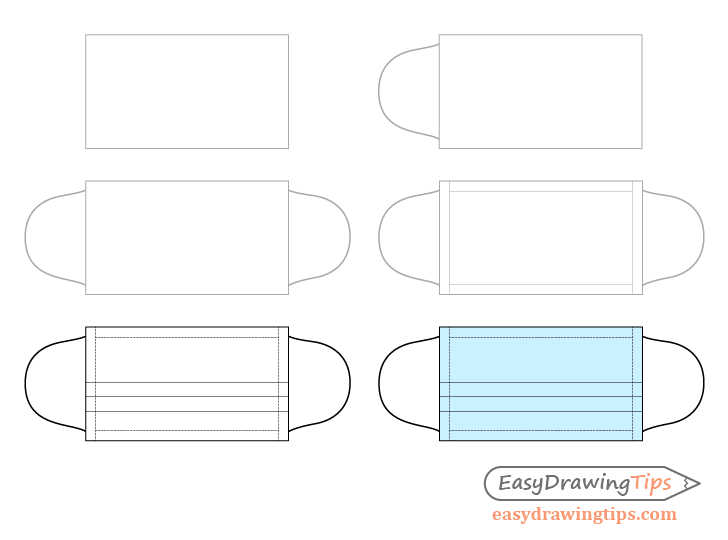
For this example it will be a fresh mask that looks like it’s just come out of the packaging and has not yet been worn. You can see a preview of the drawing steps for it in the image above.
While the tutorial is not very complicated it does require you to make a lot of straight lines. If you have trouble drawing these by hand you may wish to use a ruler to help you.
It’s also recommended that you start the tutorial in pencil and keep the lines light until you outline most of the details. You can then trace over your drawing with a black pen or marker.
Step 1 – Draw an Outline of the Mask’s Fabric

Begin by drawing a simple rectangle which will outline the main shape of the fabric portion of the mask. Be sure to leave enough room on the sides to be able to fit in the straps.
Step 2 – Draw the First Ear Loop
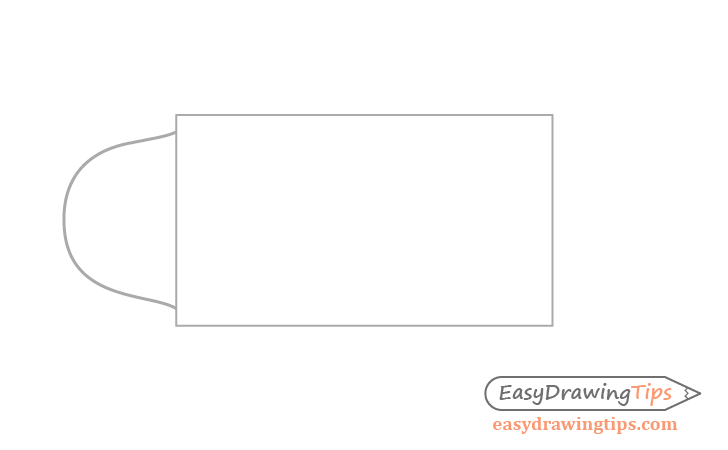
Draw the first strap similar to what is shown in the example. As it’s just a thin piece of string that can bend and warp in different directions you don’t need to be overly precise with it’s shape.
Step 3 – Draw the Second Ear Loop
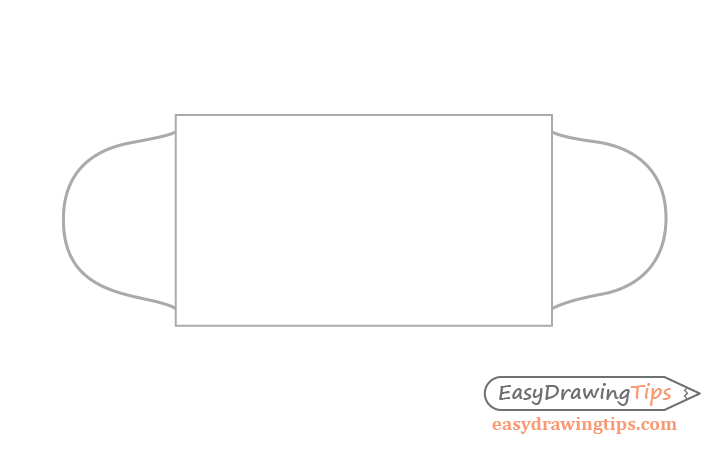
For a nicer looking drawing you can keep it somewhat symmetrical and make the second ear loop similar in shape to the first one.
Step 4 – Draw the “Stitches” Lines
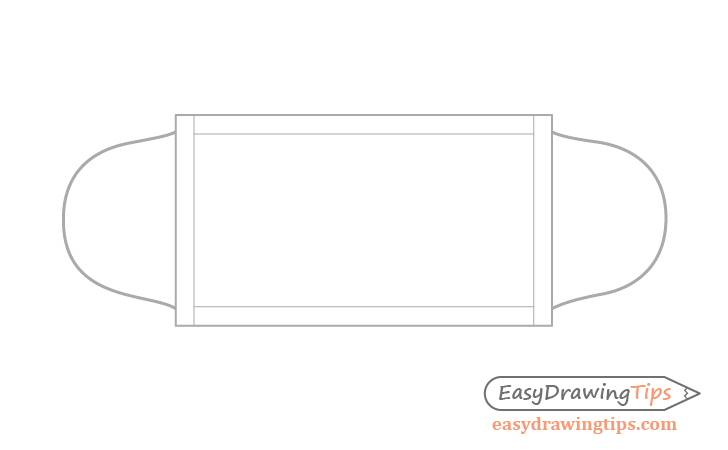
The surgical masks usually have stitches like patterns along their edges. To help add these “stitches” you can first draw some guide lines near the edges of the mask. Keep these lines as light as you can so that they are just barely visible.
Step 5 – Draw the Folds & Finish the Line Drawing
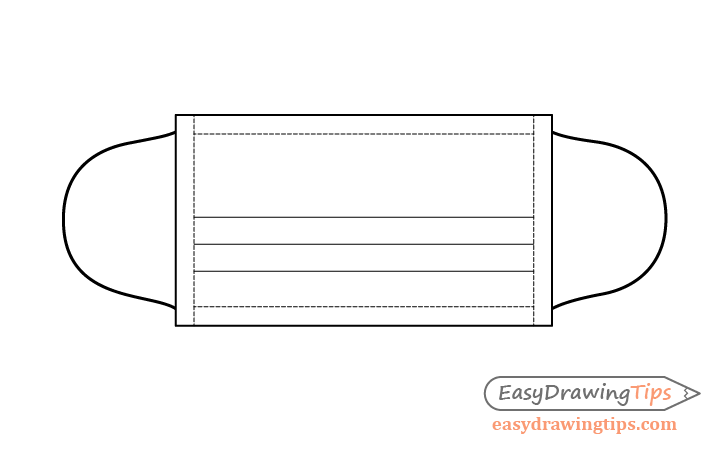
Draw three more straight horizontal lines to create the folds that surgical mask tends to have. Once done you can trace over your drawing with a black pen, marker or darker pencil lines.
When tracing over the “stitches” lines make a series of little dashes instead of one one solid line (see example above).
Step 6 – Color the Face Mask
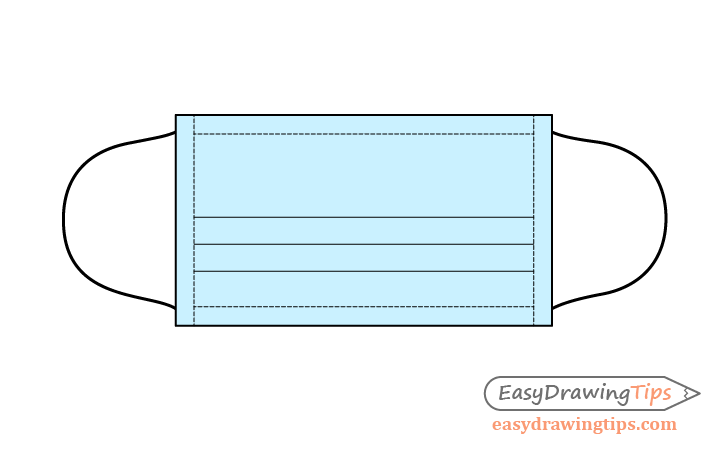
Coloring the mask is very easy. Simply fill the entire area of the fabric with a light blue. Paints or colored pencils can be a good way to do this.
Once done you should have a finished drawing.
Conclusion
Surgical face masks have a fairly simple shape (when not being worn) and can be quite easy to draw. This particular example requires you to draw a lot of straight line and as was already suggested using a ruler can be quite helpful. However, trying to do the lines by hand can be good practice for improving your drawing skills.
If you’ve enjoyed this tutorial and found it helpful you may also wish to try some of the following:
- How to Draw a Baseball Cap Step by Step
- How to Draw a Bottle of Water Step by Step
- How to Draw a Hockey Stick Step by Step


")


