How to Draw a Fox Step by Step
This tutorial show how to draw a fox in a cute cartoon style. It includes a total of twelve steps with detailed illustrated examples and quick explanations for each of them.
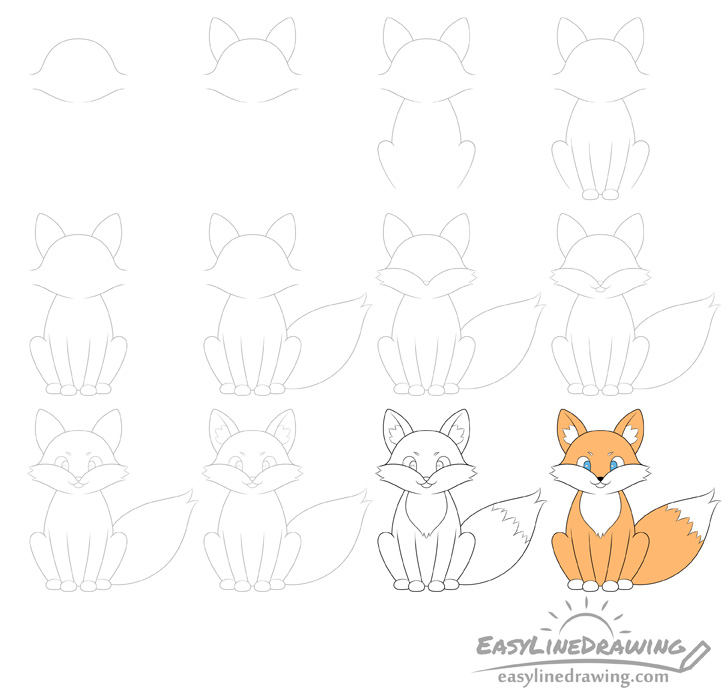
You can see a preview of the drawing steps in the picture above. A stylized fox like the one in this tutorial is not very difficult to draw but it may take a bit of time to outline all of it details. Start the drawing in pencil and make light lines that you can easily erase in case you make a mistake. You can trace over them with a black pen/marker later on before adding color.
Step 1 – Position the Fox’s Head
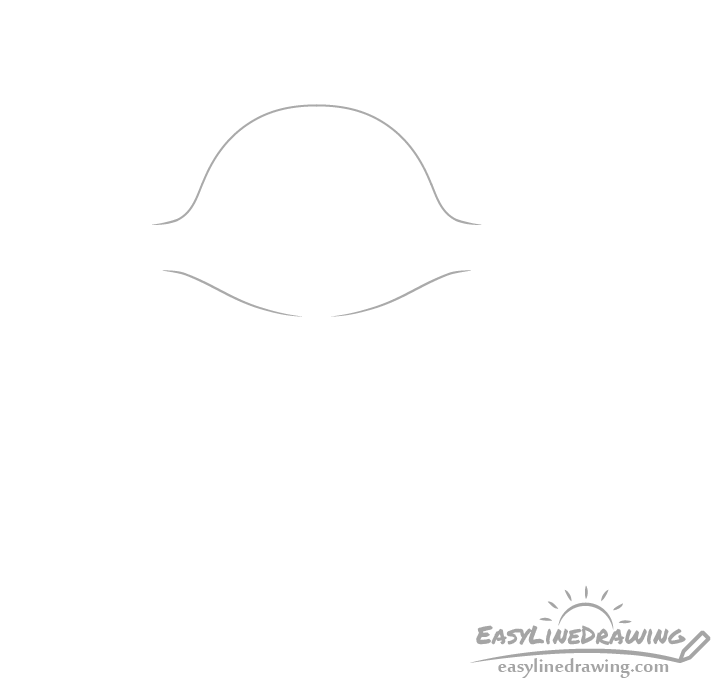
Begin with an outline of the fox’s head (shaped as shown in the example above). Leave all of the facial features and smaller details for later steps.
Make one line to define the top of the head and another one (slight broken up in the middle) to define the bottom. You can add the little gap in the bottom line simply by erasing a bit of it’s middle area.
Step 2 – Outline the Ears
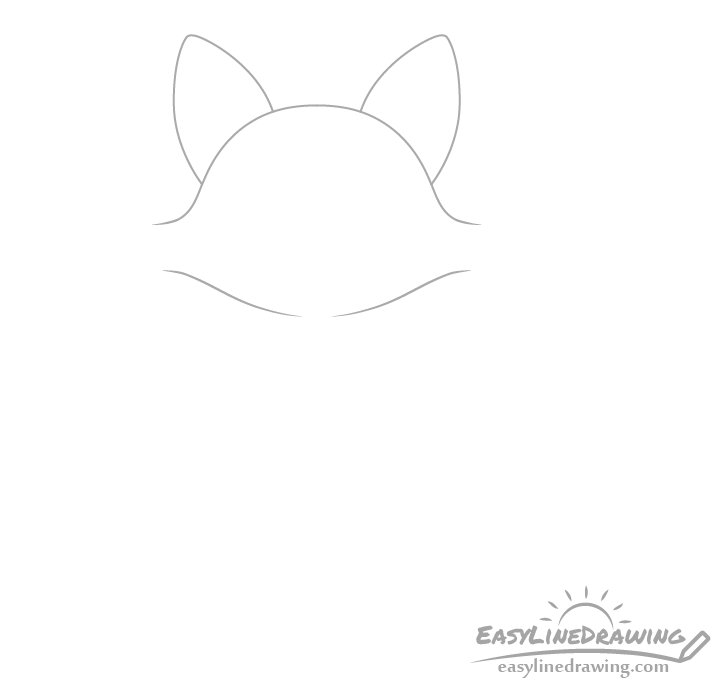
On top of the head add the outlines of the ears, again without any of their inner details. Also draw them so that they point slightly away from one another.
Step 3 – Outline the Body
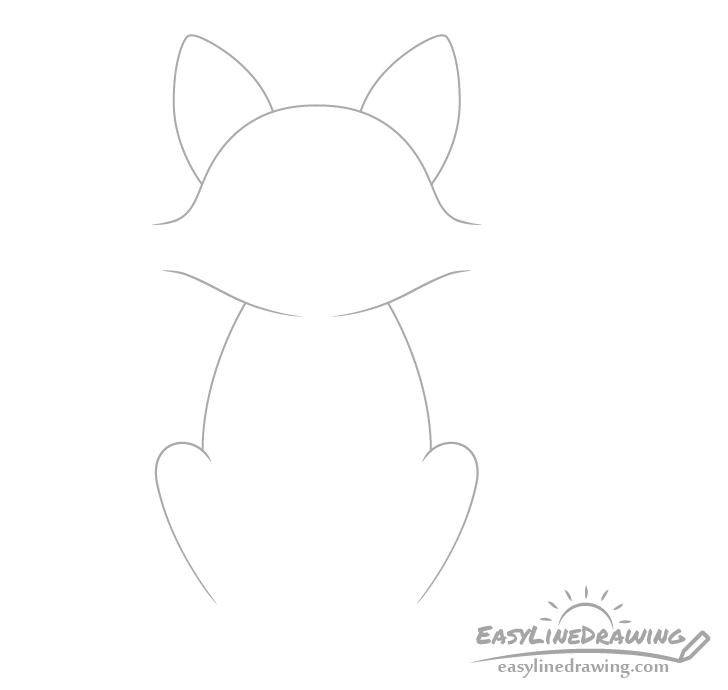
Going down from the bottom of the head add the upper part of the body. Make it narrower towards the top and wider as it goes down.
Next add an outline of the back legs on it’s sides (without the paws for now).
Step 4 – Draw the Front Legs & Paws

Starting just a bit above the vertical halfway point o the body add the front legs and add the paws afterwards. Make the legs wider towards the top and narrower towards the bottom and make paws rounder on top and flatter on the bottom.
You can also connect the two paws with a tiny line to show the bottom of the body.
Step 5 – Draw the Back Paws
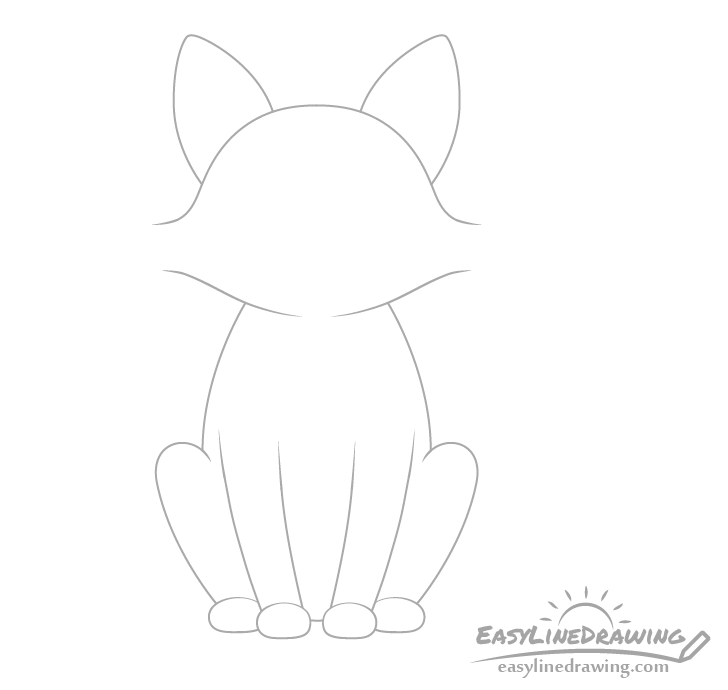
Coming out from behind the front legs/paws add the back paws. Same as the front paws make them slightly rounder on the top and flatter on the bottom.
Step 6 – Draw the Tail
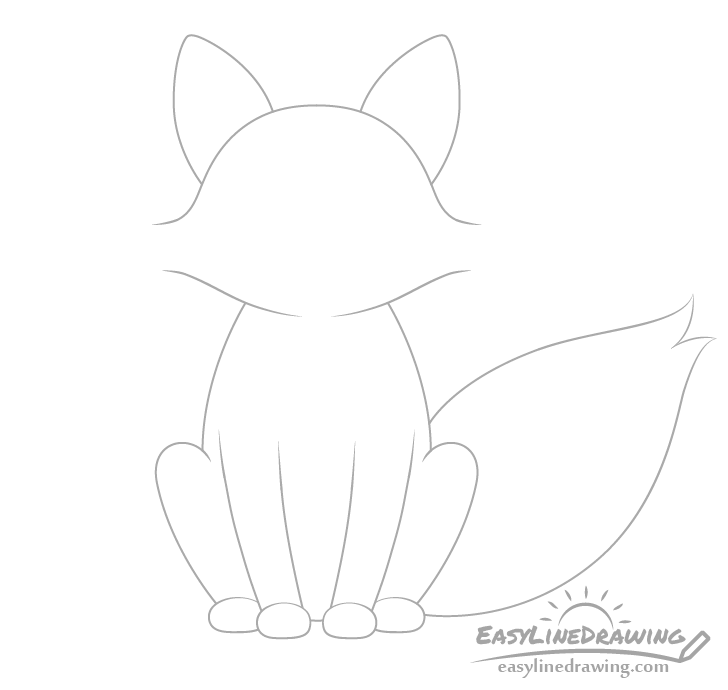
The tail is one of the most defining characteristics of fox and for a stylized fox you can draw it really big and fluffy. Make the tail narrower towards the base wider towards the middle and again narrower towards the tip. You can also add a bit of a split on it’s end to give a hint of fur clumps.
Step 7 – Draw the Nose & Cheek Fur
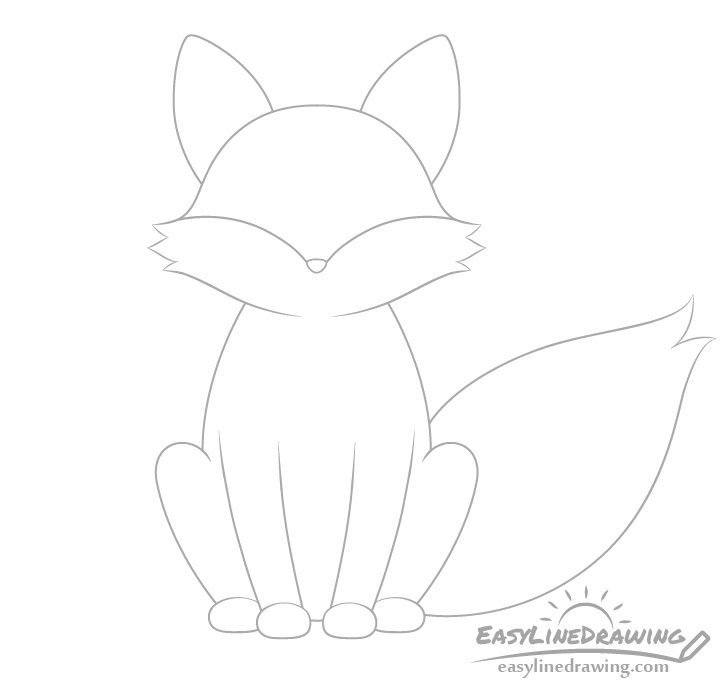
With most of the fox’s larger details outline you can add the cheeks and nose as these two will be pretty much tied into one another.
Make the nose somewhat similar in shape to a triangle with rounded corners. Position it about a quarter of the way up on the head.
Next define the cheeks by projecting a pair of curved lines from each side of the head to the nose (see example). Afterwards add some fur clumps to each cheek to finish this step.
Step 8 – Draw the Mouth

Draw the mouth as set of three small curves two going out from the bottom/middle of the nose (for the upper part of the mouth) and one more below those (for the lower part).
Step 9 – Draw the Eyes
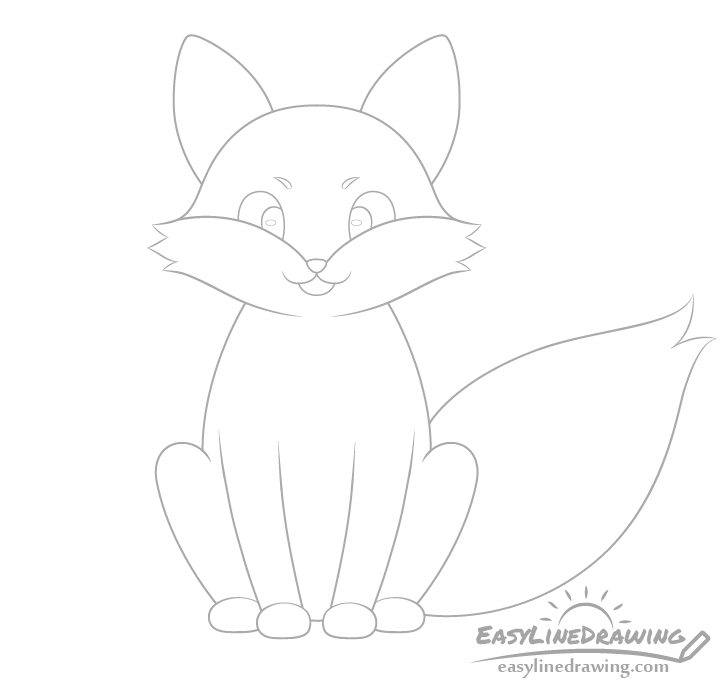
Draw the eyes right above the cheeks. Start with the outline of each eye, next add the inner parts (irises) with a small oval shaped highlight in each of them.
Finally add a tiny pair of eyebrows just above each eye (shaped a bit like drops of water).
Step 10 – Draw the Ear Fur
Similar to the fur on the cheeks add some fluff inside the ears but before doing that also draw a pair of lines to show the curve of each ear.
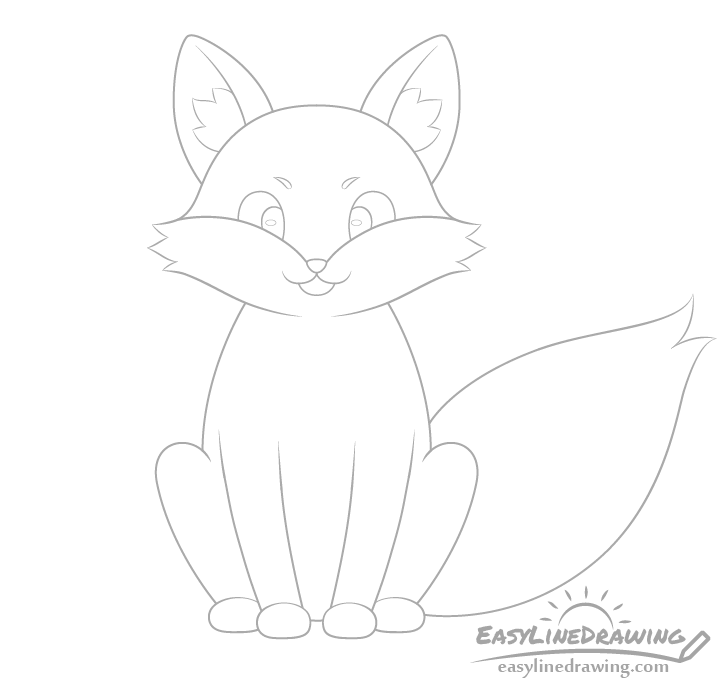
Step 11 – Finish the Line Drawing
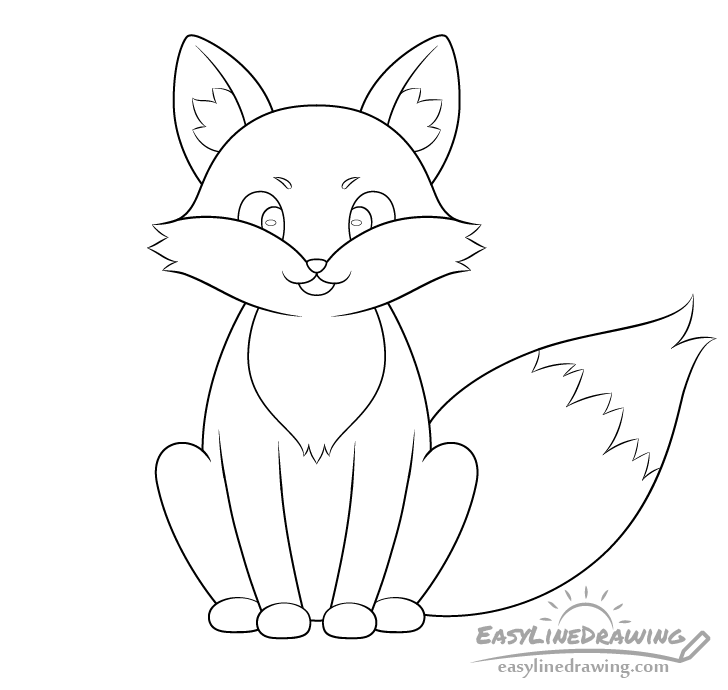
Add some fur to the chest area below the head and a fur pattern near the end of the tail to create what will be the white tip in the next step.
Afterwards you can go over your drawing with a black pen or marker as was suggested at the start of the tutorial. Alternatively you can also darken your lines by simply pressing harder on the pencil and tracing over them.
Step 12 – Color the Fox
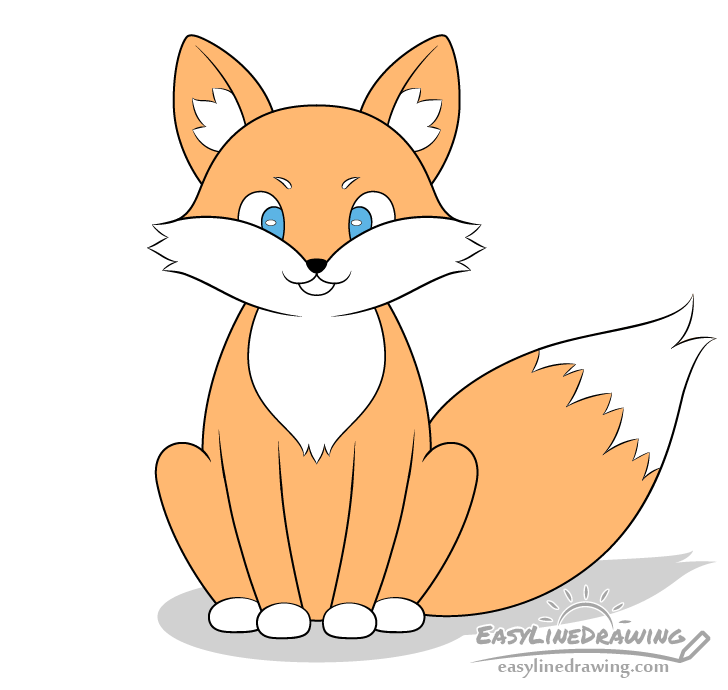
To finish the drawing you can color most of the fox orange but also leave some white spots on the fur as follow:
- Ear fluff
- Eyebrows
- Cheeks
- Chest
- Tail End
- Paws
You can make the irises of the eyes a light blue and leave the highlights inside each of them as well as the rest of each eye white.
You can also optionally add a shadow to underneath the fox as shown in the example and shade it a light grey.
Conclusion
While a stylized cartoon fox like this one is much easier to draw than a more realistic fox it can still take a bit work. However if you put in some effort you can have a very nice looking drawing once done. Try and follow the steps carefully and be sure to first do the line drawing in pencil so that you can easily correct any mistakes.
If you enjoyed drawing the fox you might also like some of these other animal drawing tutorial:
- How to Draw a Cat Step by Step
- How to Draw a Hot Dog Step by Step
- How to Draw a Bird Step by Step
- How to Draw a Toucan Step by Step
- How to Draw a Tortoise Step by Step
- How to Draw a Seahorse Step by Step


")


