How to Draw a Flower Step by Step
This tutorial shows an easy way to draw a flower in eight steps. It includes simple examples and quick drawing instructions.
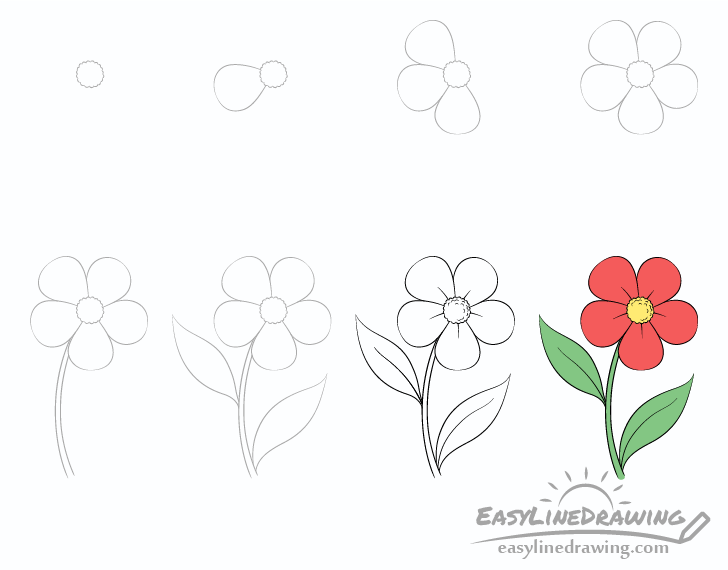
Drawing a simple flower like the one in the example can be good for beginners as it’s not very complicated and also looks nice.
Start the drawing in pencil and make light lines that you can easily erase in case you make a mistake. You can darken your lines after you finish the light line drawing.
You may also want to have some colored pencils, paints or markers if you want to add some color.
Step 1 – Draw the Center of the Flower

Begin by drawing the center of the flower. You can see in the above example that it’s pretty much a bunch of little curves that come together to create a circle.
To make things easier you can first draw a very light circle (does not need to be perfect) to act as a guide and then draw the little bumps/curves around it.
For drawing a tulip flower see:
How to Draw a Tulip Step by Step
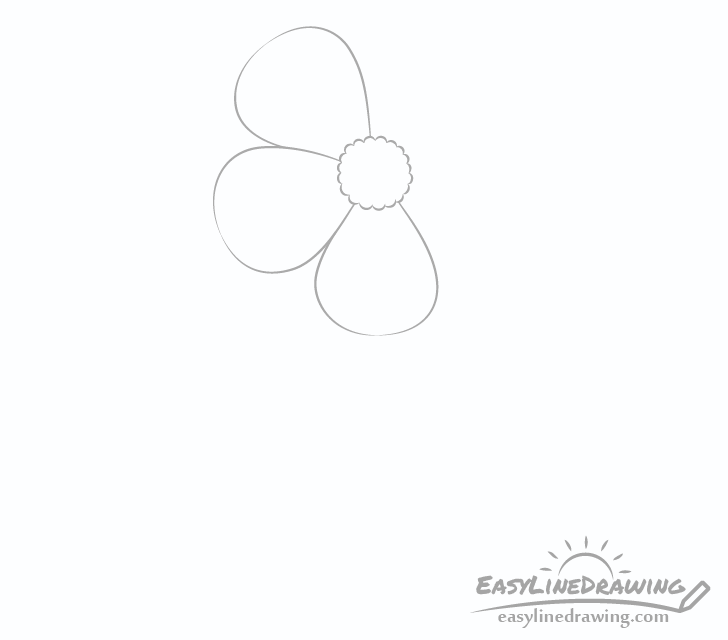
Step 2 – Draw the First Petals

In total the flower will have five petals each roughly the same in size and shape. Try and size these so they fit nicely around the center in a way where none ares too “squashed together” and where there are no gaps between them.
Add the first petal as shown in the example. Make it wider as it goes away from the center of the flower transitioning into a nice and smooth curve on the end.
Step 3 – Add More Petals
Add two more petals shaped similar to the first one. As already mentioned try and keep these similar in shape and size to the first one.
Step 4 – Finish Adding Petals
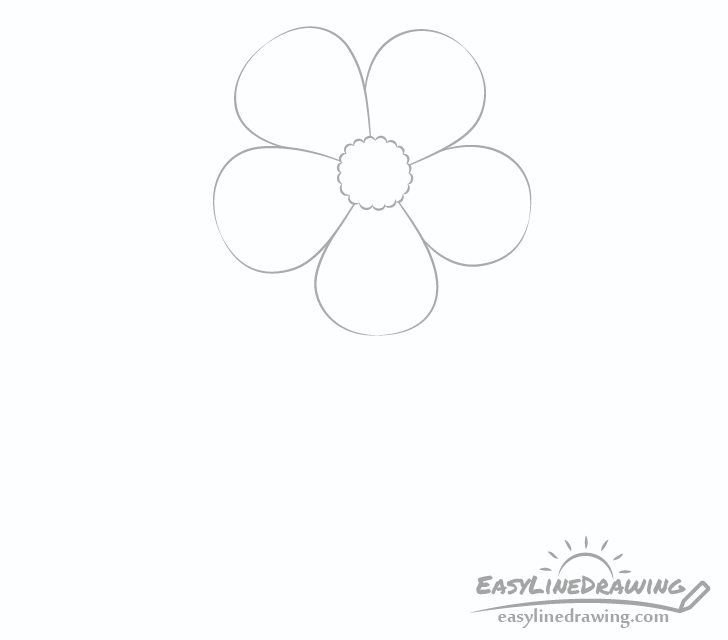
Finally add the last two petals to finish the outline of the flower. If you notice that your petals don’t seem to fit well simply erase the ones you think are the problem and redraw them.
Step 5 – Draw the Stem
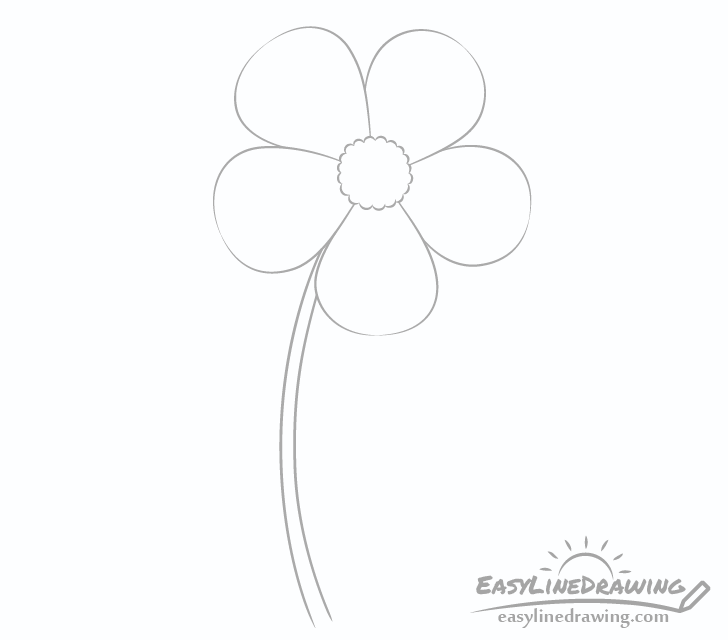
Going down from the petals add the stem. Draw it with a smooth curve and make it slightly wider towards the bottom than the top.
Step 6 – Draw the Leafs
Now add a pair of leaves to the flower. Draw the one near the top slightly smaller than the one at the bottom.
Make the shapes of the leaves narrow near the stem, then wider towards their centers and then narrower again ending with pointy tips.
You can also draw each leaf with a bit of a “wave” in it’s overall shape where each first curves in one direction and then in the other.
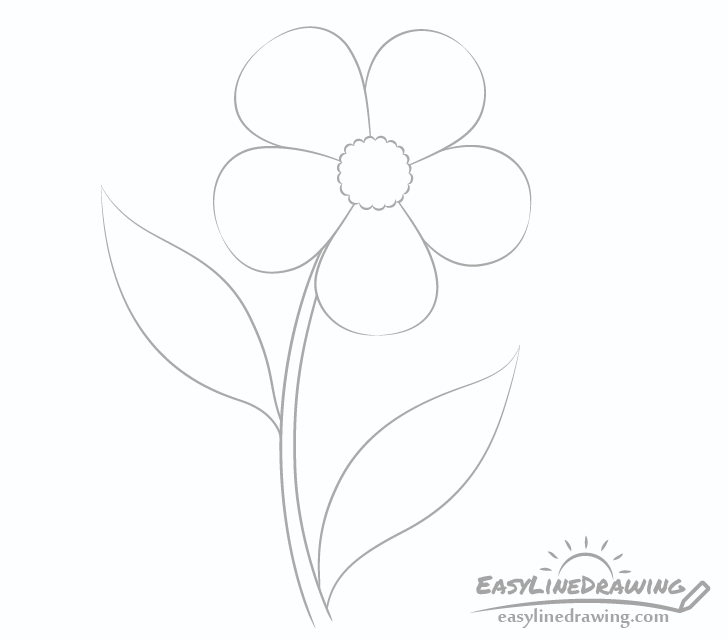
Draw 7 – The Smaller Details & Finish the Line Drawing
To finish the line drawing add a few of the smaller details of the flower:
These will be:
- Some small curves/bumps inside the center so it does not look flat.
- Small lines near the base of each petal to show tiny folds flowers often have in that area.
- Lines down the middle of each leaf to show that they also have a bit of a fold there.
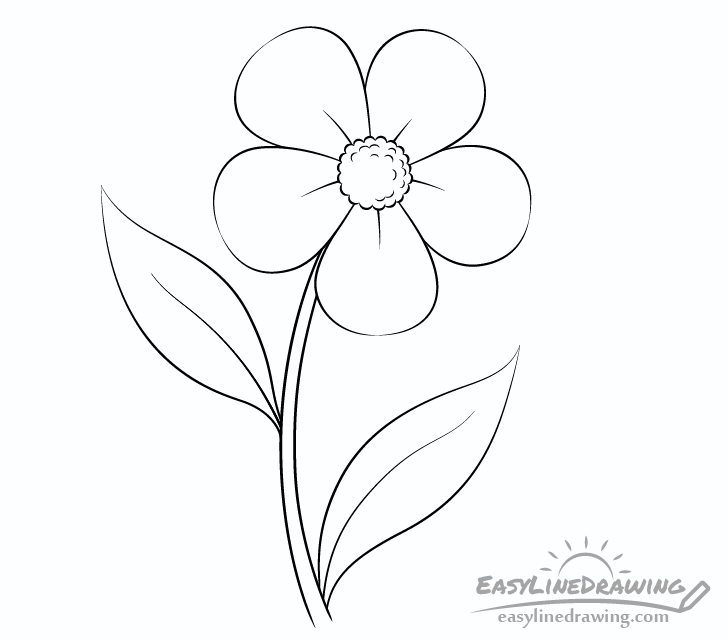
Once done adding the details you can go over your drawing with darker pencil lines or a black pen/marker.
If you are worried about making a mistake when tracing over your lines then a pencil is safer as it can still be erased.
Step 8 – Color the Flower Drawing
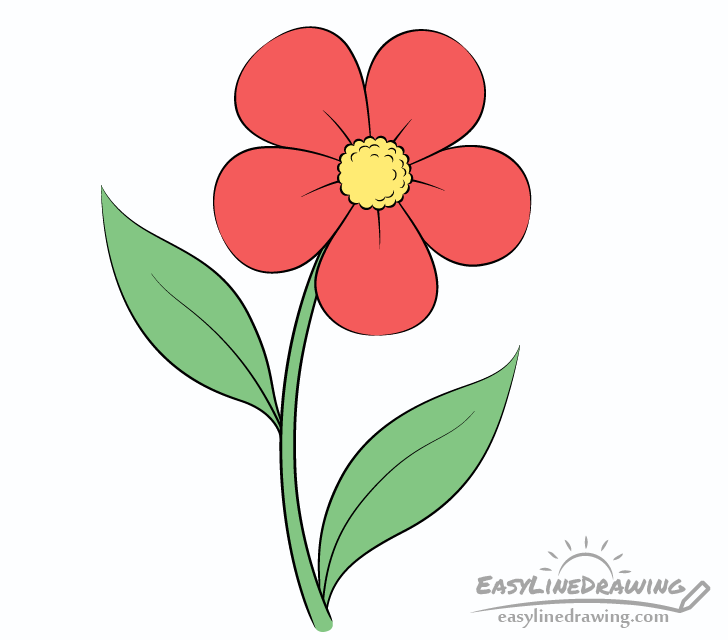
To color the flower you can use paints, colored pencils or markers. Make the center yellow, the petals red, and the stem/leaves green. You can of course also use a different color combination if you prefer.
Conclusion
This is a very simply drawing of a flower that can be easy enough even if you are a total beginner . At the same time it can still look quite nice and be fun to draw.
If you would like to try more simple tutorials similar to this one see the ones below:
- How to Draw a Tree Step by Step
- How to Draw a Leaf Step by Step
- How to Draw an Apple Step by Step
- How to Draw a House Step by Step
- How to Draw an Oak Leaf Step by Step
- How to Draw a Butterfly Step by Step


")


