How to Draw a Duck Step by Step
This tutorial shows how to draw a cartoon duck sitting on water in six steps. It includes basic drawing and coloring examples along with simple explanations.
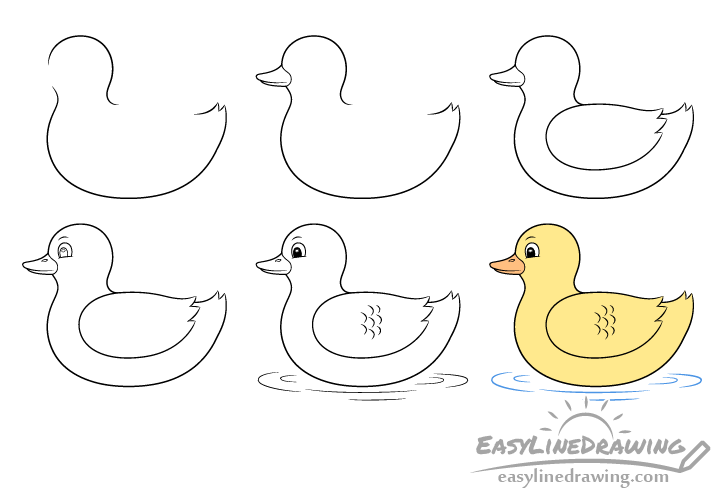
Drawing a duck like the one in this example is fairly easy. As it’s being viewed from the side you only need to add one eye and one wing. Also as the duck is floating on water you don’t need to worry about drawing the feet at all.
Start the tutorial using a pencil and make thin and light lines as you will need to erase small parts of the drawing in some of the step. You can darken them in step fiver before coloring.
Step 1 – Draw the Outline of the Duck’s Head & Body
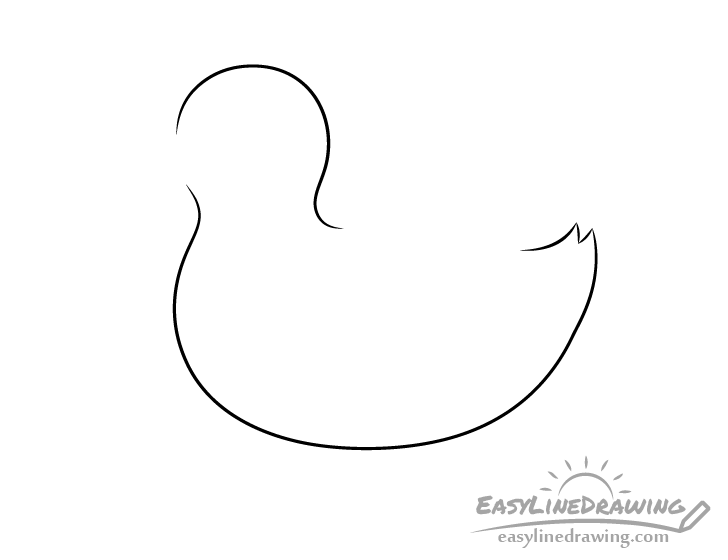
Begin by making an outline drawing of parts of the duck’s head and body. The head should be somewhat round towards the top transitioning into the slightly narrower neck. Leave the part where the bill is attached open (slightly towards the lower part of the head).
Draw the body with smooth at the bottom that then transitions into the tail. You can add a little split into it to create a hint of feathers.
Leave the area between the tail and the neck open for the wing.
Step 2 – Draw the Beak
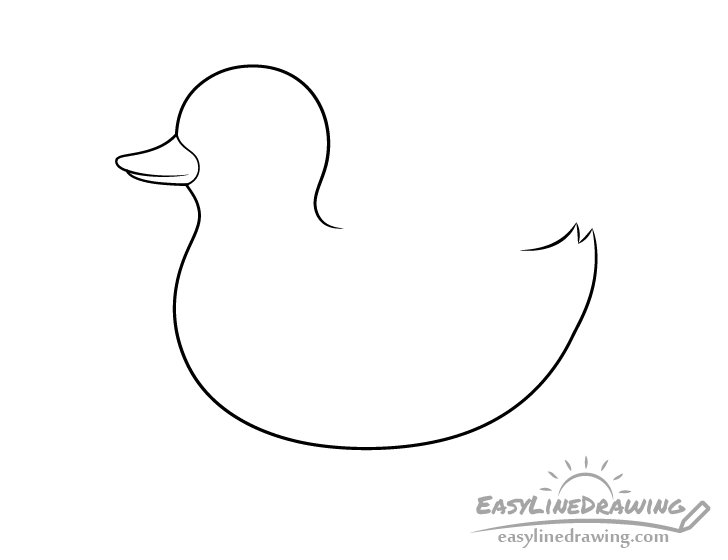
Into the opening in the head’s outline draw the bill. Make it slightly narrower as it goes out (away from the head) and draw it’s overall shape with a bit of curve.
Also, be sure to draw the top part of the bill larger and slightly longer than the bottom.
Step 3 – Draw the Wing
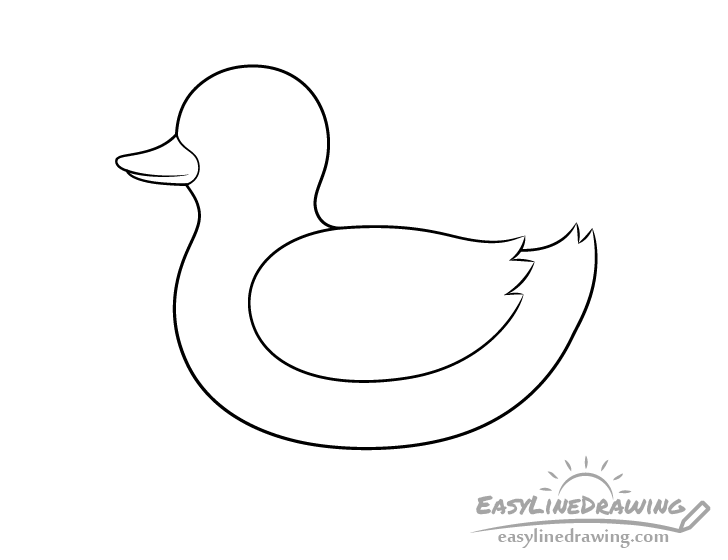
Between the neck and tail draw the wing. Similar to the tail give it some splits on it’s end to again create a hint of feathers.
Step 4 – Draw the Eye & Nostril
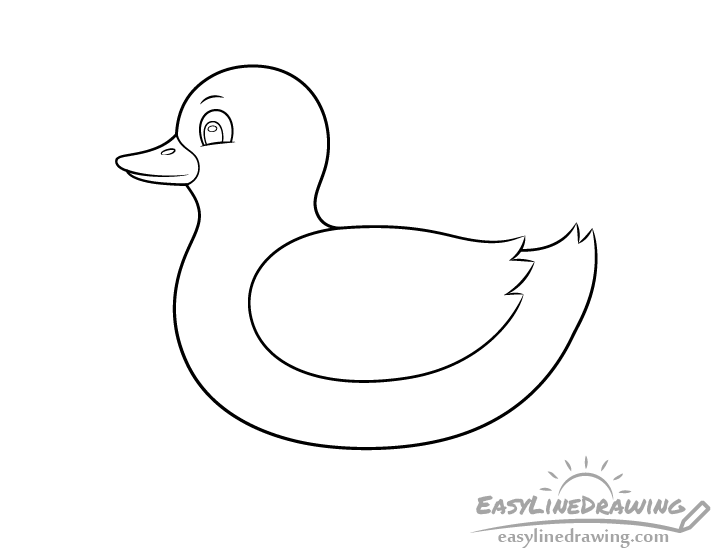
Towards the bottom/front side of the head (near the bill) draw the eye. As this is a cartoon looking duck make the eye quite large and make it’s shape somewhat like an upside down letter “U” with a light curve at it’s bottom.
Inside the eye draw the iris shapes almost exactly like the outline of the eye but smaller. Inside the iris add a small oval highlight (light reflecting from the eye).
You can also add a hint of an eyebrow above the eye with a tiny curve.
After drawing the eye also add a small oval shaped nostril to the upper part of the beak (close to the head).
Step 5 – Draw the Feather Pattern & Water
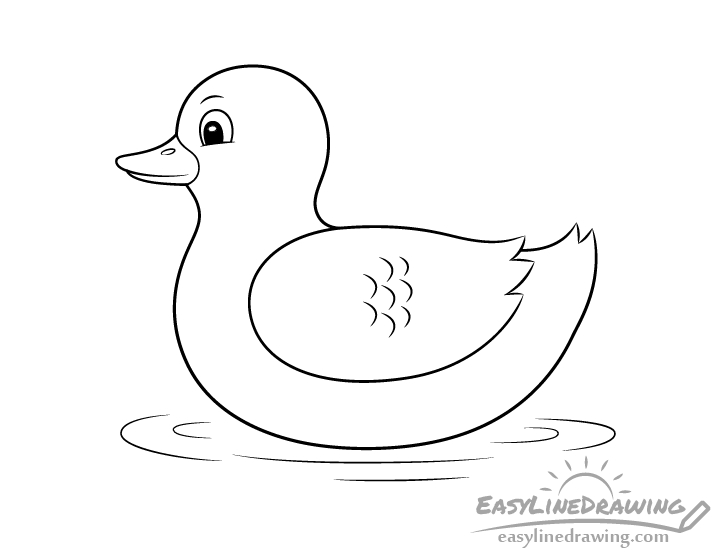
Add some water ripples around the duck to show that it’s floating and so me feather around the middle of the wing.
Draw the water ripples as though they are “wrapping around” the duck and try and make the lines that define them particularly light.
Draw the feathers as sets of little curves that that look a bit like fish scales.
Once done with the above you can go over your the duck with darker pencil lines or a black pen/marker but don’t darken the water. You can also fill in the iris of the eye with black or dark pencil shading.
Step 6 – Color the Duck
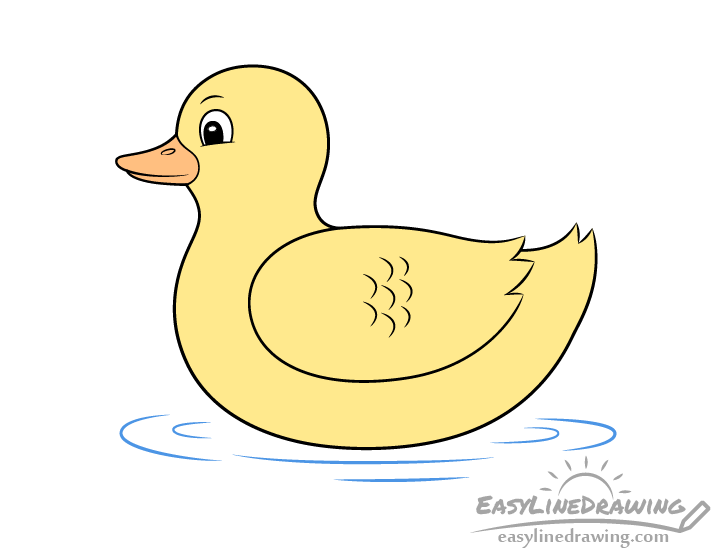
To color the duck make it’s bill orange and the rest of it yellow. Go over the water ripples with a blue pen or marker.
Conclusion
By using a simplified style and giving a drawing just a little bit of detail you can get art that looks nice and is not too difficult to create (as is shown with the duck in this tutorial). Hopefully you’ve found this guide helpful and had fun following along.
For more simple tutorial on drawing other types of birds also see:
- How to Draw a Swan Step by Step
- How to Draw an Owl Step by Step
- How to Draw a Penguin Step by Step
- How to Draw a Bird Step by Step


