How to Draw a Maple Leaf Step by Step
This short tutorial shows how to draw a maple leaf in four steps with simple illustrated examples and quick explanations.
Maple leaves have a very interesting shape but one that also makes them a little more difficult to draw then some other leave types. To help this tutorial shows a fairly simple step by step approach to drawing one.
As with most tutorials here on EasyLineDrawing it’s recommended that you start it in pencil and make light liens that you can easily erase in case of a mistake. You can darken them after you have all parts of the leaf outlined.
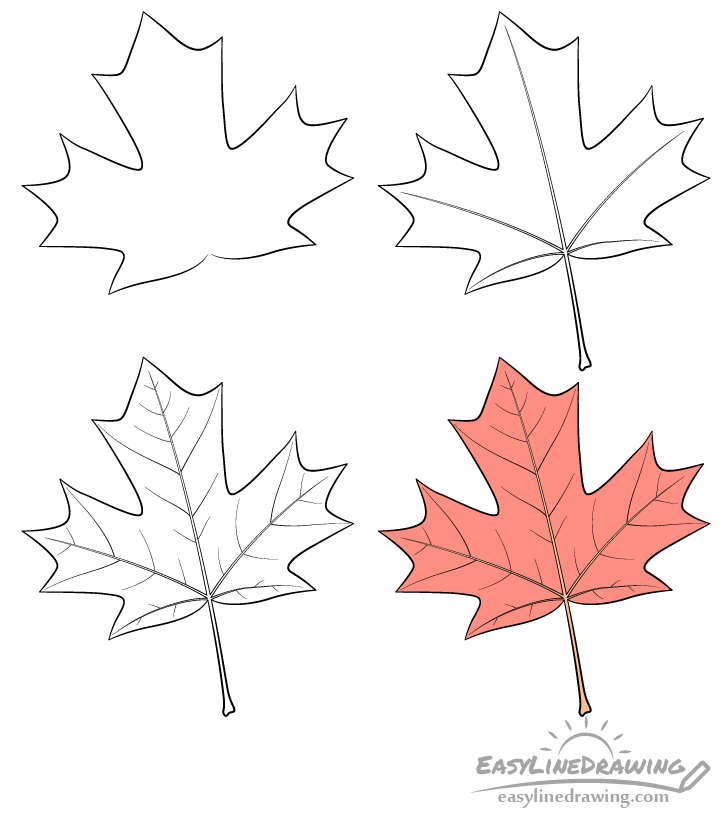
Step 1 – Outline the Blade of the Leaf
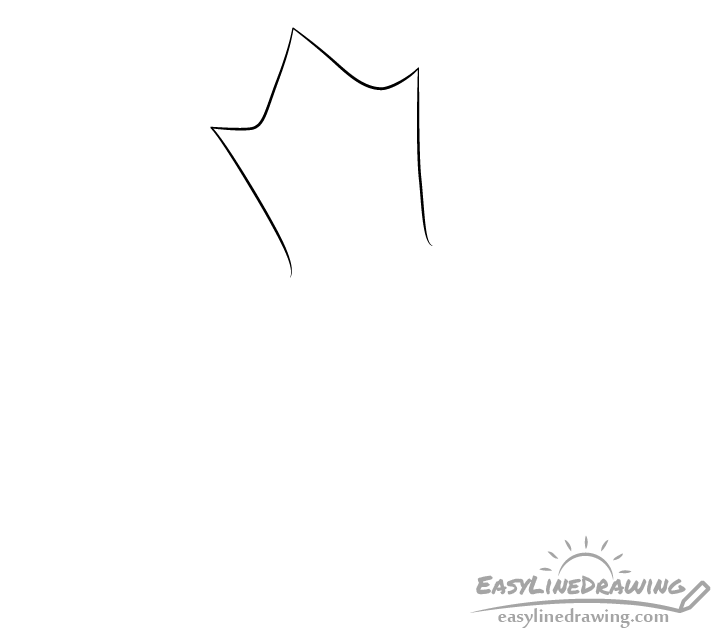
Start by outlining the main shape of the maple leaf (the blade). Think of it as being split into five main sections. First, draw it’s center part splitting into three as shown above.
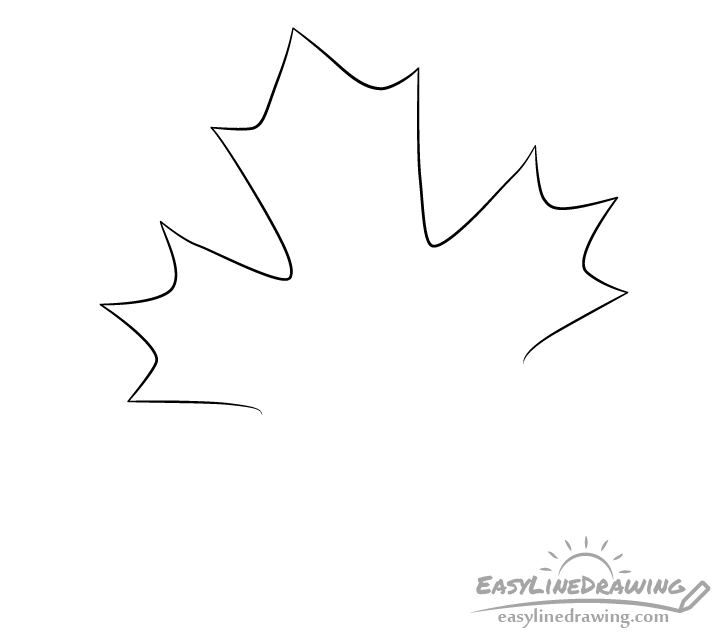
Next, add the two on the sides. Again, draw them splitting into three as shown.
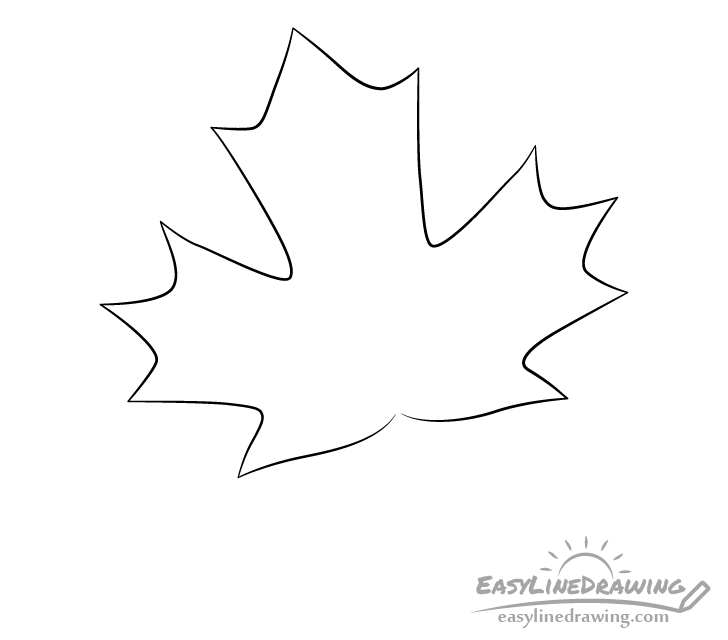
Finally, draw the two small ones on the bottom to complete the shape of the maple leaf’s blade.
Step 2 – Draw the Veins/Midrib/Petiole
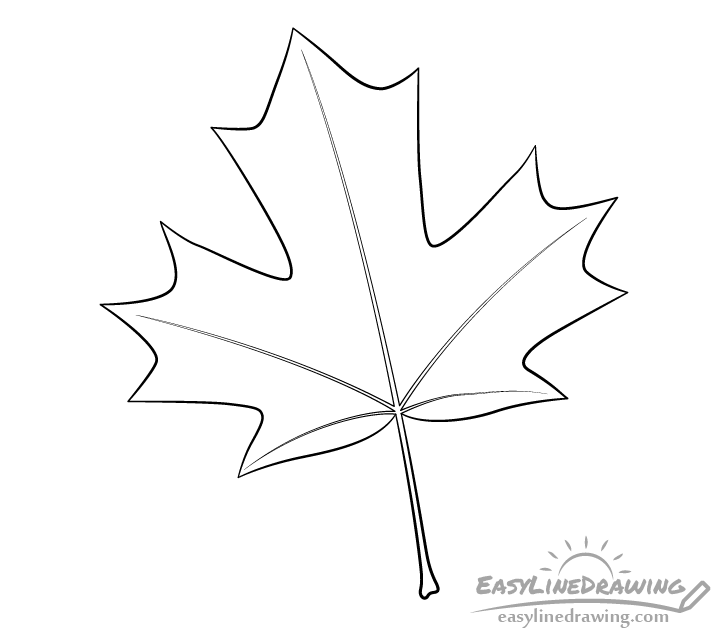
After outlining the blade add the petiole (the part that attaches the leaf to the branch) followed by the midrib. Draw the midrib running through the middle of the leaf. It should get narrower as it gets closer to the central tip. Next, draw the largest veins that branch out from the base of the midrib towards the other tips of the leaf other four parts of the leaf.
Draw the petiole, midrib and veins to be slightly curved so that they look more natural (as opposed to just straight lines).
Step 3 – Draw the Smaller Veins & Finish the Line Drawing
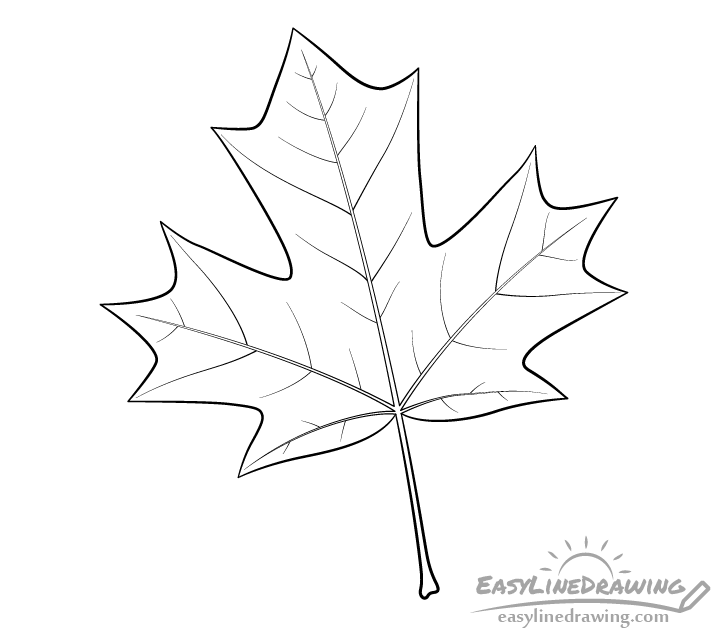
After you finish drawing the outline of the leaf add the smaller and medium sized veins. The medium sized veins should generally go towards one of the tips while the small veins can be placed fairly randomly.
After you are done adding the leaf’s various parts go over your drawing with a black/marker or darker pencil lines. Optionally you can also make the main outline of the leaf thicker than the smaller details.
Step 4 – Color the Maple Leaf
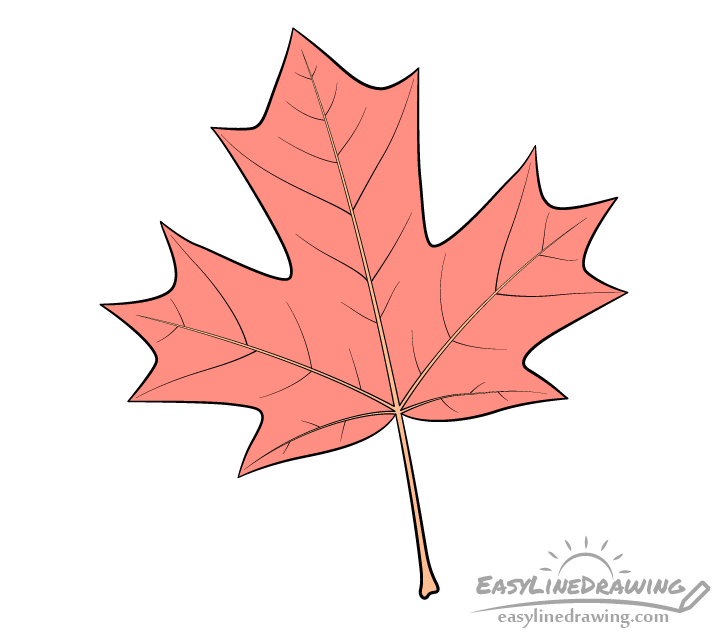
Use pretty much anything you like to color the leaf (markers, colored, pencils, paints, pastels, etc…). Generally you will want to make it either red (as in this example) green, or yellow. Depending on weather you want a summer or a fall leaf. You can also make it several different colors that transition between green, yellow and/or red.
In case of a simple red leaf like this one you can make the midrib/primary veins a slightly lighter color such as orange or yellow.
Conclusion
A maple leaf has a very interesting shape which makes it quite popular and fun to draw. While it can be a little more complex than some other leaves you can make the drawing process a little easier by applying the step by step method used in this tutorial.
For more similar guides also see:
- How to Draw a Leaf Step by Step
- How to Draw a Grape Leaf Step by Step
- How to Draw an Oak Leaf Step by Step
- How to Draw a Tree Step by Step
- How to Draw a Mushroom Step by Step
- How to Draw a Heart Step by Step

")


