How to Draw a Mushroom Step by Step
This simple tutorial shows how to draw a mushroom in six steps with detailed illustrated examples and quick instructions.
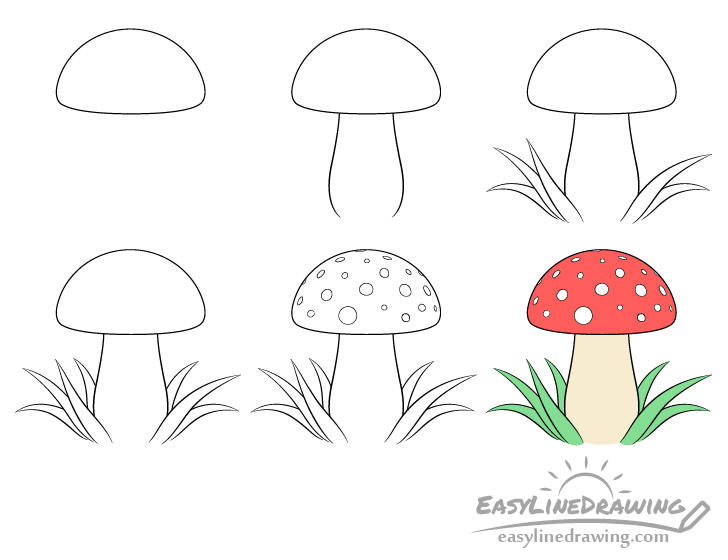
The mushroom in this drawing has a red cap with white spots and is surrounded by a little bit of grass (as you can see in the preview image above). As already mentioned, the tutorial is quite simple, it can be great if you are a beginner or are just looking for something fun and easy to draw.
Start in pencil and be sure to make light lines as you will need to do a bit of erasing in one of the steps (when adding the grass).
Step 1 – Draw the Mushroom Cap
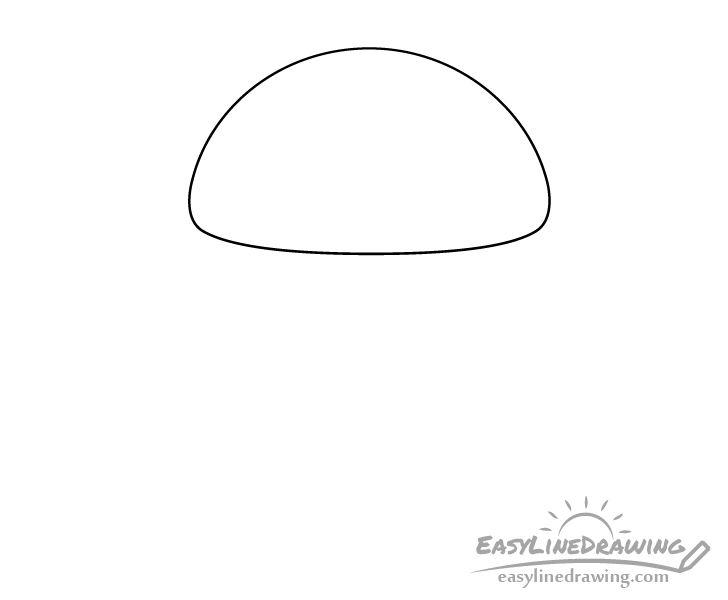
First outline the mushroom’s cap. Draw both it’s top and bottom with a curve but make the bottom one much flatter. Overall it should look similar to the top of a burger bun.
For drawing an actual burger see:
How to Draw a Burger Step by Step
Step 2 – Draw the Stem
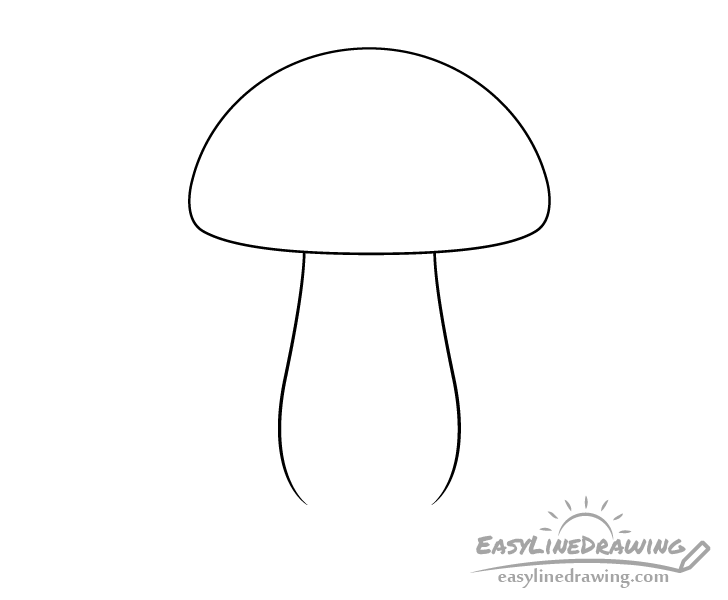
Going down from the cap add the mushroom stem. Make it narrower at the top, wider as it goes down, and then again narrower towards the bottom.
Step 3 – Draw the Blades of Grass
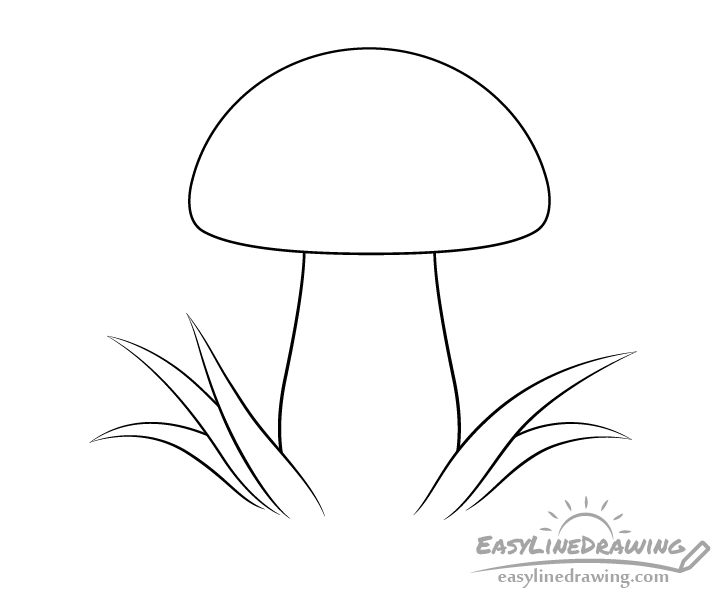
To make the mushroom look more interesting add some grass to its sides. To do this you can draw it right over top the stem and erase the parts covered by it afterwards.
Draw the grass blades with pointy tips and make them narrower towards the top, wider towards the bottom/middle and then again narrower towards the very bottom (similar to the mushroom stem).
For a tutorial on drawing grass see:
How to Draw Grass Step by Step
Step 4 – Add Some Background Grass
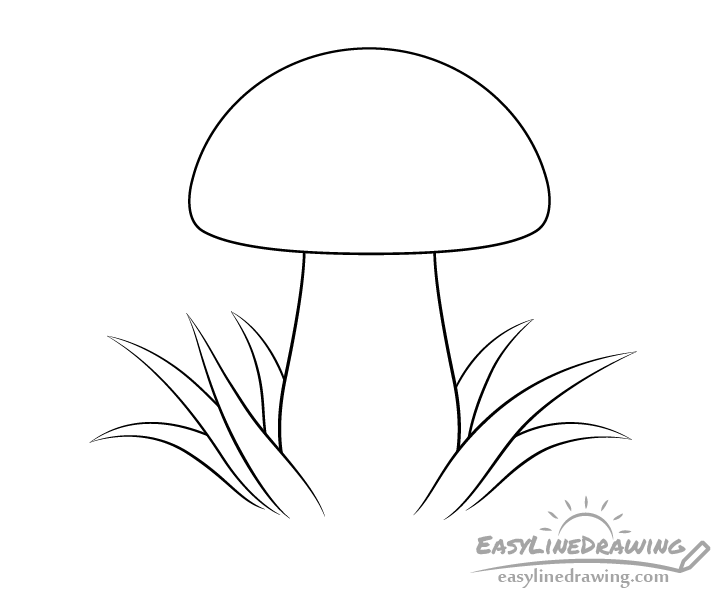
Add a few more blades of grass sticking out from behind the stem. This will make it look like the mushroom is surrounded by it.
Step 5 – Draw the Cap Spots
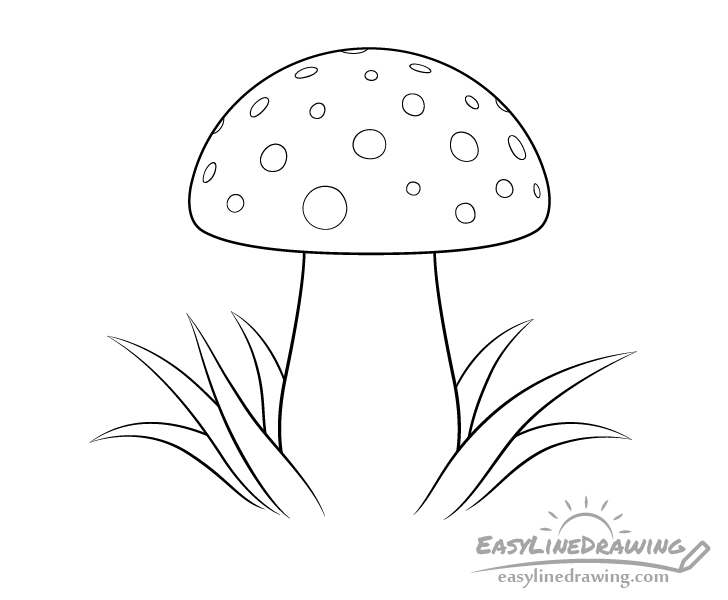
Finally, add some spots of various sizes to the mushroom cap. Draw the shapes of the ones near the middle closer to circles and the ones on the top/sides closer to ovals. Generally the closer the spots are to the edge the narrower they should be drawn. This will make it look like the they are wrapping around the cap and give it a more 3d look.
Once done drawing the spots go over your lines with a black pen/marker or simply darken them with the pencil.
Step 6 – Color the Mushroom
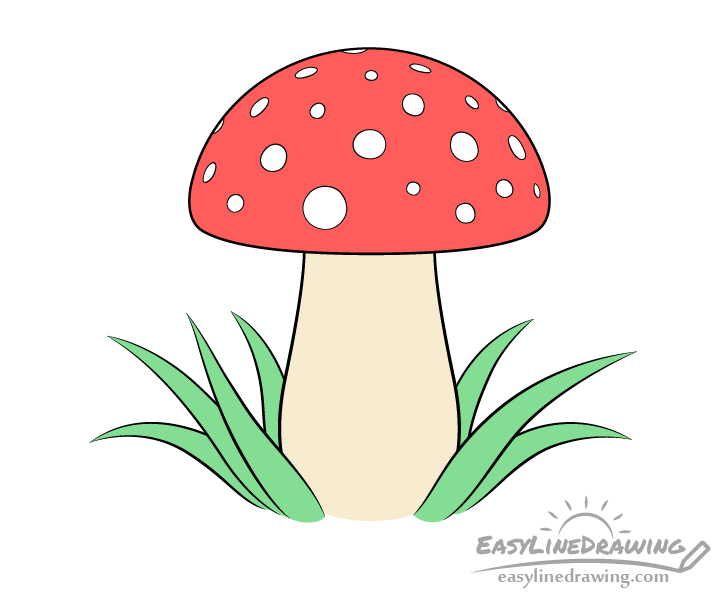
Finally, color the mushroom by making the cap red (leave the spots white), the stem a light yellow/brown and the surrounding grass green. It may be a good idea to use colored pencils or paints for the stem as markers tend to be a little too bright. You can color the cap and grass with whatever medium you prefer.
Conclusion
For the most part the mushroom shown in this tutorial is fairly easy to draw. Adding the spots may take a bit more work but the effort is definitely worth it as they can make your drawing look a lot more interesting.
For more similar step by step drawing guides also see:
- How to Draw a Maple Leaf Step by Step
- How to Draw a Flower Step by Step
- How to Draw a Watermelon Slice Step by Step
- How to Draw a Strawberry Step by Step
- How to Draw a Tree Step by Step
- How to Draw Mountains Step by Step