How to Draw Mountains Step by Step
This tutorial shows how to draw mountains in six steps with easy to follow illustrated examples and quick drawing instructions.
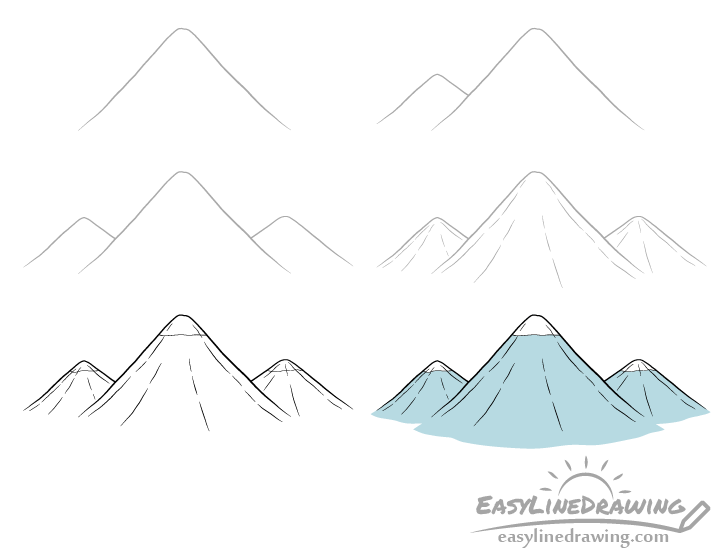
The tutorial is quite simple and should be fairly easy even for beginners. You can see a preview of its different stages for in the image above.
Start the drawing in pencil and make light lines that can be easily erase in case you make a mistake. You can darken them later on with a black pen or marker.
Step 1 – Draw an Outline of the Front Mountain
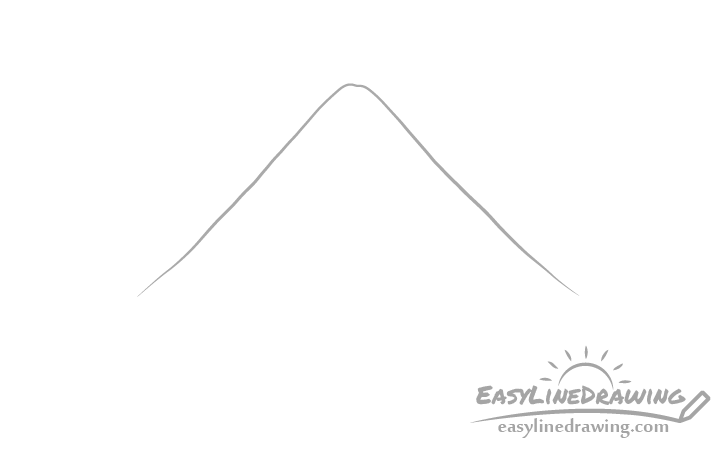
In this case there will be three mountains in total. One larger one in the front and two more distant ones behind it.
Draw the larger mountain first as shown in the example. Make it wide at the bottom and narrower towards the top as you would generally expect a mountain to look like but don’t make the top overly pointy. You should also deliberately make your lines a little wobbly as mountains tend to have uneven surfaces.
Leave the bottom of the mountain open with no outline. Adding one there will make the drawing seem odd like the mountain has been cut off.
Step 2 – Draw the First Side Mountain
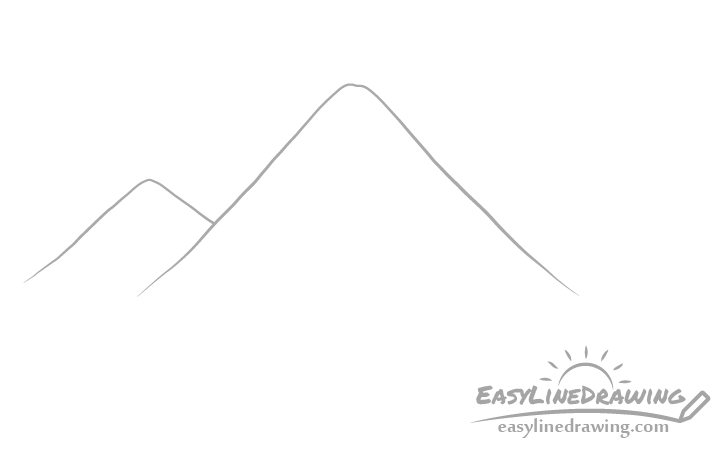
To one side of the larger mountain and partially hidden behind it add a smaller mountain. You can draw it a similar way with slightly wobbly lines.
Step 3 – Draw the Second Side Mountain
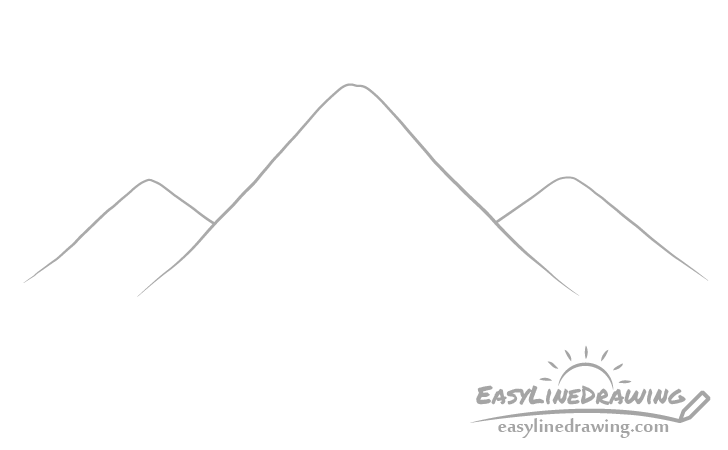
Add a second smaller mountain on the other side of the first one. Make it just a tiny bit different in shape but try and keeps it’s overall size the same as the first smaller mountains so that your drawing looks more balanced.
Step 4 – Add the Smaller Details
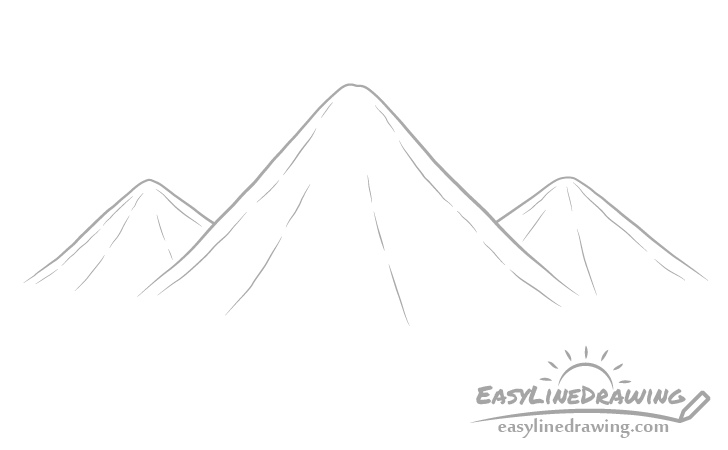
To make the mountain appear less flat and a bit more three dimensional give them some details in the form of several (again) wobbly and sometimes broken up lines running towards their tips.
Draw these lines on more of an angle as they go to the sides and closer to being vertical near the middle.
Step 5 – Outline the Snow
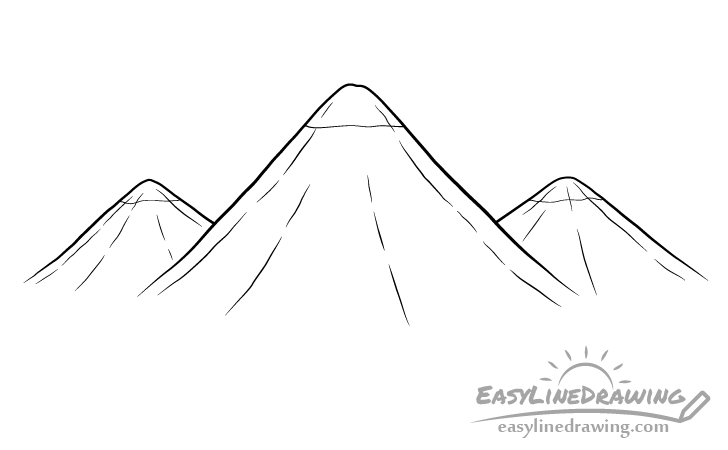
For this quick step add some snow to the top of each mountain. You can indicate it with a wavy line a bit below each of their tips.
Step 6 – Color the Mountains
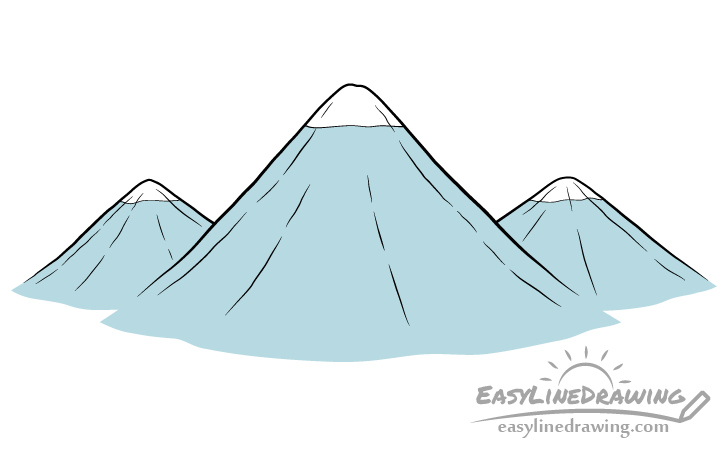
You can leave the snow colored tops white and make the rest of the mountains a blue/grey color. However, as the bottoms of the mountains have no outline coloring them will be a little bit tricky.
If for example you were to end the colored part in a straight line the drawing would look a bit odd. For this reason you want to make the bottoms of the mountains slightly curved with somewhat uneven bumps in those curves as shown in the example. This will give them more natural look. You can outline the shapes of the bottoms before coloring. Do this very lightly in regular or blue pencil.
Conclusion
This tutorial is slightly different from most here on EasyLineDrawing in that a large part of the drawing does not have a hard outline but is instead done with color. As already mentioned drawing the mountains in such a way will give them a more natural appearance. Outlining the bottom of the mountains can make it look like their bottoms have been cut off.
For more similar tutorials also see the following:
- How to Draw a Tree Step by Step
- How to Draw a Cloud Step by Step
- How to Draw the Sun in Different Ways
- How to Draw a Volcano Step by Step

")


