How to Draw Grass Step by Step
This tutorial show how to draw a clump of grass in six steps with examples that show a detailed breakdown of the drawing process.
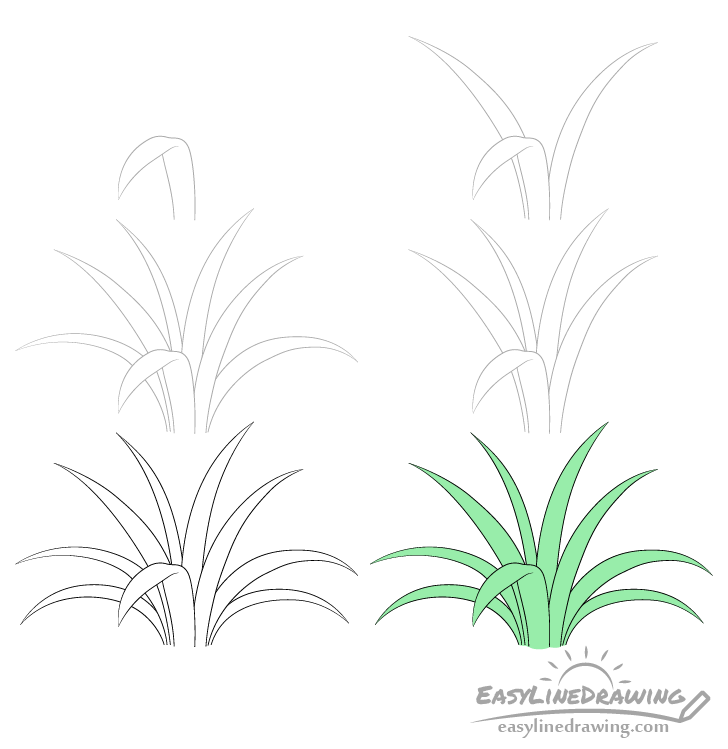
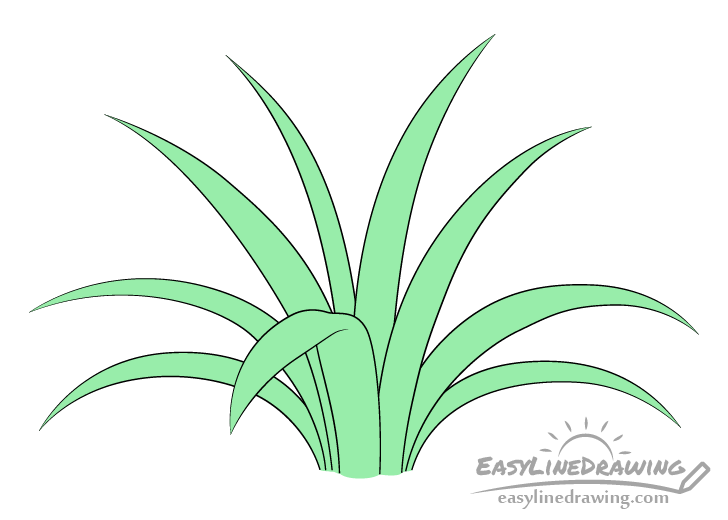
You can see the illustrations for each of the steps in the preview image above.
Blades of grass can vary in size and shape so drawing them does not require a lot of precision. You should still however start it in pencil just in case you do wish to make a correction. You can darken your lines before coloring with a black pen or marker.
Step 1 – Draw the Forward leaning Blade of Grass
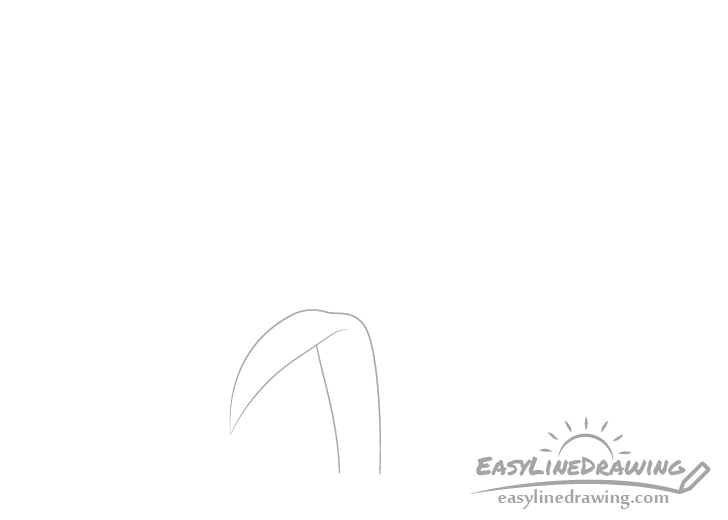
Begin by drawing a blade of grass that is facing/leaning forwards (towards the viewer)
Draw it narrower at the base, wider towards the middle (with a bend) and then narrower again ending with a pointy tip.
Step 2 – Draw the Grass on the Sides

Sticking out from behind the first blade (one to each side) draw two more blades of grass.
Draw each one with a smooth curve where again both gradually get narrower as they go up ending with pointy tips.
Step 3 – Draw the Grass in the Middle
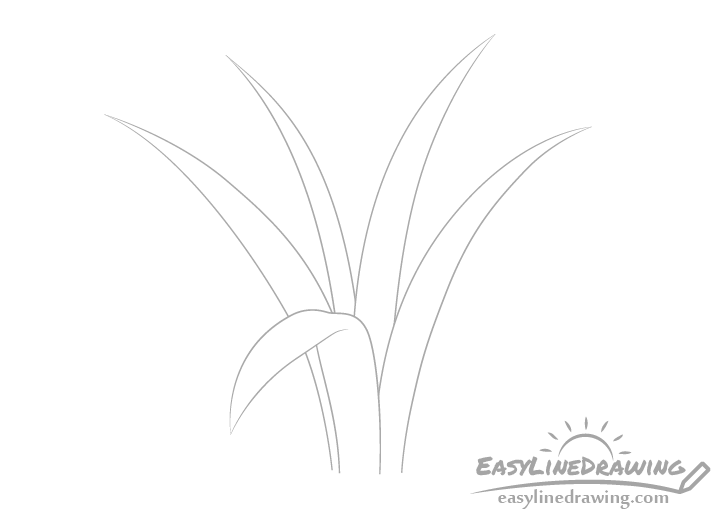
Between the previous two blades of grass add two more. To make the grass look a little more natural and random make one fairly thin in comparison to the other. Other than that you can draw them similar to the other two.
Step 4 – Add More Grass on the Sides

Leaning more downwards and with more of a curve in their shapes than the pairs from the previous two sets add two more blades of grass.
Place these on the sides of the clump.
Step 5 – Finish the Line Drawing
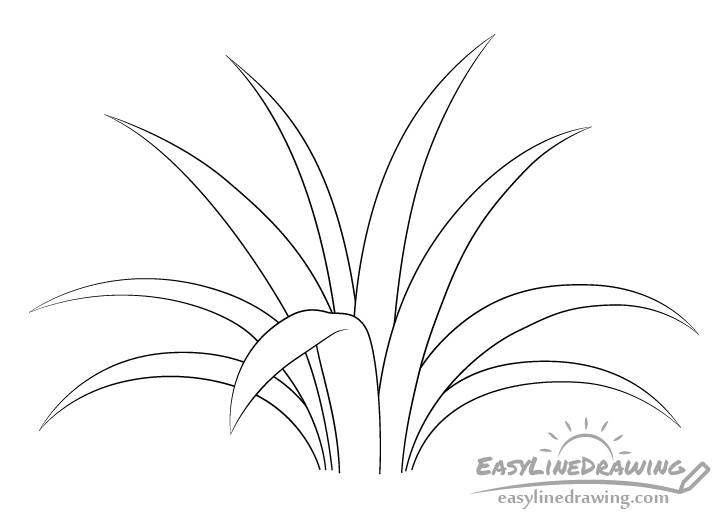
Finally add another pair of blades (again on the sides) below the previous one to finish the basic outline of the grass clump.
Afterwards make sure that you are happy with the way all of the blades are placed and trace over your lines with a black pen or marker. If you don’t have one handy just darken them with the pencil.
Step 6 – Color the Grass
To color the grass you can obviously just make it green. Both markers and colored pencils can be a good option as they can make it easier to go over the thin parts of the blades than something like paints.
Conclusion
As mentioned at the start of the tutorial, drawing grass is fairly easy as it does not require a lot of precision. Blades of grass can be different in size and shape as well as their bends and angles. However, one thing you may want to consider if you want a nicer looking drawing is having adding the blades of grass in such a way that you create a balanced looking clump. One that is not tilted, skewed or overly dense on one side. Of course there are times when you may want these things as well.
For more similar tutorials also see:
- How to Draw an Oak Leaf Step by Step
- How to Draw a Tree Step by Step
- How to Draw a Leaf Step by Step
- How to Draw a Tulip Step by Step
- How to Draw a Cactus Step by Step
- How to Draw a Suit Step by Step

")


