How to Draw a Cactus Step by Step
This tutorial shows how to draw a cactus in six steps with illustrated examples and quick and drawing tips that can be easy enough for beginners.

You can see the drawing stages for the cactus in the above preview picture. It’s a fairly simple tutorial but you should still start it in pencil and make light lines. You will need to erase a bit of the outline from step one as you go into step two. You can darken your lines later on with a black pen or marker.
Step 1 – Draw the Trunk of the Cactus
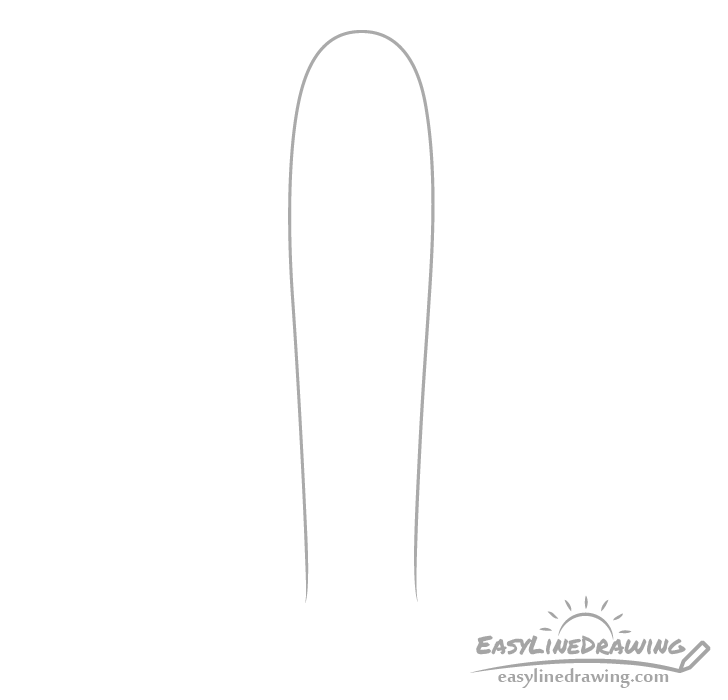
Start with a simple outline of the trunk of the cactus. Make it’s shape a little bit wider as it goes up and then narrower again towards the top (ending with a curve).
Step 2 – Draw the Arms
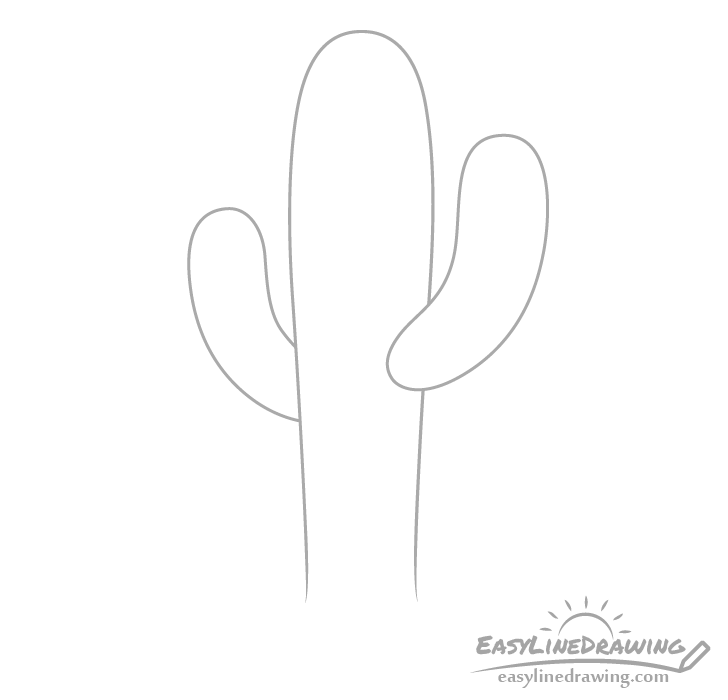
Onto the trunk add two arms that curve in opposite directions. Make both narrower towards the bottom and wider towards the top. The first one (on the left) will be coming out from slightly behind the cactus. The second one (on the right) will be slightly in front. When adding the arm in front draw it right over top of the trunk outline and then erase the part that it overlaps so that you have a clean drawing similar to the above example.
Step 3 – Draw the Lines
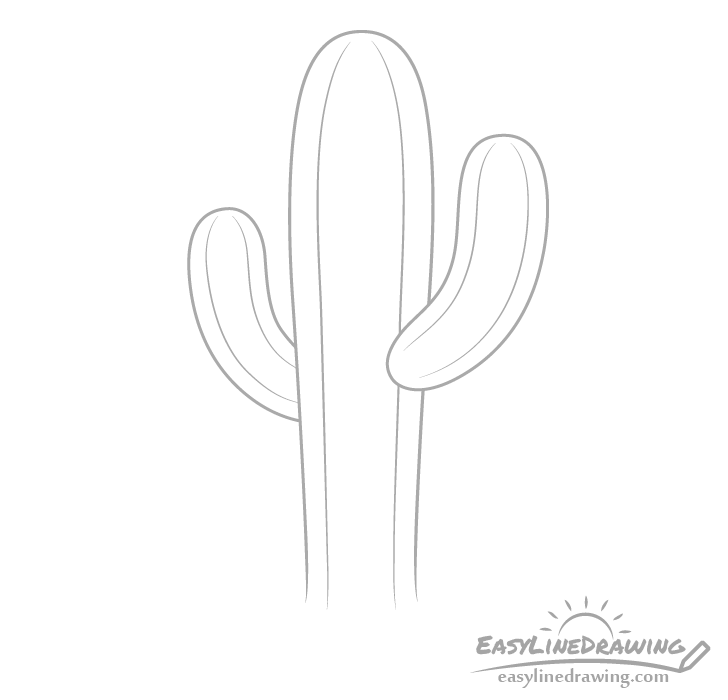
Along the trunk an the arms add some lines to create sort of “stripes” that are so characteristic of this type of cactus.
You can use the outlines of the trunk/arms as guides when drawing these as you want the “stripes” to somewhat follow their shapes.
Step 4 – Draw the Spikes

To add the last set of details to the cactus you can draw some needles spread randomly throughout it’s trunk and arms.
You can make their angles follow curves of the cactus. For example the needles on top of the trunk should point more upwards and ones on the sides should generally point sideways. Also try and make the needles somewhat different in length.
Step 5 – Draw Some Sand & Finish the Line Drawing
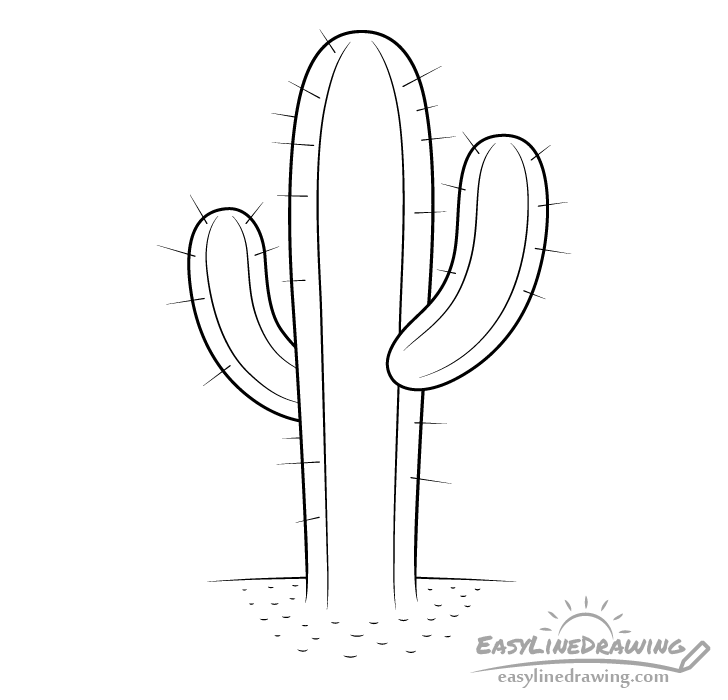
This next little bit is optional but if you wish you can add some sand around the bottom of the cactus (as they often grow in a desert). To do this first draw a pair of lines on each side of the bottom of the trunk to show the ground and then draw some tiny curves randomly spaced around it to give a hint of sand. Draw them slightly larger in the front (towards the bottom of the picture) and smaller as they go towards the back.
Step 6 – Color the Cactus
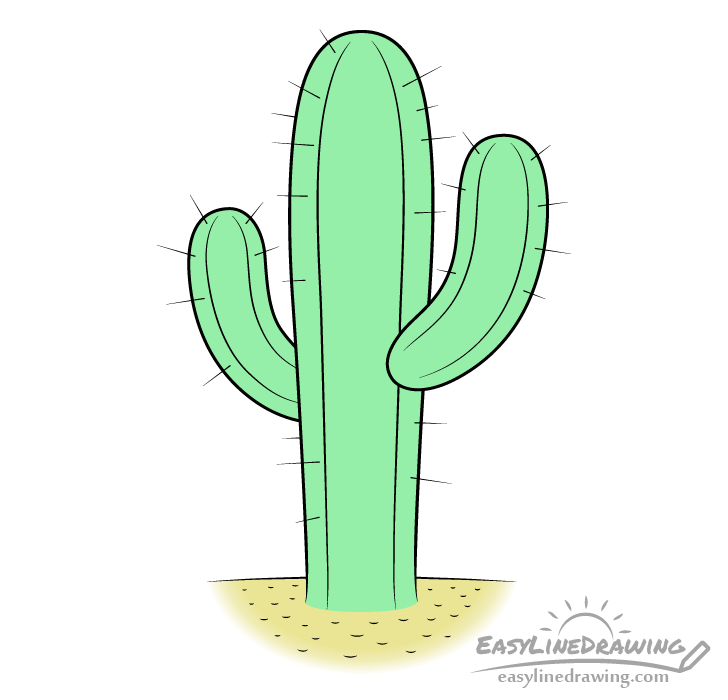
To color the cactus you can use whatever method you like (colored pencils, paints, markers, etc…) simply make it a solid green. Make the sand yellow (optionally with a bit of brown).
Once done coloring the cactus drawing you are pretty much done with the tutorial.
Conclusion
A simple cactus like the on in the examples does not require too much effort to draw. At the same time it’s also not so plain as to be too basic and boring. If you’ve followed all the way though the tutorial hopefully you had fun with it.
For more similar tutorials also see:
- How to Draw Grass Step by Step
- How to Draw a Mushroom Step by Step
- How to Draw an Oak Leaf Step by Step
- How to Draw Mountains Step by Step
- How to Draw a Magic Staff Step by Step
- How to Draw a Volcano Step by Step
- How to Draw a Tulip Step by Step


