How to Draw a Dagger Step by Step
This tutorial shows how to draw a dagger in six steps. It provides simple illustrated examples and easy to follow drawing instructions.
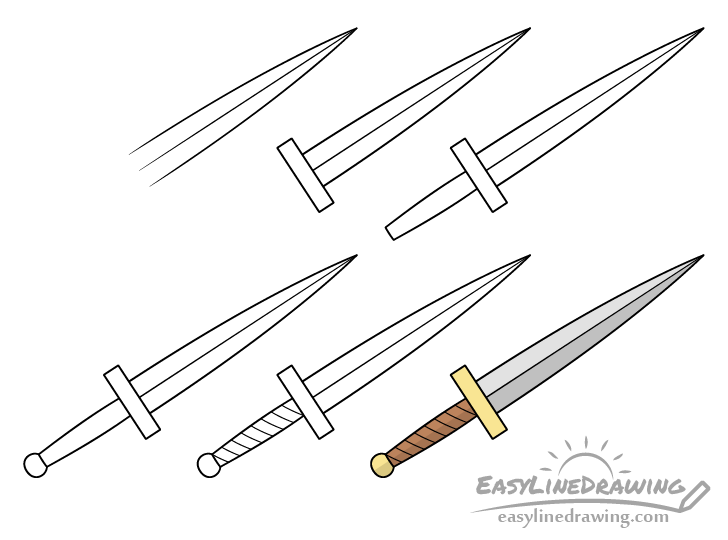
The dagger shown as the example has a fairly basic design with the most common parts such weapons tend to have (the blade, guard, grip and pommel). You can see these in the preview image above.
Overall this guide is quite easy and can be great for beginners. The tutorial is also created in a way where you don’t need to erase any parts of the drawing as you go between the steps (unless you make a mistake). However, it’s still recommended that you start in pencil and use light lines just in case you do need to make a correction. You can darken them later on before coloring.
Step 1 – Draw the Blade of the Dagger

Begin the dagger drawing with the blade. First, draw a straight line that run’s through what will be the blade’s middle and then add a curve of each it’s sides. Overall you want this part of the dagger to get wider as it gets closer to the guard (added in the next step).
Step 2 – Draw the Guard
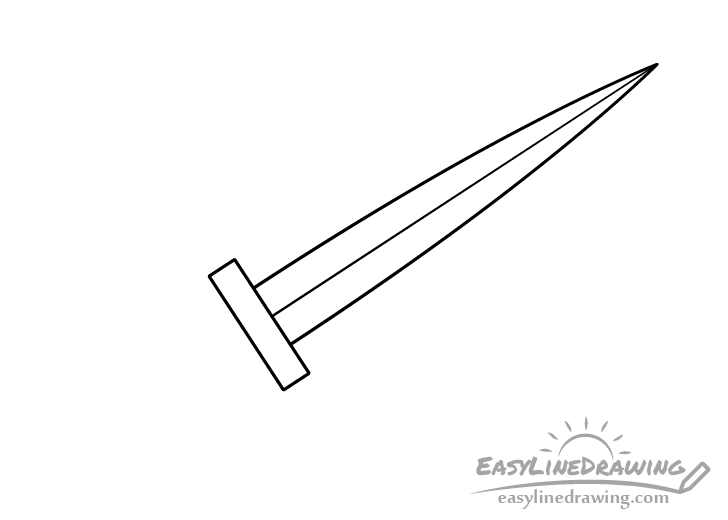
At the base of the blade draw the guard, the part that helps prevent the hand from slipping onto the blade. Make it’s shape a long/narrow rectangle.
Step 3 – Draw the Grip
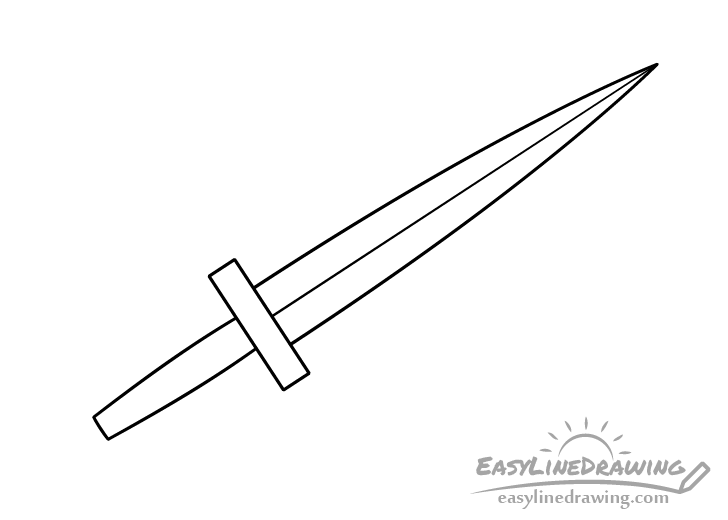
After the guard, add the grip (the handle of the dagger). When drawing this part be careful that it properly lines up with the blade so that the dagger doesn’t end up being crooked.
Define each of the grip’s sides with a smooth curve. Also, make it slightly wider towards the middle, narrower towards the pommel (added in next step) and just slightly narrower towards the grip.
Step 4 – Draw the Pommel

At the end of the grip draw the pommel. You can make it’s shape as shown in the example.
Step 5 – Draw the Wrapping Along the Grip
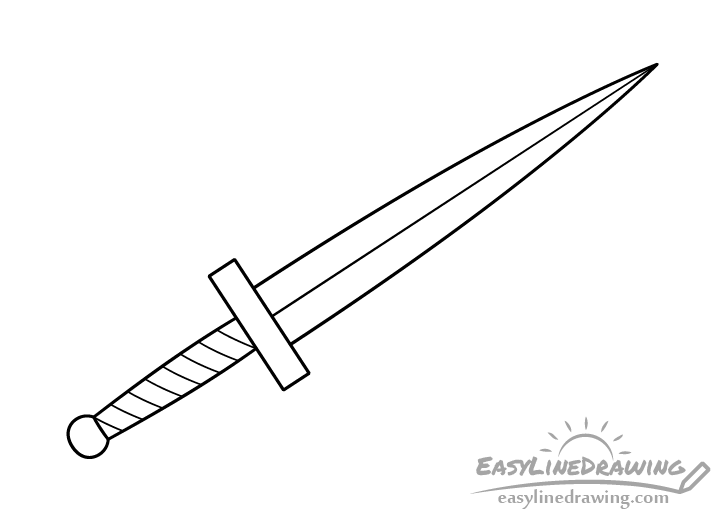
For the last part of the dagger add the wrapping along the grip. You can show this by drawing a series of slightly curved lines that run from the guard to the pommel.
After adding this last set of details you can trace over your drawing with a thin black marker or darken pencil lines. Just be sure that you are happy with how things look before doing so as it might be hard to make corrections afterwards.
Step 6 – Color & Shade the Dagger
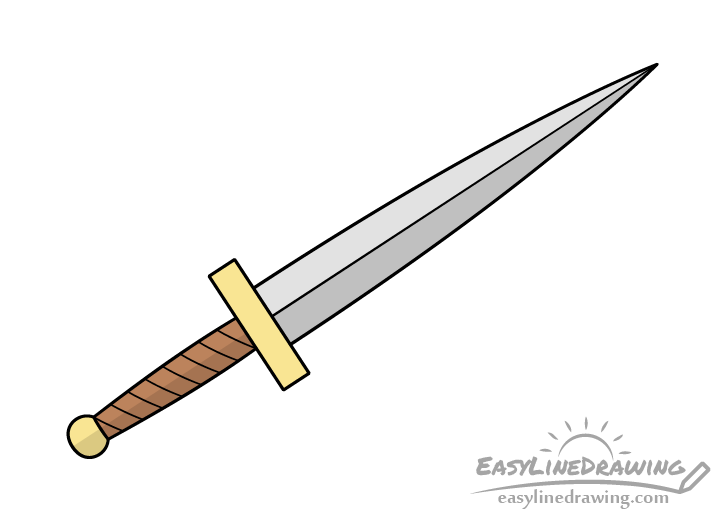
To color the dagger you can use whatever medium you like such as paints, colored pencils or markers. Make the blade a light grey (to show that it’s metallic). Color the guard and pommel yellow to make them look like gold and make the wrapping of the grip brown so that it looks like leather.
After filling in each part with it’s respective color add some basic shading by darkening the lower half of the blade, grip and pommel. An easy way to do this is with a regular pencil.
The shading will make a drawing appear more three dimensional and will in turn help it stand out more than it would otherwise.
If you are interested a quick explanation of the logic behind the shading is as follows:
The drawing is done as though the light is coming from somewhere above the dagger. The shadows are cast opposite the light source. This means that the sides of the object facing away from the light will be darker. The bottom half of the blade is angled away from the light and the bottom halves of the grip and pommel both curve away from it. Therefore, these areas will have a shadow over them.
The only exception is the guard. It’s visible side is just flat without any bends or curves. It’s also not facing away from the light or towards it. Generally in art such areas are is called a “midtone”. However, there is no need to worry about that in a highly simplified example such as this one and the guard can just be left without shading.
Conclusion
This tutorial show how to draw a dagger comprised of a simple blade, guard, grip and pommel. If you’ve found it easy to follow along and would like to get a bit more creative you can experiment by changing up the design. For example, you can make another drawing with a dagger that has a differently shaped blade or a more elaborate guard and see how that looks.
For other similar tutorials (including drawing other kinds of weapons) also try the following:
- How to Draw a Sword Step by Step
- How to Draw a Spear Step by Step
- How to Draw a Club Step by Step
- How to Draw a Sack of Money Step by Step
- How to Draw a Potion Step by Step
- How to Draw a Magic Staff Step by Step
- How to Draw a Cannon Step by Step


